Are your personal care products harming your health?

Hello friends!

When I began my health journey (12 years ago now!) the first changes I made were to our food choices–eliminating soda, drastically reducing sugar & processed foods, increasing fruits and vegetables and buying organic as much as possible and switching to local, organic, grass fed animal products.

Several years later I began to realize, while these changes were really important, I was still exposing myself to a huge number of chemicals and toxic ingredients in my personal care & beauty products.

On average, women use 168 chemicals every day, most before they even step out of the house in the morning! Many of these chemicals are endocrine disruptors and/or labeled as probable carcinogens by the World Health Organization and others. According to the Environmental Working Group:

  • One in every 24 women, 4.3 million women altogether, are exposed daily to personal care product ingredients that are known or probable reproductive and developmental toxins, linked to impaired fertility or developmental harm for a baby in the womb or a child.
  • One of every five adults are potentially exposed every day to all seven of the top carcinogenic impurities common to personal care product ingredients: hydroquinone, ethylene dioxide, 1,4-dioxane, formaldehyde, nitrosamines, PAHs, and acrylamide. The top most common impurity ranked by number of people exposed is hydroquinone, which is a potential contaminant in products used daily by 94 percent of all women and 69 percent of all men.

Our skin is our largest organ, and somewhere between 60% and 100% (depending on which studies you look at and which area of the body you’re talking about) of what we put onto our bodies is absorbed into the blood stream. So while I believe healthy skin begins with what we put IN our bodies, its also really important to make sure the products we are using ON our bodies don’t contain toxic chemicals and ingredients that are harming our health.

There are more than 80,000 manmade chemicals used in our modern-day world. Most of these chemicals have no safety data – particularly those used in the skin care and beauty industry. The Food and Drug Administration allows companies to use chemicals known to be extremely harmful in the products we put on our bodies and on our kids’ bodies every single day.

The European Union has banned more than 1,300 chemicals from use in personal care products. Canada has banned 500. The United States has only partially banned 30.

So its up to us to do our own research, choose the products we use carefully, and let these companies know by where we spend our dollars, that we don’t appreciate toxic, health damaging chemicals in our products. 

If this seems daunting to you, you’re not alone! It was for me and it has been a slow process of finding products I like, that work well, that I can feel good about using on my body and on my children’s bodies, AND made by companies I can feel good about supporting.

EWG’s Skin Deep Database

One resource I LOVE is the Environmental Working Group’s Skin Deep cosmetics database, where they rate personal care products based on how well they work, and whether they contain ingredients that are harmful to our health. I highly recommend researching the products you use in this database!

My Skin Care Routine & Favorite Products

Although you couldn’t tell by looking in my bathroom cabinet, I’ve become pretty minimalist when it comes to my personal care products & what I actually use every day.

For washing my face every morning and evening & removing makeup, I love my Norwex body cloths. No cleansers are needed with these microfiber cloths that contain silver to make them antibacterial. Just get the cloth wet and it gently cleans & cleanses without any harmful chemicals. They even remove mascara! While they’re a bit pricey, they last forever and I consider it a huge savings since I spend money on other facial cleansers and make up removers. (if you need a Norwex consultant, reach out to my friend Carrie at carrie.aiken.business@gmail.com)

After washing my face, I use either:

My other favorite skin care product right now is Beautycounter’s Number 3 Charcoal Mask, which I use once/week.

Whether it was finding better, safer products (maybe), all of the vegetables, fruits, healthy fats & water I consume every single day (yes, most definitely) or eliminating inflammatory foods like gluten, dairy and sugar (which makes a HUGE difference in my skin!) at 42 my skin is honestly the brightest and clearest it has ever been.

For body soap, I like to buy locally made pure & natural cleansing bars or I order Dr. Bronners or Kiss My Face Olive Oil Bars from Amazon. For a body moisturizer, I use pure, organic Almond, Coconut or Sesame Oils, also from Plant Therapy.

For shampoo & conditioner I use Beautycounter’s Daily Shampoo & Daily Conditioner (for me) or BC’s kids shampoo and conditioner for my kiddos.

For brushing my teeth, I’ve recently started using the Natural Toothpowder from Primal Life Organics.

Beauty counter

After a LOT of research, I switched all of my makeup and some of my skin care products to Beautycounter and I’m so thrilled with it that I became a Beautycounter consultant so I can share it with my friends and clients. (I never endorse or recommend products that I don’t personally use and love!!)

Beautycounter’s mission is to get safer products into the hands of everyone. As a result, Beautycounter has banned the use of more than 1,500 questionable or harmful chemicals, all while ensuring their products perform well and that they’re as indulgent as any luxe product on the market. You can find out more about the ingredients BC does not and will not ever use here, by checking out “the Never list.”

You can find out more about Beautycounter’s mission and purchase Beautycounter products here. (When you shop with me – Kristi Cirignano – as your consultant, you are helping to support my work at Nourished for Life Wellness Coaching. Thank you!!!) It’s not just makeup–Beautycounter also offers hair care, kids products, body products, and skincare.

I love all of the makeup I have tried (especially the Dew Skin Tinted Moisturizer, eye liner, eye brown pencil and the lengthening mascara) and as I mentioned above, I’m also really loving their Daily Shampoo and Conditioner, Number 3 Balancing Oil and Number 3 Balancing Mask. Feel free to send me a message if you have questions about any Beautycounter products and I’ll be happy to help!

To your health and wellness!

PS: Local friends, join me Wednesday, March 14 from 10:30 to 11:30 for a FREE workshop at Sift Yoga introducing a series I’ll be doing in April called Stressed to Zen! We’ll talk about what stress is, how it can help us and how it can harm our health and how to change your perception of stress to find more peace and joy in your life!

PSS: Some of the links in this post are affiliate links. I share products & companies I love with you regardless of whether they have an affiliate program, and I only recommend products I actually use and love! By purchasing through my affiliate links, a small percentage of your purchase goes to help support my mission of providing resources, information and support to empower people to change their health and their future through whole foods and a healthy lifestyle. Thank you!!!

Double Chocolate Buckwheat Waffles

You all know I love my chocolate, and I also love buckwheat. And these Double Chocolate Buckwheat Waffles, well, they’re pretty magical!

So when my son and I went on a date to a local coffee shop where they sell the most amazing gluten free, chocolate waffles (warm chocolate-y goodness that reminded me of my Buckwheat Brownies) we had to come home and try to recreate them.

After trying out the few recipes I found on Pinterest, none of them were really what we were looking for. So we started experimenting. At least a dozen batches later, my tasters finally said this one was the winner. It’s not quite Honey + Moon’s chocolate bubble waffles (which I highly recommend trying if you’re local), but they’re just as delicious! We don’t have a bubble waffle iron, but if you do please try these out in it and let me know what you think.

Double Chocolate Buckwheat Waffles

If you’re interested in some of the healthful properties of buckwheat, you can read more about that (and get the recipe for Matteo’s Buckwheat Pancakes) here.

Or just dive right in to making these! They’re part healthy breakfast, part dessert, and 100% delicious. They will make the perfect Valentine’s Day breakfast for all of your loves!

XO,

Kristi

Double Chocolate Buckwheat Waffles (gluten free, dairy free, refined sugar free)

Delicious, healthful, chocolatey goodness in these gluten, dairy and refined sugar free waffles. Egg free/vegan option.
Calories: 2093kcal

Ingredients

  • 1 1/2 cups Buckwheat flour
  • 3/4 c. raw cacao (I like Navitas Organics Raw Cacao)
  • 1 tsp. unrefined sea salt
  • 1 tsp. baking soda
  • 1 tsp organic cinnamon (optional)
  • 1 1/2 c. vegan "buttermilk" (1 T apple cider vinegar or lemon juice + unsweetened, unflavored almond milk, or your favorite plant based milk, to fill a 1-1/2 cup liquid measure; let sit for a few minutes to sour)
  • 2 farm fresh or organic eggs
  • 1/2 c. pure maple syrup
  • 2 tsp vanilla extract
  • 1/2 c. melted coconut oil
  • 1 c. Enjoy Life Dark Chocolate Morsels

Instructions

  • Whisk together dry ingredients in a mixing bowl.
    In a separate bowl, whisk together the buttermilk, eggs, maple syrup & vanilla. Stir buttermilk mixture into the dry ingredients, then add the coconut oil. (This prevents the coconut oil from solidifying if your milk and eggs aren't at room temperature.) Stir until well combined.
    Stir in the chocolate chips. Let the batter sit for a few minutes for the buckwheat to absorb the wet ingredients and the batter to thicken up a bit, If your batter is too thick, add a tiny bit more almond milk. Meanwhile, heat your waffle iron.
    When waffle iron is hot, scoop about 1 cup of batter onto your waffle iron and cook according to your waffle maker's directions. With my waffle iron, the indicator light comes on well before the waffles are actually done. I found setting a timer for 4-5 minutes worked perfectly. If your waffles don't come cleanly & easily out of the waffle maker, you probably need to cook them longer.
    Carefully remove waffles from waffle maker, place on a plate, and keep warm in a 200 degree preheated oven, if desired, while you make the rest of the waffles.
    We enjoy these waffles plain or with berries or banana slices. Feel free to serve with pure maple syrup if you wish! These will keep well in a zip lock baggie for 2-3 days (although I can't say any of ours have lasted that long!) or they freeze well. To reheat, place on a sheet pan and warm in the oven or pop in the toaster.
    Enjoy!!    

Notes

MAKES APPROX. 6 FULL SIZE WAFFLES (24 QUARTERS) OR 9-12 SERVINGS
You can substitute an equal amount of coconut palm sugar in place of the maple syrup if you prefer. I've tried both and it works great.
I haven't tried this recipe with flax eggs, but I think it would work fine for a vegan/ egg free version. If you try it, please let me know!
I'm a dark chocolate girl, so I love the dark chocolate morsels, but we also tried this recipe with Enjoy Life milk chocolate mini chips and they work just fine too.

My Word for the Year & the 7 Fundamentals of Good Health

Hello Friends!

I love the idea of a theme word for the year—one simple word to come back to whenever you need to re-center and make sure your actions are consistent with your values, priorities and focus for the year.

In 2017 my word was “growth”.  I had a new business that was not even a year old and many goals for personal and professional growth. So when I created my vision board for the year, I put the word GROWTH right in the center, and then divided my board into the areas where I wanted to grow in the coming year. You don’t have to make a vision board to have a theme word. But I love both of these tools so much. There is such power in setting intentions for what you want for your year and praying about it, believing in it, planning for it and working at it until it becomes reality! And 2017 truly was a year of huge growth for me—both personally and professionally.

This year, the word I kept coming back to is “authentic.” For me this word is a calling to be my true, authentic self and a reminder to share my heart and passion with you even when I’m far from perfect. Which is not always easy! I’m a perfectionist by nature, and I have a hard time letting those around me see my flaws and imperfections (which are many, believe me!) Being a wife, mom, health coach & small business owner is a messy, complicated, often imperfect business. Lets face it–being human is messy and imperfect! So this year I’m making a commitment to myself and all of you to let go of perfectionism, quit worrying so much about what others think, and just:

  • Be true to my beliefs, my faith, my values, my dreams, my priorities …
  • Be the authentic, genuine person God created me to be …
  • Be honest with myself and others and always speak the truth in love …
  • Be true to what I’ve been called to do and share information and resources that can help you change your health and future …

even when it’s scary or hard  (which, let’s be honest, is a lot of the time)!

A word can be such a powerful tool to help you set and focus your intentions for the year! Do you have a word for 2018? I’d love to hear it if you do! Or join me in letting go of perfectionism and making more authentic living one of your goals for 2018.

Those of you who have been with me from the very beginning of this blog know that my passion is nourishing our bodies with whole foods to help us resolve symptoms of chronic illnesses, feel great and reduce risk of disease. And that is still my first priority for sure!

But the past six months I’ve been doing some additional schooling through the Institute of Functional Health Coaching. It is an amazing program and I am learning so much that I want to share with all of you! The Institute teaches a functional, whole person approach and focuses on seven fundamentals of good health:

  • Whole foods
  • Sleep
  • Stress perception
  • Safe movement
  • Fun
  • Faith, and
  • Trauma

As I’ve gone through this course, continued to research and study each of the fundamentals, and started applying this approach in my own health journey as well as with clients, I am becoming more and more convinced of its wisdom.

Food choices are an essential piece of our health puzzle. But all of these other fundamentals play a huge role as well. We can be doing everything right with our food choices, but may need to address stress or sleep in order to progress in our health journey. Stress especially, I believe, can override everything else! Chronically elevated stress hormones impair digestion, which means we aren’t digesting or absorbing or fully utilizing all of those amazing nutrients we may be consuming.

Chronic stress impairs weight loss and fertility and creates a cascade of other health problems. It creates chronic inflammation in our bodies, which we are learning is the root cause of many of our symptoms and most diseases. It can prevent our immune system from functioning optimally and our bodies from truly resting and recovering.

You may have noticed you can be doing everything right to keep yourself healthy and then you have a day or two or three of especially heightened stressors or a night of no sleep and the next thing you know, you’ve caught a bug. This has certainly happened to me! Stress wreaks havoc on our bodies, as does lack of sleep, lack of movement (or OVER exercising) and lack of fun! Sometimes we may even be doing everything else right but we have trauma in our past that hasn’t been addressed and is making it impossible to move forward in our health.

So in 2018 you will continue to get new recipes and inspiration for healthy eating from my blog posts and emails. But you may also notice me expanding my focus a bit and sharing what is currently on my heart and mind about some of these other fundamentals of wellness!

Thank you for joining me on this wellness journey. I am so thankful for the time you invest with me and in your own health and wellness and I never take it for granted!

Wishing you and yours much health and happiness in 2018!

PS: Join me on my Facebook page THIS FRIDAY, FEBRUARY 9 at 10am where I’ll be doing a Live Q&A. Bring your healthy living and eating questions and post them in the comments or send me a message in advance to make sure I address them!

PSS: If you’d like some time to focus and get clear on your goals and priorities for 2018 and make your own vision board, please join me at Sift Yoga on February 17 for a vision board workshop we’re calling Visualize your Life!

Nourished for Life Wellness Coaching | Kristi Cirignano, CHC | nourished-for-life.com | kristi@nourished-for-life.com | 812-760-6527  

Summer Tomato Corn Salad

Hello friends!

One of the fun things about focusing on eating fresh fruits and vegetables is that your meals change with the seasons and what is available locally at any given time. In the summertime, the way I cook changes completely. In the winter I tend to make a lot of soups, stews, chili, crock pot meals and heavier pasta dishes. When we have an abundance of local goodness from the farm and our farmers market, I love to eat as fresh and close to the earth as possible.

I actually don’t know if you can really call most of what I do during the summer “cooking”. And this hardly even qualifies as a recipe. But its still one of our favorite summer dishes.

Summer Tomato Corn Salad
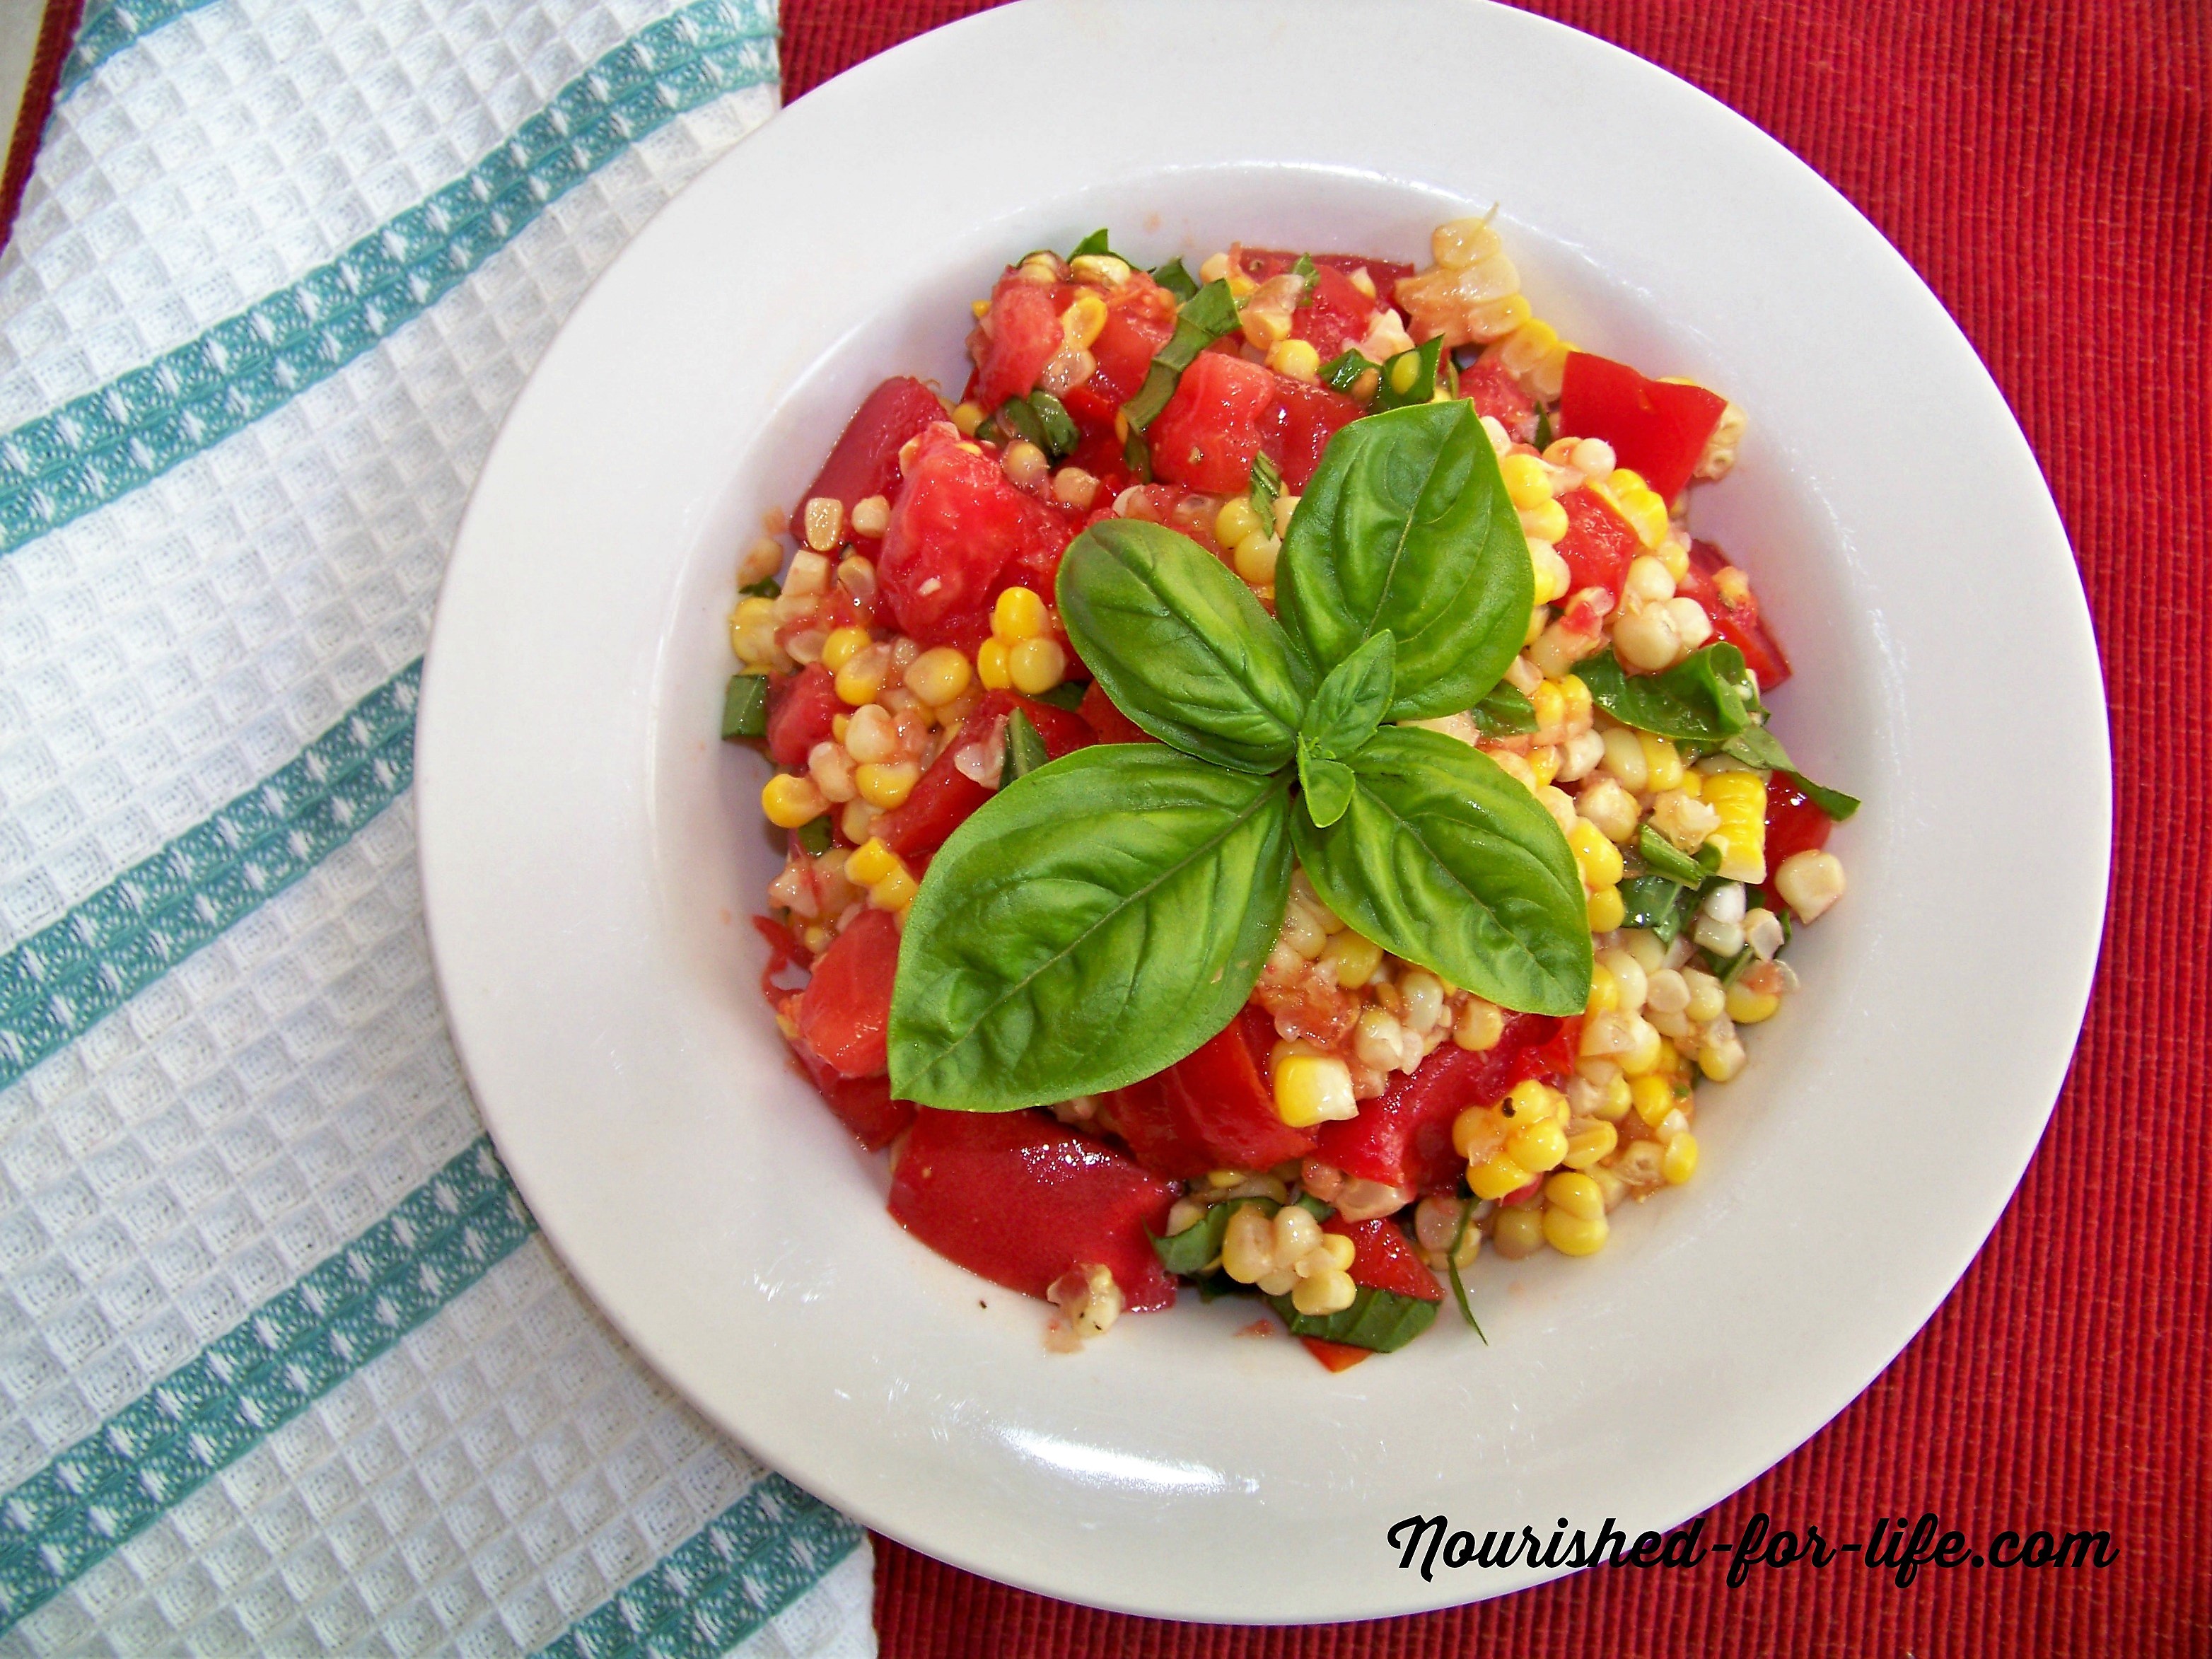
When we make sweet corn, I always cook a few extra ears for this salad. If your corn is really fresh and tender, you don’t even have to cook it! I chop the freshest most delicious tomatoes we have (preferably a mix of sungolds, grape or cherry, and different colors of heirloom tomatoes) and then add the leftover corn (cut from the cob).

Drizzle with a good quality extra virgin olive oil, sprinkle with sea salt and pepper. and a generous handful of fresh basil. Summer heaven on a plate!

This salad is delicious on its own or as a side salad with an organic, pastured chicken breast.

Summer Tomato Corn Salad

Calories: 235kcal

Ingredients

  • 2-3 cobs sweet corn kernels removed (please use organic, non-GMO corn)
  • Aprrox. 1 lb fresh local summer tomatoes 3 medium tomatoes or a combination of sun gold, grape, cherry and heirlooms
  • Approx. 1/4 c. Fresh basil leaves thinly sliced
  • Extra virgin olive oil
  • Sea salt & pepper to taste

Instructions

  • Combine corn, tomatoes & basil in bowl. Add extra virgin olive oil, salt and pepper & toss gently to combine.
  • Enjoy immediately or store, refrigerated, up to 2 days.

Make sure to check out the Upcoming Events on my website and follow me on Facebook for all of the latest news!

Have a great week! Especially those of you heading back to school this week!!!

XOXO,

Kristi

PS:  If you’re heading back to school this week and need some lunch box inspiration, check out my blog post on Real Food School Lunches in Ten Minutes a Day!

Chocolate Crisp Rice Protein Treats

Hello Friends! I promised you I would post this Chocolate Crisp Rice Protein Treats recipe this week, so here it is!

Chocolate Crisp Rice Protein Treats

I can’t really take the credit for this one. I originally got this recipe from my friend and mentor Bonnie Schnautz, ND of BRenewed Wellness Center. But it is so deliciously addictive and is a regular at our house so I have to pass it on to all of you!

I make these with Juice Plus Complete, my favorite whole food, plant-based protein powder. When it comes to protein powders, I’m extremely picky. Plant-based is a must. I avoid anything with whey (a highly processed by-product of the commercial dairy industry loaded with hormones and antibiotics) or any artificial flavors, colors, sweeteners or other questionable additives. Complete contains 15 different plants including nutrient dense legumes, ancient grains, broccoli sprouts, pomegranate, spirulina and even mushrooms. It is also high fiber, low glycemic, non-GMO and is NSF certified to be free of chemicals, heavy metals and any other contaminants or fillers.

Chocolate Crisp Rice Protein Treats

Try these for a delicious treat or (don’t tell my kids) they could even be a high protein, nutrient dense breakfast bar. Just don’t eat the whole pan at once!

Chocolate Crisp Rice Protein Treats

Ingredients

  • 1/2 c. all natural organic peanut butter (make sure to buy a brand with no sugar added. We use Aldi's Simply Nature brand)
  • 1/2 c. raw honey
  • 1 scoop 1/3 c
  • Chocolate Complete
  • or your favorite whole food plant-based protein powder
  • 1-1/2 to 2 c. gluten free crisp rice cereal (I use
  • Barbara's Organic Brown Rice Crisps
  • )

Instructions

  • Stir together the peanut butter, raw honey and Chocolate complete. Mix in the crisp rice cereal. I start with 1-1/2 cups and then add more as needed. It really varies depending on your brand of peanut butter and how runny or thick your honey is.
  • Press into an 8x8 pan and cover tightly. I keep ours in the refrigerator. If you like them softer, room temperature is fine too. Enjoy!

Delicious Dairy Free Pesto

Pesto might be one of my favorite summer foods. In Liguria, Italy, the home of pesto, it is made with basil Genovese and often served with a small, dense, twisted pasta also native to Liguria called trofie. Traditionally in Pasta al Trofie, blanched red potatoes and green beans are tossed with the trofie and pesto.

Sadly, I haven’t found anyone who makes gluten free trofie, but I do so love fresh pesto! Right now while my patio pots are overflowing with fresh herbs and we have an abundance of green beans from the farm, I’m really loving making this recipe and using about a third of it as the topping for my Garlic & Herb Wild Salmon, about one third stirred into green beans prepared per these instructions from thekitchn.com and the final third we spoon over a side dish of rice. The perfect light summery dinner.

While it’s not traditional, I like to use half basil and half parsley in my pesto and I substitute walnuts for the traditional pine nuts, both for cost & availability reasons and because walnuts have so many health benefits! I increase the amount of nuts and add an extra pinch of sea salt to make up for the missing cheese, which YOU won’t miss at all, I promise.

Buon appetito!

Delicious Dairy Free Pesto

Ingredients

  • 1 cup fresh basil leaves tightly packed
  • 1 cup fresh flat leaf Italian parsley leaves
  • 2 cloves fresh garlic
  • 1/2 tsp sea salt plus more to taste
  • 1/4 tsp fresh ground black pepper plus more to taste
  • 1/2 cup toasted walnuts
  • About 2/3 cup good quality extra virgin olive oil

Instructions

  • Place first 6 ingredients (everything but olive oil) into food processor and pulse until finely chopped. With the food processor still running, gradually pour in the olive oil, until the pesto reaches a smooth and thick consistency. Taste and season with additional sea salt and pepper, as needed.
    Serve over pasta, vegetables, rice or anything your heart desires!

Making Whole Food Nutrition a Priority, Part 1

Last week I made beef stock. Yep, I was pretty excited and proud of myself. I make chicken stock fairly often…every time I roast whole chickens in fact. But I had a chance to get some stock bones from local grass fed cows and decided to make some beef bone broth. It was amazingly rich and delicious, full of gut healing nutrients and collagen. I ended up with six quarts of beautiful stock and I froze most of it in glass jars to use this fall.

Whole Food Nutrition

At least half of you are probably thinking right now that I clearly have WAY too much time on my hands. But I assure you that is not the case! I’m a very busy, work-from-home mom with 4 kids to keep up with, including a 2-1/2 year old whose constant and ever changing demands keep me running from morning till bedtime.

But this post is not actually about making bone broth, although I highly recommend it! (You can read about some of the benefits and check out the recipe I used here.)

This post is actually about making real food a priority. None of us, including me, have time to spend all day in the kitchen, which is why in my next couple of posts I’m going to share some of my favorite tips for eating real, whole foods in the very limited time we have.

Tip #1 is simply to choose to make whole food nutrition a priority. 

We all lead such busy, hectic lives and it’s easy to use time as an excuse for not cooking or not eating as healthfully as we know we should. But honestly, what is more important than your health, or the health of your family? If there is one thing we should make a priority, isn’t it our health?

We all order our time and lives around the things that are our highest priorities. So why not make the decision, right here and now, to make your own and your family’s health a priority and invest your time in eating real, whole foods?

Once you make the decision to skip the drive thru, take out and processed, packaged foods at the grocery store and eat only real, whole foods, there may be a transition time when it seems overwhelming and really hard. But stick with it a few weeks and I promise you’ll soon get into a new groove where planning for healthy meals and snacks will just be a normal part of our life. You might even find you love it! And feeling great, having more energy and better health–both now and in the future–will be an amazing reward and the best gift you could give to your family.

So once you’ve made the decision, what next? How do you get started or improve on your commitment to eating real food?

Tip #2 — Set yourself up for success with a well stocked pantry and freezer.

The most important things you can do to set yourself up for success are planning and preparation. I’m going to devote part 2 of this series to how I go about planning our weekly meals, grocery shopping & meal prep. So stay tuned for that. But even more important than a weekly plan is your overall preparation with a well-stocked pantry and freezer. This makes last minute meals and snacks when you haven’t had time to plan much easier and makes it less likely you will resort to the drive thru or carry out or processed foods.

The things I buy in bulk and always have in my pantry include:

We buy meat from hormone and antibiotic free, pastured or grass fed animals in bulk from a local farm (Fischer Farms in Jasper, Indiana) so our freezer is always stocked. In my freezer you will also always find wild caught Alaskan Salmon, plenty of frozen fruit for smoothies (my daughters also like frozen fruit straight out of the freezer as a snack), extra loaves of sprouted wheat and gluten free bread and homemade stock for soup or other dishes.

This means even if I don’t have time to go to the grocery store all week, I can always pull together a healthy snack or meal in relatively short order.

Please don’t think real food has to be time consuming to prepare or fancy! No guilt here … there are plenty of times I don’t have time to cook a fancy meal. My go to quick-and-easy (but still real food) meals when I have had zero time to plan or prep a meal are:

  • Leftovers!! This is one huge advantage of cooking regularly.
  • Our favorite Buckwheat Pancakes
  • Eggs–scrambled, fried, hard boiled (if I have some already made) or if I have just a bit more time an omelette or frittata
  • Gluten free pasta with jarred pasta sauce or a quick pan sauce
  • Oatmeal
  • A nut butter sandwich on sprouted wheat or gluten free bead
  • A big lettuce salad with canned tuna, chickpeas, leftover chicken, avocado, nuts or berries. (You can find two of my favorite green salads here and here)
  • Depending on what I have on hand, we usually have fruit and/or veggies with hummus and/or a big leafy green salad on the side.
  • In a pinch I’m perfectly satisfied with a Complete plant-based protein shake. It’s satisfying and healthy and I feel a million times better than if I had gone through the drive thru.

We also have an aeroponic growing system called a Tower Garden which means I always have fresh lettuce, herbs and other greens growing right in my kitchen that I can grab for a quick salad or to go in a smoothie or protein shake. I absolutely love our Tower Garden and highly recommend it for any real food home.

#3 — Break your prep and cooking into smaller jobs and squeeze them in whenever and however fits your schedule. 

This is where I come back to the beef stock. It may seem like a big, overwhelming, time consuming project but it really couldn’t be easier when you break it up and fit it into your existing schedule. I kept the bones in my freezer til I had a few extra minutes one evening after dinner. Threw them in a stock pot with water and some aromatics and let it simmer over night. Five minutes and done. In the morning, I didn’t have time to deal with it so I stuck the whole stock pot in the refrigerator. 1 minute or less. One afternoon when I had a few minutes I strained the broth, put it in jars and put the jars in the freezer. 10 minutes max. It took a little planning but almost no actual time.

Another example of this is my favorite quinoa salad that I like to make for a dinner side dish or have on hand for a quick lunch or dinner. It feels like a lot of work by the time I cook the quinoa, make the dressing (an amazing tomato vinaigrette) and chop all of the vegetables. But it’s a lot more manageable if I break it up into smaller jobs. I make the dressing one day when I have time and put it in the fridge. When I’m cooking rice for dinner, I put on another pot and cook the quinoa at the same time. It goes in the fridge too until I have time to actually make the salad. And then it doesn’t take much time to chop the veggies and put it all together and I have a yummy and nourishing side dish or meal for whenever I need it.

These are just examples. Think about the real food dishes or meals your family likes, and figure out ways to break up your prep and cooking time to fit it into the nooks and crannies of your schedule.

Make the commitment. It may take some time and effort to make the transition and figure out how to make a real food eating plan work for you. But once you do, it really won’t take much more time, only a bit more planning! And it will be so worth it for your short and long term health!

XOXO,

PS —  For more tips and tricks, read Making Whole Food Nutrition a Priority, Part 2! And follow me on Facebook for more healthy living information and inspiration!

Buckwheat Brownies

Happy Monday, friends!

As we head into this hectic holiday season I have to confess, I am already worn out! In the past three weeks we have had Halloween (thankfully the kiddos all took it pretty easy on me on their costumes), celebrated 4 birthdays, the end of the soccer season, wrestling, hours of Nutcracker rehearsals, a traveling husband, a teething toddler and then said toddler also had a cold (which means neither toddler nor mama have slept much in the past couple of weeks).

I can only imagine how poorly I would be functioning right now if I wasn’t fueling my body with real whole foods. During these especially hectic and sleep deprived phases of life, we need the nourishment that comes from plants even more. Which is why I take my Juice Plus religiously and do my best to get my green smoothie in every single day, even when I am so tired I can barely see straight. The phytonutrients from all of those fruits and vegetables provides more nourishment and sustained energy for my body than all of the caffeine in the world ever could.

But, after all of that talk about plant nutrition, I hope you will forgive me for sharing a brownie recipe today. Because once in a while we need chocolate too, don’t we?

Buckwheat Brownies

My son has been gluten and dairy free for six years now and his baby sister and I have since joined him. In the last six years I have tried a LOT of brownie recipes. When I bake, I like to use the most healthful ingredients I possibly can. But I have to be honest–the recipes I’ve tried with black beans and other mystery ingredients just don’t cut it for me. Neither have any of the other gluten and dairy free variations I’ve tried, whether healthy or not. None have ever measured up to the perfectly moist, rich, chocolatey, chewey not cakey, dense but not too dense, gooey but not too gooey brownie I have in my head.

That is, until these. It turns out buckwheat–one of my favorite flours–is the perfect solution! You can read more about the health benefits of buckwheat (and get our favorite pancake recipe) here. No one will ever know these brownies are gluten free unless you tell them. They are moist, amazing, and unlike many gluten free baked goods they stay moist and keep well (tightly wrapped) for up to a week.

Buckwheat Brownies

I use Nutiva coconut sugar, which is still sugar and should only be eaten in moderation as a special treat. But it is more healthful than conventional white sugar, which is heavily processed, bleached and almost always made from GMO sugar beets. Nutiva’s coconut sugar is organic and non-GMO. It is unrefined, which means that unlike white sugar which is completely empty calories devoid of any nutrition, coconut sugar retains some small amounts of nutrients from the coconut. According to Vani Hari, the Food Babe, coconut sugar has 10,000 times the potassium, 20 times the magnesium and 20 times the iron of conventional white sugar. It also contains inulin fiber, which slows the absorption into the blood stream. It also has just over half of the glycemic load of white sugar, which helps you avoid that blood sugar/insulin spike and crash.

I also like baking with Nutiva Shortening, which is a blend of coconut oil and red palm oil. Both are naturally solid at room temperature (so no hydrogenation, the process which turns Crisco shortening and margarine into toxic trans fats), minimally processed, healthful fats. It makes a close to perfect substitute for butter. But if you can have dairy, real organic butter works great here too.

Buckwheat Brownies

I may have mentioned it before, but its worth repeating: When baking with gluten free flours, use a scale! Baking by weight is so much more accurate than volume and allows you to substitute flours or make adjustments to a recipe with a lot more success!  You can buy a good, inexpensive scale from Amazon. I have this one.

Buckwheat Brownies

You may be wondering why a health coach who preaches the evils of sugar is sharing a brownie recipe. But I love chocolate and I’m completely fine with an occasional treat when it’s made with the most healthful ingredients possible.

My personal rules for sweet treats and desserts (that I follow most of the time) are:

1) Make them out of the most healthful ingredients I can (and avoid artificial colors, flavors & sweeteners, high fructose corn syrup, trans fats and unpronounceable preservatives and additives as much as humanly possible).

2) Enjoy sweet treats after a healthy meal, never on an empty stomach. This helps to avoid the blood sugar spike & sugar headache I get from eating sweets on an empty stomach. And if I have already enjoyed a satisfying meal, one treat should be sufficient to satisfy my chocolate or sweets craving.

3) When you eat a sweet treat, make it a good one and enjoy it mindfully. I try not to eat treats that aren’t worth it and I never eat them on the run. It’s so easy to get in the habit of grabbing something to munch on anytime you walk by the pantry or as you sit in the car or at your desk. Try to get out of the habit of mindless snacking. This will make a huge impact on your health. Choose your snacks wisely–fruits and vegetables as much as possible, and when you do choose to eat a sweet treat, sit down and savor every bite!

Buckwheat Brownies

Enjoy and Happy Thanksgiving, friends! I hope you are all surrounded by loved ones this week and take the time to count your blessings! I am thankful for YOU and for the commitment you make to your health and the health of your family with the choices you make every day!

XOXO,

Kristi

Best Ever Buckwheat Brownies (gluten, dairy & refined sugar free)

No one will know these moist, amazing brownies are free of gluten, dairy and refined sugar and are made with nutrient dense buckwheat flour.
Prep Time10 minutes
Cook Time22 minutes
Total Time32 minutes
Servings: 16 Brownies
Calories: 10426kcal

Ingredients

  • 6 oz. Enjoy Life semi-sweet chocolate chunks (or 5 oz. Enjoy Life dark chocolate morsels)
  • 8 (Approx 175 g) T. Nutiva shortening (or organic butter, if you can have dairy)
  • 1 c. Nutiva coconut sugar
  • 2 farm fresh eggs
  • 1/2 tsp. Vanilla extract
  • 87 g approx. 2/3 c. Buckwheat flour
  • 1/2 tsp. Baking Soda
  • 1 tsp. Sea salt
  • 1/2 c. Enjoy Life chocolate chips or chopped walnuts optional add-ins

Instructions

  • Pre-heat oven to 325 degrees. Grease a 9 x 9 baking pain.
  • In a double boiler over medium high heat (or in a heat-proof bowl sitting over a saucepan with an inch or two of water in it) melt the chocolate and shortening and stir together. Let cool and then whisk in the coconut sugar. Whisk in the eggs, one at a time, making sure they are completely incorporated. Then add vanilla.
  • In a separate bowl, whisk together the buckwheat, baking soda and sea salt.
  • Add the flour mixture to the chocolate mixture and stir until combined.
  • Stir in the chocolate chips or walnuts, if desired,
  • Smooth batter into prepared pan and bake a 325 degrees for 20-22 minutes. Do not overbake! If you use a glass or an 8x8 pan you may have to adjust the baking time a bit. Let baked brownies cool and enjoy!
  • These brownies keep well, wrapped tightly, for several days and up to a week or freeze well for several months.

Notes

*I'm usually a dark chocolate girl, but I actually prefer semi-sweet chocolate in these. If you want a lighter brownie with a bit of a caramel taste, cut back to 5 oz of the semi-sweet chunks. If you like a darker chocolate brownie, by all means use the dark chocolate morsels instead.
**If you don't use Enjoy Life chocolate chips (which I highly recommend!) please use a good quality chocolate. It really does make all the difference in these brownies. I've tried them with a common grocery store brand of chocolate and they were just not the same.
***I honestly can't decide whether I like these better with chocolate chips or walnuts. So you choose! They're delicious either way!

Garlicky Roasted Sweet Potatoes

One of our favorite places is our local CSA, Seton Harvest, otherwise known as “the farm”. Of course we get amazing, locally grown, chemical free produce, usually harvested the day we pick it up. But its more than that. Going to the farm to pick up our weekly share, we get to escape our normal routine and stresses and breathe in the fresh country air; visit with friends; pet the dogs; feed the chickens; pick strawberries, fresh herbs, arugula, sungold tomatoes or whatever is in season and available for u-pick; hunt for caterpillars; chase butterflies; climb piles of mulch and make mazes out of bales of hale (yes that was us, sorry Joe and Julie!)

My big kids have practically grown up at the farm and it makes me so happy to see my youngest experiencing her first year running around the farm and loving it just as much as the rest of us do. Perhaps most of all, I LOVE that my kids know who grows their food and where it comes from (not just the supermarket!) and that they love things like eggplant and eagerly ask Farmer Joe when it will be in season and that they love to pick greens like arugula and sorrell and eat them on the drive home.

Garlicky Roasted Sweet Potatoes

One of our favorite places is our local CSA, Seton Harvest, otherwise known as “the farm”. Of course we get amazing, locally grown, chemical free produce, usually harvested the day we pick it up. But its more than that. Going to the farm to pick up our weekly share, we get to escape our normal routine and stresses and breathe in the fresh country air; visit with friends; pet the dogs; feed the chickens; pick strawberries, fresh herbs, arugula, sungold tomatoes or whatever is in season and available for u-pick; hunt for caterpillars; chase butterflies; climb piles of mulch and make mazes out of bales of hale (yes that was us, sorry Joe and Julie!)

My big kids have practically grown up at the farm and it makes me so happy to see my youngest experiencing her first year running around the farm and loving it just as much as the rest of us do. Perhaps most of all, I LOVE that my kids know who grows their food and where it comes from (not just the supermarket!) and that they love things like eggplant and eagerly ask Farmer Joe when it will be in season and that they love to pick greens like arugula and sorell and eat them on the drive home.

One of our favorite events at the farm is the annual sweet potato harvest, when we enjoy a beautiful fall evening of fellowship and digging sweet potatoes. Sadly, kid schedules haven’t allowed us to participate the last couple of years, so these pictures are a few years old, but we have been enjoying the labors of our fellow shareholders this week. When was the last time you dug up a sweet potato and then took it home and roasted it with fresh garlic (also fresh from the farm)? If you haven’t been so lucky, put it on your bucket list and find a time and place to experience this!

Even if you can’t harvest your own sweet potatoes, you can still make these sweet potatoes! This recipe is very loosely based on a recipe I found in Victoria magazine many years ago. I can’t tell you what issue or who the original author was but I do know it was a Thanksgiving recipe and it had crispy sage leaves on top. We’ve kept it simple, just sweet potatoes and fresh garlic, maybe a pinch of sea salt at the end if you think you need it. That’s it. And they are so good.

Garlicky Roasted Sweet Potatoes

Whether you need a new sweet potato recipe for your Thanksgiving dinner or just a nutrient dense side dish for the next time you grill  — these will hit the spot. In a pinch, you can make them without the marinating time, but that is truly the secret to this recipe. Skip it and you will have perfectly fine roasted sweet potatoes. Plan ahead a bit and you will be rewarded with amazingly delicious, crispy potatoes infused with garlicky goodness.

One quick equipment note:  I highly recommend a good mandoline for this recipe and any others involving sliced vegetables. It makes quick work of the sweet potatoes here, and ensures that they are all the same thickness so they cook evenly and at the same speed. I have this OXO Mandoline and love it!

Garlicky Roasted Sweet Potatoes

These sweet potatoes are marinated in garlic and extra virgin olive oil and roasted to crispy golden perfection. So simple and yet so delicious!
Prep Time2 hours 15 minutes
Cook Time30 minutes
Total Time2 hours 45 minutes

Ingredients

Instructions

  • Peel and slice the sweet potatoes into 1/4 inch thick slices. Use a mandoline to make this much easier and ensure your slices will be the same size and cook evenly.
  • Mince the garlic.
  • Put the sliced potatoes and garlic in a gallon size zip lock freezer bag. Add the olive oil. Zip the bag and then turn and massage the bag until the garlic and olive oil is distributed well. You want every slice of potato to be well coated, with some oil accumulating in the bottom of the bag. Lay the bag on one side and let it sit on the counter for at least 2 hours or in the refrigerator up to 24 hours. Turn the bag over a few times. This allows the olive oil to become infused with garlic flavor and gives the potatoes plenty of time to marinate in the garlic infused olive oil. The longer they marinate, the more flavor you will have.  
  • Preheat oven to 400 degrees. 
  • Remove the potato slices from the bag and lay evenly in a single layer on 2 or 3 baking sheets. The slices can overlap a bit, but you don't want to pile them up or the potatoes will steam, rather than roast, and will be mushy not crispy. 
  • Roast for about 30 minutes, rotating the pans from top to bottom of your oven part way through. At 20 minutes, start checking the potatoes. There is a very fine line between crispy potatoes and burnt potatoes. We like ours just this side of burnt. So it may seem a bit fussy, but I check them, remove any slices that are dark enough, and then put the pans back into the oven, checking every 2-3 minutes and repeating this procedure until they are all done perfectly. If you prefer not to fuss over your potatoes this much, just take them out when the first few are browned but not yet burned and the others are just beginning to turn golden brown around the edges or on the underside when you flip one over. They will be delicious either way! 

Healthy School Lunches in Ten Minutes a Day

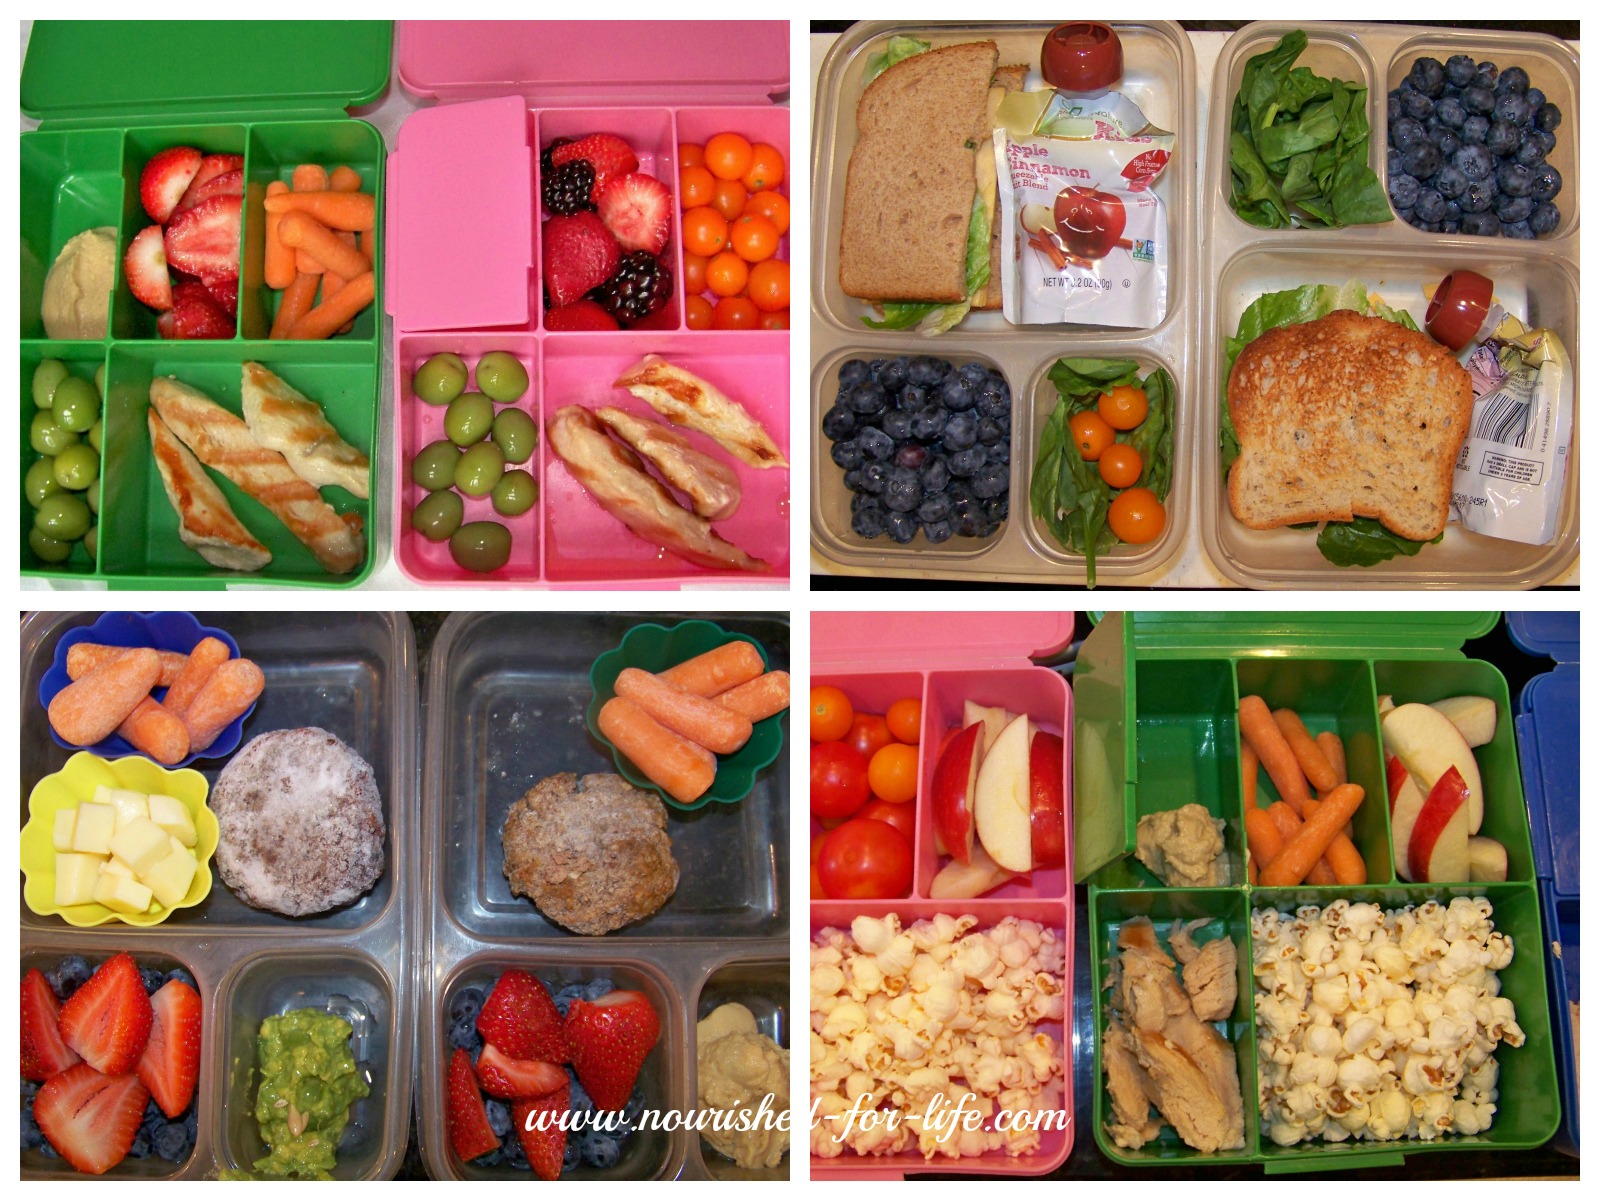
I recently read about a 2014 study that found home packed school lunches, as a whole, included more sugar, calories and unhealthy fats had lower nutritional value than school lunches. Wow! If this is true, we have some serious work to do, fellow lunch packing parents! I’ll admit packing school lunches is not my favorite activity. But it’s really important to me to feed my family foods that nourish their bodies and minds and we also have multiple food allergies, so its a necessity for us.

Our school lunches aren’t fancy, but they are filled with real whole foods that I feel good about feeding my kids. I’ve given you a quick reference list of the things on the rotation for my kids’ lunches. Read on below for my tips for getting this done quickly and easily. With a little planning ahead it really is possible to pack healthy, real food lunches in ten minutes a day!

I make most of our school lunches the night before. If I’m packing leftovers, I make lunches while I’m cleaning up from dinner so I only have to put food away once and I’m getting lunches packed at the same time. Then in the morning all I have to do is put the lunch containers in insulated lunch bags with a few ice packs. The biggest exception to this is soup–I heat it up and put it in thermoses in the morning while the kids are eating breakfast and it is still warm at lunch time.

I might have a bit of a problem with lunchbox containers. We have so many! But it helps keep the lunch packing process a bit more fun for me and I hope it keeps the kids from getting bored with their lunch options, too. We use the three compartment plastic EasyLunchBoxes and our Pottery Barn Kids bento boxes the most, but I also have several different Sistema containers. I really like their Lunch Cubes and Salad to Go containers and we use the Small Split for their morning snack.

Lunchbox collage

I generally follow the same basic formula: Main course (meat or another healthy protein/fat/whole grain), at least one fruit and at least one vegetable. Then I may add another side or two, depending on which lunch containers I’m using and whether I feel like they need more food.

I stock my freezer with things I can easily pull out and pop in a lunch container and they are thawed and ready to eat by lunchtime the next day.

  • When I make hamburgers, meatballs, or chicken for dinner I always make extra to freeze for lunches. I cut up chicken breasts into strips, grill them on a grill pan and freeze them for lunches. I always keep turkey meatballs and leftover hamburger patties in the freezer. My kids will happily eat any of these cold. I used to cut rounds of bread with a biscuit cutter and make cute little hamburger sliders with lettuce and cheese, but they prefer just the plain patty, which doesn’t seem quite as fun but I won’t complain because it makes my job easier. If possible, buy hormone and antibiotic free meat from grass fed/pastured animals. In addition to avoiding the hormones and antibiotics, pastured meat is much higher in omega-3 fatty acids and you get the benefit of the nutrition from all of the greens the animals eat. We buy our meat directly from Fischer Farms, a wonderful local family farm. I love knowing where my meat comes from and that it was raised humanely and healthfully.
  • Protein Muffins — I love to freeze these super healthy and delicious Grain Free Banana Protein Muffins from One Lovely Life for breakfasts and lunches. I make the recipe exactly as written except that I make 18 standard size muffins. These Flourless Chocolate Muffins were also on my list this week. Like the banana muffins, they are high in protein, have no flour, sugar or refined oils and they are so good.  You will never know they are made of chickpeas. My kids think they’re getting a chocolate cupcake in their lunches.
  • This week I also made and froze 24 Mini Pizzas. I use Food for Life sprouted grain hamburger buns or English muffins (for my gluten eaters) and for my gluten free kiddos either Food for Life gluten free English muffins or Udi’s whole grain gluten free hamburger buns. I lay the bun or muffin halves face up on a baking sheet and toast them in the oven, top with organic pasta sauce and cheese (or Diaya non-dairy cheese shreds for my dairy free kids), pop them back in the oven until the cheese melts, then let them cool and freeze them in a zip top bag. I’ll add a piece of fruit and a small salad or sprouts to their lunch and they will be set.

Healthy School Lunches

Other Main Courses — 

  1. Tacos — We have tacos for dinner several times a month and I always make extra so we can have tacos for lunches at least one day. I make 3 extra tacos before I clean up from dinner, put each one in a snack size zip top baggie so the toppings don’t fall out, and then put them in their lunch container with a piece of fruit and another side or two (sometimes a few organic blue corn chips and salsa or guacamole). The tacos are cold and I’m pretty sure the shells are soggy by lunch time but my kids still love them.
  2. Canned tuna — My daughter likes tuna plain straight from the can on a sandwich, on a salad or with whole grain crackers.
  3. Almond butter or sunbutter sandwiches are quick and easy.  Make sure you buy 100% pure, no sugar added Almond butter and use sprouted, whole grain or gluten free bread with the fewest and best ingredients possible.
  4. Lettuce and cheese sandwiches — I use Diaya cheddar style slices for my dairy free kiddos and put lettuce and cheese on sprouted wheat, whole grain or gluten free bread. My daughter likes a slice of tomato too. Once in a great while I give them BLTs.
  5. Chili or soup is good for variety in the fall and winter and makes a great, healthy lunch when paired with a real food muffin and a piece of fruit.
  6. Hard boiled eggs  — Make a dozen hard boiled eggs at a time and have enough for several days lunches. Buy local, organic or omega-3 eggs from pastured chickens, if possible.
  7. Organic yogurt — My preference is plain yogurt with just a bit of honey and some fruit or granola added, so I can control the amount of sugar.

Sides — Every lunch I pack has at least one vegetable and one fruit. I may add  a second fruit or one or two of the other options listed here:

  1. Veggies with hummus or guacamole for dipping— carrots, celery, bell peppers, broccoli, cauliflower, grape or cherry tomatoes, cucumber, or sugar snap peas, depending on which child and what they will eat.
  2. Lettuce or spinach salad — this is really just a few bites of salad, sometimes it gets eaten and sometimes it doesn’t!
  3. Pea, sunflower or radish sprouts — This is new for us this year. At our farmers market this summer we discovered Sprout Farms, a farmer who grows and sells micro greens and my kids love them! The amazing thing is that the sprouts really do taste just like the vegetable or seed they are grown from. The Pea Shoots really taste like peas and the Sunflower Shoots really taste like sunflower seeds. I’m thrilled to have another leafy green my crew will eat in their lunches. If you’re local, you can purchase them at the Downtown Evansville or Newburgh Farmer’s Markets or through their website. Or if you’re really ambitious you can grow sprouts in your own sprouting trays.
  4. Fresh Fruit — apple slices, berries, bananas, clementines and grapes are the most common lunchbox fruits for us
  5. Unsweetened applesauce — look for 100% applesauce with no added sugar (I’ve been known to pack apple slices and applesauce a few times when lunch supplies were very low.)
  6. Individual size fruit cups in 100% juice — I always have a few on hand for emergencies when we are out of fresh fruit
  7. Olives — My kiddos love olives and they are an easy and healthy fruit full of good healthy fats!  Our favorites are Castelvetrano Olives.
  8. Nuts and dates — I often fill one space in their bento boxes with nuts or a mix of dates and nuts for a healthy treat
  9. Cheese — buy organic where possible, local grass fed cheese is the best option if its available and fits your budget
  10. Protein muffins — see above for two of my favorites for my freezer stash
  11. Popcorn — a healthy whole grain treat as long as it isn’t popped in hydrogenated oils or loaded up with artificial flavoring
  12. Pretzels or whole grain or gluten free crackers — not really real food, but make it into my kids’ lunches once in a while
  13. Organic blue corn chips — also not really real food but I still use them once in a while on taco day

I hope this gives you some inspiration for your lunch boxes. It really is worth the effort to feed our kids real foods that nourish and heal their bodies and minds. I would love to hear if you have other real food lunch box ideas that your kids enjoy. Please share in the comments!