Maple Pecan Pumpkin Spice Muffins

Maple Pecan Pumpkin Spice Muffins

It’s fall!

I’m already seeing pumpkin everything, everywhere. So in honor of the first day of fall and one of my favorite times of year, I’m joining in the pumpkin love today.

You should absolutely jump on the pumpkin bandwagon this fall too. Not just because its delicious, but because pumpkin is packed full of nutrition. Pumpkin is very high in Vitamin A, one serving providing 245% RDA. It is also a good source of calcium, Vitamin C, several B vitamins (including folate) and a number of minerals including magnesium, potassium and phosphorus.

Maple Pecan Pumpkin Spice Muffins

These amazingly moist and flavorful muffins are the perfect way to satisfy your pumpkin spice cravings with health promoting ingredients and without any sugar or other harmful ingredients.

They are free of gluten, dairy, sugar and refined oils. They are paleo and vegetarian, and can easily be made vegan as well by substituting flax eggs. They are high in protein due to the almond butter, almond meal and eggs. Use eggs from pastured chickens for a healthy dose of omega -3s. And they freeze well too. I love to keep these in the freezer to pull out and pop in the oven for a quick healthy weekday breakfast.

Treat yourself to some delicious, healthful, pumpkin-y goodness!

Maple Pecan Pumpkin Spice Muffins (gluten & dairy free, paleo)

Ingredients

  • 1 very ripe banana mashed
  • 1 c.
  • Organic pumpkin purée
  • 3 eggs
  • 1 c.
  • Almond butter
  • 1/2 c.
  • Real maple syrup
  • 1 tsp.
  • Vanilla extract
  • 1 c.
  • Almond meal
  • 1 tsp.
  • Baking soda
  • 1 tsp. Unprocessed sea salt (I use
  • Celtic Sea Salt
  • or
  • Redmond Real Salt
  • )
  • 2 tsp. Ground cinnamon
  • 1 tsp. Ground ginger
  • 1/2 tsp. Ground nutmeg

Instructions

  • Preheat oven to 350 degrees and grease a muffin tin well with coconut oil or a bsking spray. If you prefer you can use paper or silicone muffin wrappers, but I really like these muffins with a bit of a crusty edge from baking directly in the pan.
  • Placed ripe, peeled banana in a mixing bowl and mash it with a fork.
  • Add the pumpkin purée and eggs and mix well. Add in the almond butter, maple syrup and vanilla, mixing until the batter is smooth and well combined.
  • Stir in the dry ingredients and spices and mix until combined.
  • Spoon into muffin tins,filling each cup about 3/4 of the way full. You should have 18 muffins. Bake 20-22 minutes. Cool for 10 to 15 minutes and then carefully remove the muffins from the pan and allow them to finish cooling on a wire cooling rack.
  • Enjoy your healthy pumpkin-y goodness!

Cousin Claudio’s Authentic Italian Pasta Sauce

sauce

It’s beginning to feel like fall here, which is putting me in the mood for soups, stews and heartier pasta dishes that I don’t usually make in the summer. So today seemed like a good day to share one of our favorites.  I know this isn’t my usual heavy-on-the-fruits-and-vegetables kind of recipe but, while we don’t eat pasta every day, we do love it and this dish is nourishing to the soul as well as the body.

Nick’s Cousin Claudio is a chef in Italy. When we got married there in 2004, one of the incredibly special things about our trip was meeting some of our Italian relatives. We were married in Ripa Teatina, a tiny hilltop town overlooking the Adriatic, in the church where Nick’s great-grandparents were married before they emigrated to the United States, and where some of his cousins still live.

A few days before our wedding, family members we had never met welcomed us into their home for a meal and Claudio cooked pasta for us. This pasta. We didn’t get his recipe, but he gave us basic instructions and when we got home I experimented and made it over and over until we felt like we had finally achieved it. Of course, we call it Cousin Claudio’s Sauce.

(This picture is in front of the little grocery store the family runs.)

One day last year on a hectic school and soccer night, I gave the kids pasta with jarred sauce (which for the record, we do eat). On that night though, my daughter declined to eat her dinner, and when I inquired as to why she wasn’t eating she said sweetly, “Mommy, I just really prefer Cousin Claudio’s Sauce.” Don’t we all, my dear. I’m still not sure whether I should have felt pleased or embarrassed or annoyed. I may have created a monster. I’ve definitely raised a foodie.

Those of you who know us well have probably had Cousin Claudio’s Sauce, as it is one of our favorite meals to share with family and friends. And to this day it takes me back to that simple but incredible meal in a beautiful place with very special people. We are still overwhelmed by and so thankful for their warmth and hospitality.

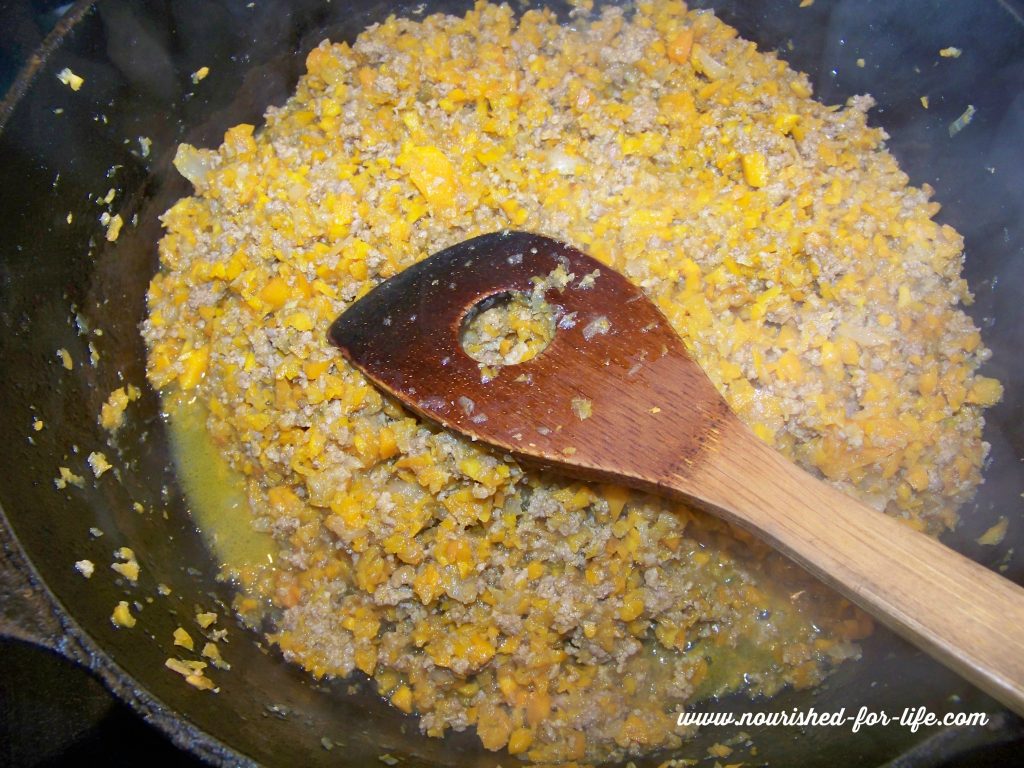
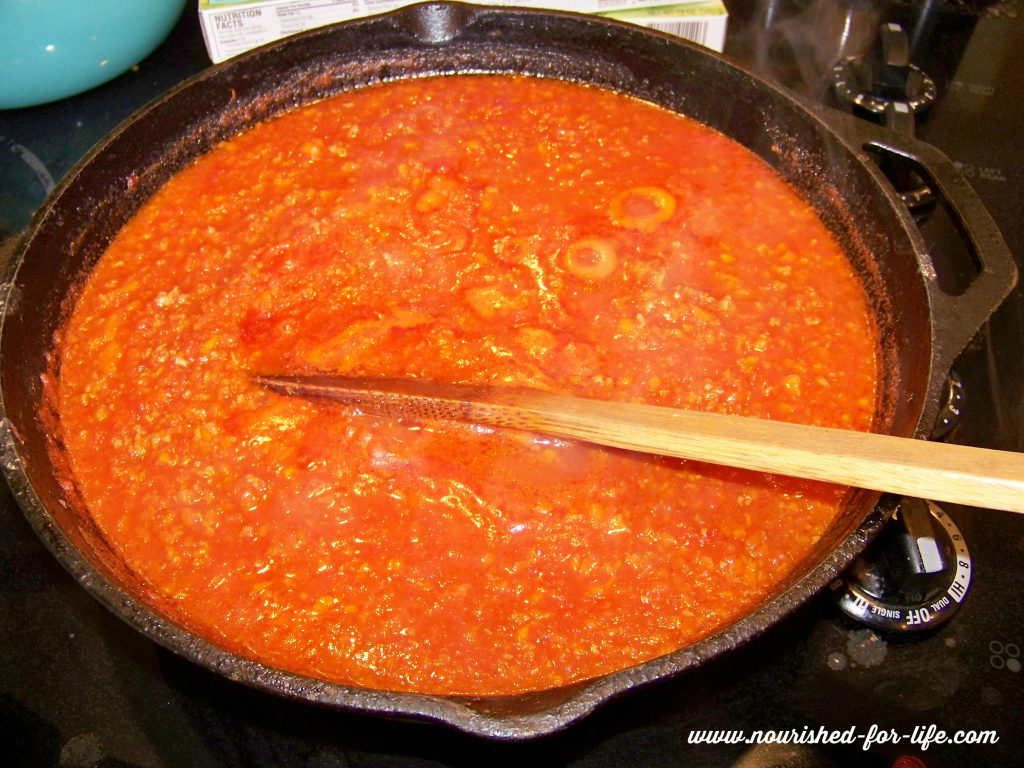
This sauce is so simple but it is really important not to rush it. Take your time and allow the flavors to develop at each step. The carrots and onions basically melt into the sauce and you will have to look closely to even know they are there. Use a flat or angled wooden spoon and break the meat up into really tiny bits as it cooks. Allow the onions, carrots and meat to all three to simmer together, and then give the wine plenty of time to cook down. If you prefer not to use wine, you can substitute an equal amount of chicken or vegetable broth with lemon juice. You just need the acidity to brighten the flavors. Finishing the sauce with butter adds just the right bit of creaminess, flavor and mouth feel to the sauce. A drizzle of olive oil or ghee and a tiny pinch of salt is a good dairy free substitute.

Authentic Italian Pasta Sauce

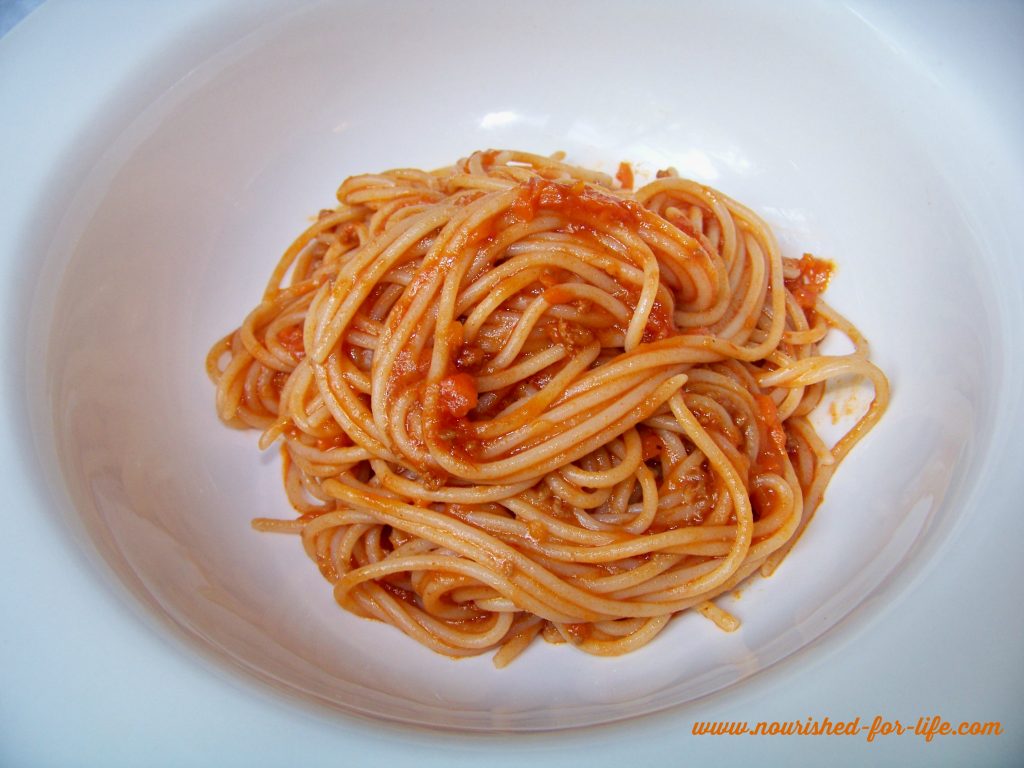
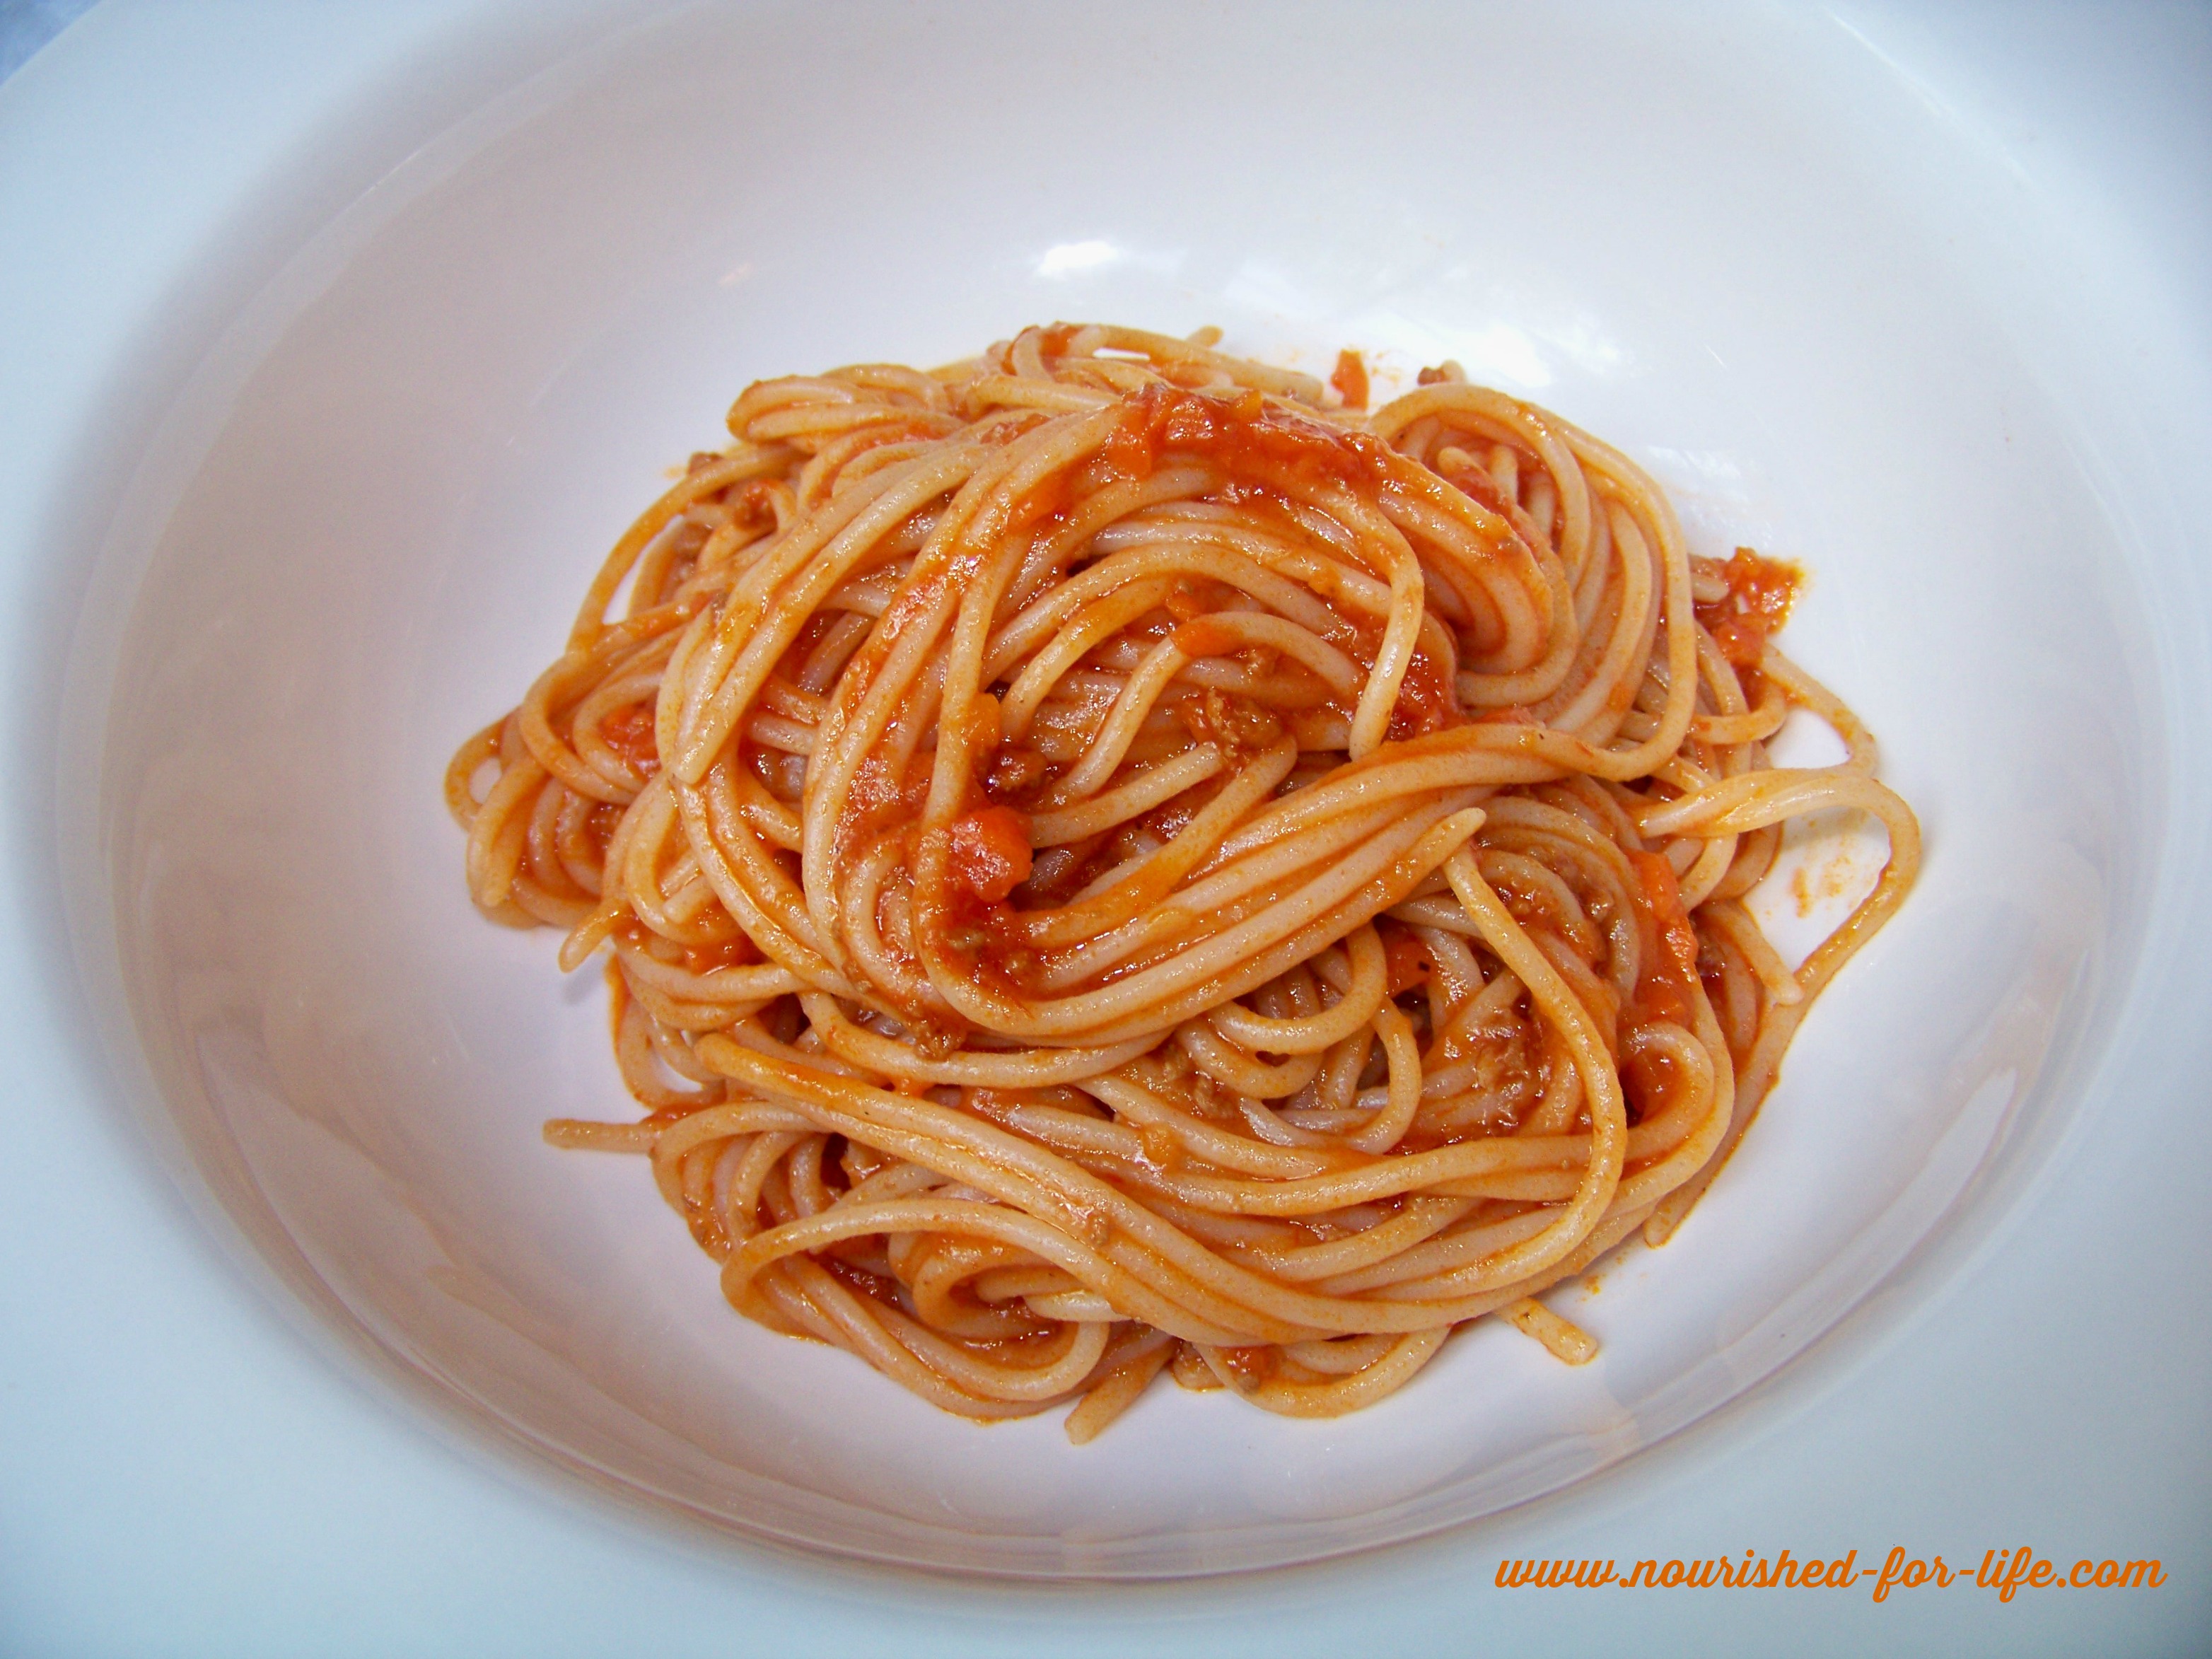
This sauce is best served with linguine. It won’t be the same with a shorter pasta shape or capelinni. We used to love DeCecco brand linguine, which is made in Chieti, Italy, very near where we were married and first had this sauce. Now that we are gluten free, the only pasta that measures up for us is Jovial, which is a whole grain brown rice pasta made in Tuscany with traditional methods. Now I use Jovial’s Organic Brown Rice Spaghetti for this sauce now (until they start making linguine!) and it is delicious. Even if you aren’t gluten free, I highly recommend it as a healthier, whole grain option. You can’t even tell the difference. And we’re pretty picky about our pasta!

Authentic Italian Pasta Sauce

I’m feeding a family of six and I love to get 2 meals from anything that takes a bit of time to prepare. So this recipe will sauce 4, 12 oz. boxes of Jovial spaghetti. It can easily be cut in half, if you aren’t feeding a small hungry army like I am.

A few other important tips to make this a truly authenitc Italian pasta experience:

1. Salt your pasta cooking water liberally to season the pasta. Do not add oil to your cooking water. This prevents the pasta from absorbing the sauce.

2. Cook your pasta to almost but not quite al dente, the point where it still has just a bit of bite. This usually means undercooking it by two or three minutes from the package directions so check it often towards the end of the cooking time.

3. Do NOT rinse your cooked pasta. Drain the pasta in a colander and then put it straight into your warm sauce. Toss it well with a pair of tongs and let it sit in the sauce on very low heat for just a few minutes. This allows the pasta to absorb all of the flavors of the sauce while it finishes cooking.

4.Italians do not over-sauce their pasta. The sauce is a delicious condiment to showcase the pasta. So after you let your pasta sit in the sauce for a few minutes, pull it out, put it in a serving bowl, top it with just a bit more sauce if you feel like you need to and then save the remaining sauce for another meal.

Authentic Italian Pasta

I hope you love Cousin Claudio’s Sauce as much as we do. And I hope Claudio will think we are doing his sauce (and his name) justice.

Serve with an arugula salad and enjoy with your loved ones!

Print Recipe
5 from 1 vote

Cousin Claudio’s Authentic Italian Pasta Sauce

Ingredients

  • 2 T extra virgin olive oil
  • 1 sweet onion finely minced
  • 8-10 large full size carrots, finely minced (approx. 3 cups, minced)
  • 1 lb ground beef please use organic, grass fed beef if possible
  • 1 c. Dry white wine can substitute 2/3 c broth with juice of one lemon
  • 2, 28 oz cans crushed or puréed tomatoes
  • 2-4 cups water
  • 2 T butter optional (use olive oil, coconut oil or ghee with a tiny pinch of salt ffor a dairy free version)
  • 2, 12 oz boxes
  • Jovial Organic Brown Rice Spaghetti
  • Parmigiano reggiano for serving optional

Instructions

  • Coat a large skillet or cast iron pant with the olive oil and warm over medium heat.
  • Place carrots In a food processor and pulse until they are minced finely, but not puréed, then add to your skillet. Repeat with the onions.
  • Cook the carrots and onions over medium heat, stirring often, until they are softened but,not yet starting to brown or caramelize.
  • Move the carrots and onions to one side of the skillet and add the ground beef in the open space. Use a flat or angled wooden or bamboo spoon and break the meat up into really tiny bits as it cooks. When the beef is browned, stir it into the vegetables. Allow the onions, carrots and meat to all three to simmer together until the meat is cooked through and any liquid has evaporated.
  • Add the white wine or broth and cook, stirring often, until the liquid is mostly absorbed.
  • Add the tomatoes and stir to combine. Add one cup of water. Bring to a boil and then reduce to a simmer. Allow the sauce to simmer for at least 2 hours, stirring often, scraping down the sides of your skillet and incorporating the bits of sauce from the edges of the pan. Add water, 1 cup at a time, as needed to keep the sauce the same consistency. The color will deepen and turn more orange as it cooks. The longer you allow the sauce to simmer, the deeper the flavor will be. Just keep adding a bit more water as it cooks down.
  • Just before serving, stir in 2 T butter or one of the dairy free alternatives.
  • Bring 6-8 quarts of water to a boil in a large stock pot. When the water has come to a boil, add approx 1 T sea salt to the water. Do not add any oil. Cook the pasta according to your package instructions, but check it a few minutes early and remove it from the water just before it is al dente.
  • Drain pasta in a colander and add it to your sauce. Use tongs to combine the pasta and sauce, making sure all of the pasta is coated. Let it sit over low heat for just a few minutes to allow the pasta to absorb all of the flavors from the sauce as it finishes cooking. Use your tongs to lift the pasta out of the sauce and into a serving bowl. You should have half of the sauce remaining, set it aside for another meal.
  • Serve with grated parmigiano reggiano, if you wish, and enjoy with your loved ones!

Salted Caramel Almond Clusters

I love chocolate. I blame my mom (sorry, mom). And the days when she or one of my sisters or I would make a pan of brownies and my family would inhale the entire pan in record time. I am blessed to have a mom who loves to bake and our home always smelled of homemade bread, cookies and brownies.   

Now as a health coach and mom who works hard to feed my family nourishing foods that promote health, I still have absolutely no problem with a treat once in a while. But these days I try to choose my treats wisely. I try to choose treats that are delicious (never waste a treat on something mediocre!) and that completely satisfy my chocolate cravings or sweet tooth with healthful, real food ingredients and without harmful ingredients that sabotage our health like sugar, white flour, artificial flavors or colors, high fructose corn syrup, artificial sweeteners, trans fats, processed oils and chemical preservatives.

These Salted Caramel Almond Clusters fit the bill perfectly.

Salted Caramel Almond Clusters

My family all loves these salty sweet treats but lets be honest:

I make them for me.  

Salted caramel, almonds and chocolate. Three of my favorite things all in one delicious little bite.

And the best part?

It’s all real food with just a very small amount of sugar in the chocolate chips. So you can enjoy them completely guilt free. As long as you don’t eat 10 or 12 at once. But I have to warn you they are pretty addicting so that is not out of the realm of possibility.

Almonds contain lots of healthy fats, fiber, protein, magnesium and vitamin E. The health benefits of almonds include lower blood sugar levels, reduced blood pressure and lower cholesterol levels. You don’t need to fear the fat content of almonds, as they actually reduce hunger and promote weight loss.

Raw honey is a far healthier sweetener than processed white sugar. It doesn’t cause the same blood sugar spike or increase in insulin levels, and the glycemic effect is moderated even more when it’s paired with a healthy protein like in these little treats. According to Dr. Josh Axe, raw honey contains 22 amino acids, 27 minerals and 5,000 enzymes. Raw honey contains vitamins B6, thiamin, riboflavin, pantothenic acid and niacin. The bee pollen in raw honey helps improve immune function, fight infections and ward off seasonal allergies. Raw honey promotes antioxidant activity and a bit of raw honey at bedtime even improves sleep. You never want to heat raw honey as this destroys most of the health benefits.  

Dr. William Sears and Dr. Josh Axe both list dark chocolate as one of the top 10 highest antioxidant foods. Dark chocolate has an ORAC Score (Oxygen Radical Absorption Capacity) of 21,000, and Dr. Axe places it third on his list of highest antioxidant foods behind only Goji berries and wild blueberries. Hooray!! We can enjoy a small piece of dark chocolate or a few dark chocolate chips as a healthful treat every single day. Milk chocolate obviously has more sugar added and fewer health benefits, which means we need to eat it in moderation and as a once in a while treat.

If you love your chocolate like I do, its also important to choose the purest and best quality chocolate you can. I personally love Enjoy Life chocolate chips, chunks and baking chocolate. Enjoy Life products are free of gluten, dairy, soy, peanuts and fillers. Perfect for those of us with food allergies. But even if we suddenly didn’t have food allergies, this chocolate is so good I doubt I would ever be able to switch back to anything else!                

Salted Caramel Almond Clusters

These healthy little treats are amazing and satisfy your sweet tooth and chocolate cravings without any harmful ingredients! Enjoy completely guilt free!!
Prep Time10 minutes
Cook Time5 minutes
Total Time15 minutes
Servings: 36 Clusters
Author: Kristi Cirignano

Ingredients

  • 1/4 c raw honey
  • 1/4 c almond butter (make sure you use pure 100% almond butter with no sugar or other added ingredients. I prefer the fresh ground almond butter available locally at Fresh Market or at many natural grocery stores. I also sometimes order Kirkland Almond Butter from Amazon)
  • 1/2 tsp unprocessed sea salt
  • 1/2 tsp. vanilla extract
  • 1-1/2 c whole almonds (I usually use roasted and salted almonds from Aldi in this recipe, if you use raw or unsalted Almonds I would increase the sea salt to 1 tsp.)
  • 1/2 c Enjoy Life chocolate chips

Instructions

  • In a small bowl, stir together the honey, almond butter, sea salt and vanilla.
  • Add almonds and stir until they are all coated.
  • Line a baking sheet with parchment paper. Using two spoons, drop spoonfuls of the caramel almond mixture into the parchment paper. I usually get about 36 clusters.
  • Put your baking sheet in the freezer while you melt the chocolate for the topping. 
  • In a small saucepan over VERY low heat, slowly melt the chocolate chips until the chocolate is smooth and will spread easily. Stir often to prevent burning. If your heat is too high, your chocolate will become thick so its important to use very low heat and be patient. As soon as your chocolate is melted, remove it from the heat.
  • Use a spoon to spread a bit of the melted chocolate onto each cluster.
  • Return the baking sheet to the freezer for 1-2 hours to let the clusters harden. Store Salted Caramel Almond Clusters in the freezer until you are ready to enjoy, as they will get soft and gooey at room temperature. 
  • Try not to eat them all at once! 

Notes

This recipe is adapted from Elana's Pantry . I have probably made these a hundred times since I found Elana's delicious Macadamia Caramel Clusters and have tried a dozen variations and methods. This is by far my favorite and the only way I make these delicious little treats now! Thank you for the inspiration, Elana!


Sources:

draxe.com/the-many-health-benefits-of-raw-honey

https://authoritynutrition.com/9-proven-benefits-of-almonds/

Sears, W., & Sears, M. (2010). Prime-time health: A scientifically proven plan for feeling young and living longer. New York: Little, Brown and Co.

http://draxe.com/top-10-high-antioxidant-foods/

Healthy School Lunches in Ten Minutes a Day

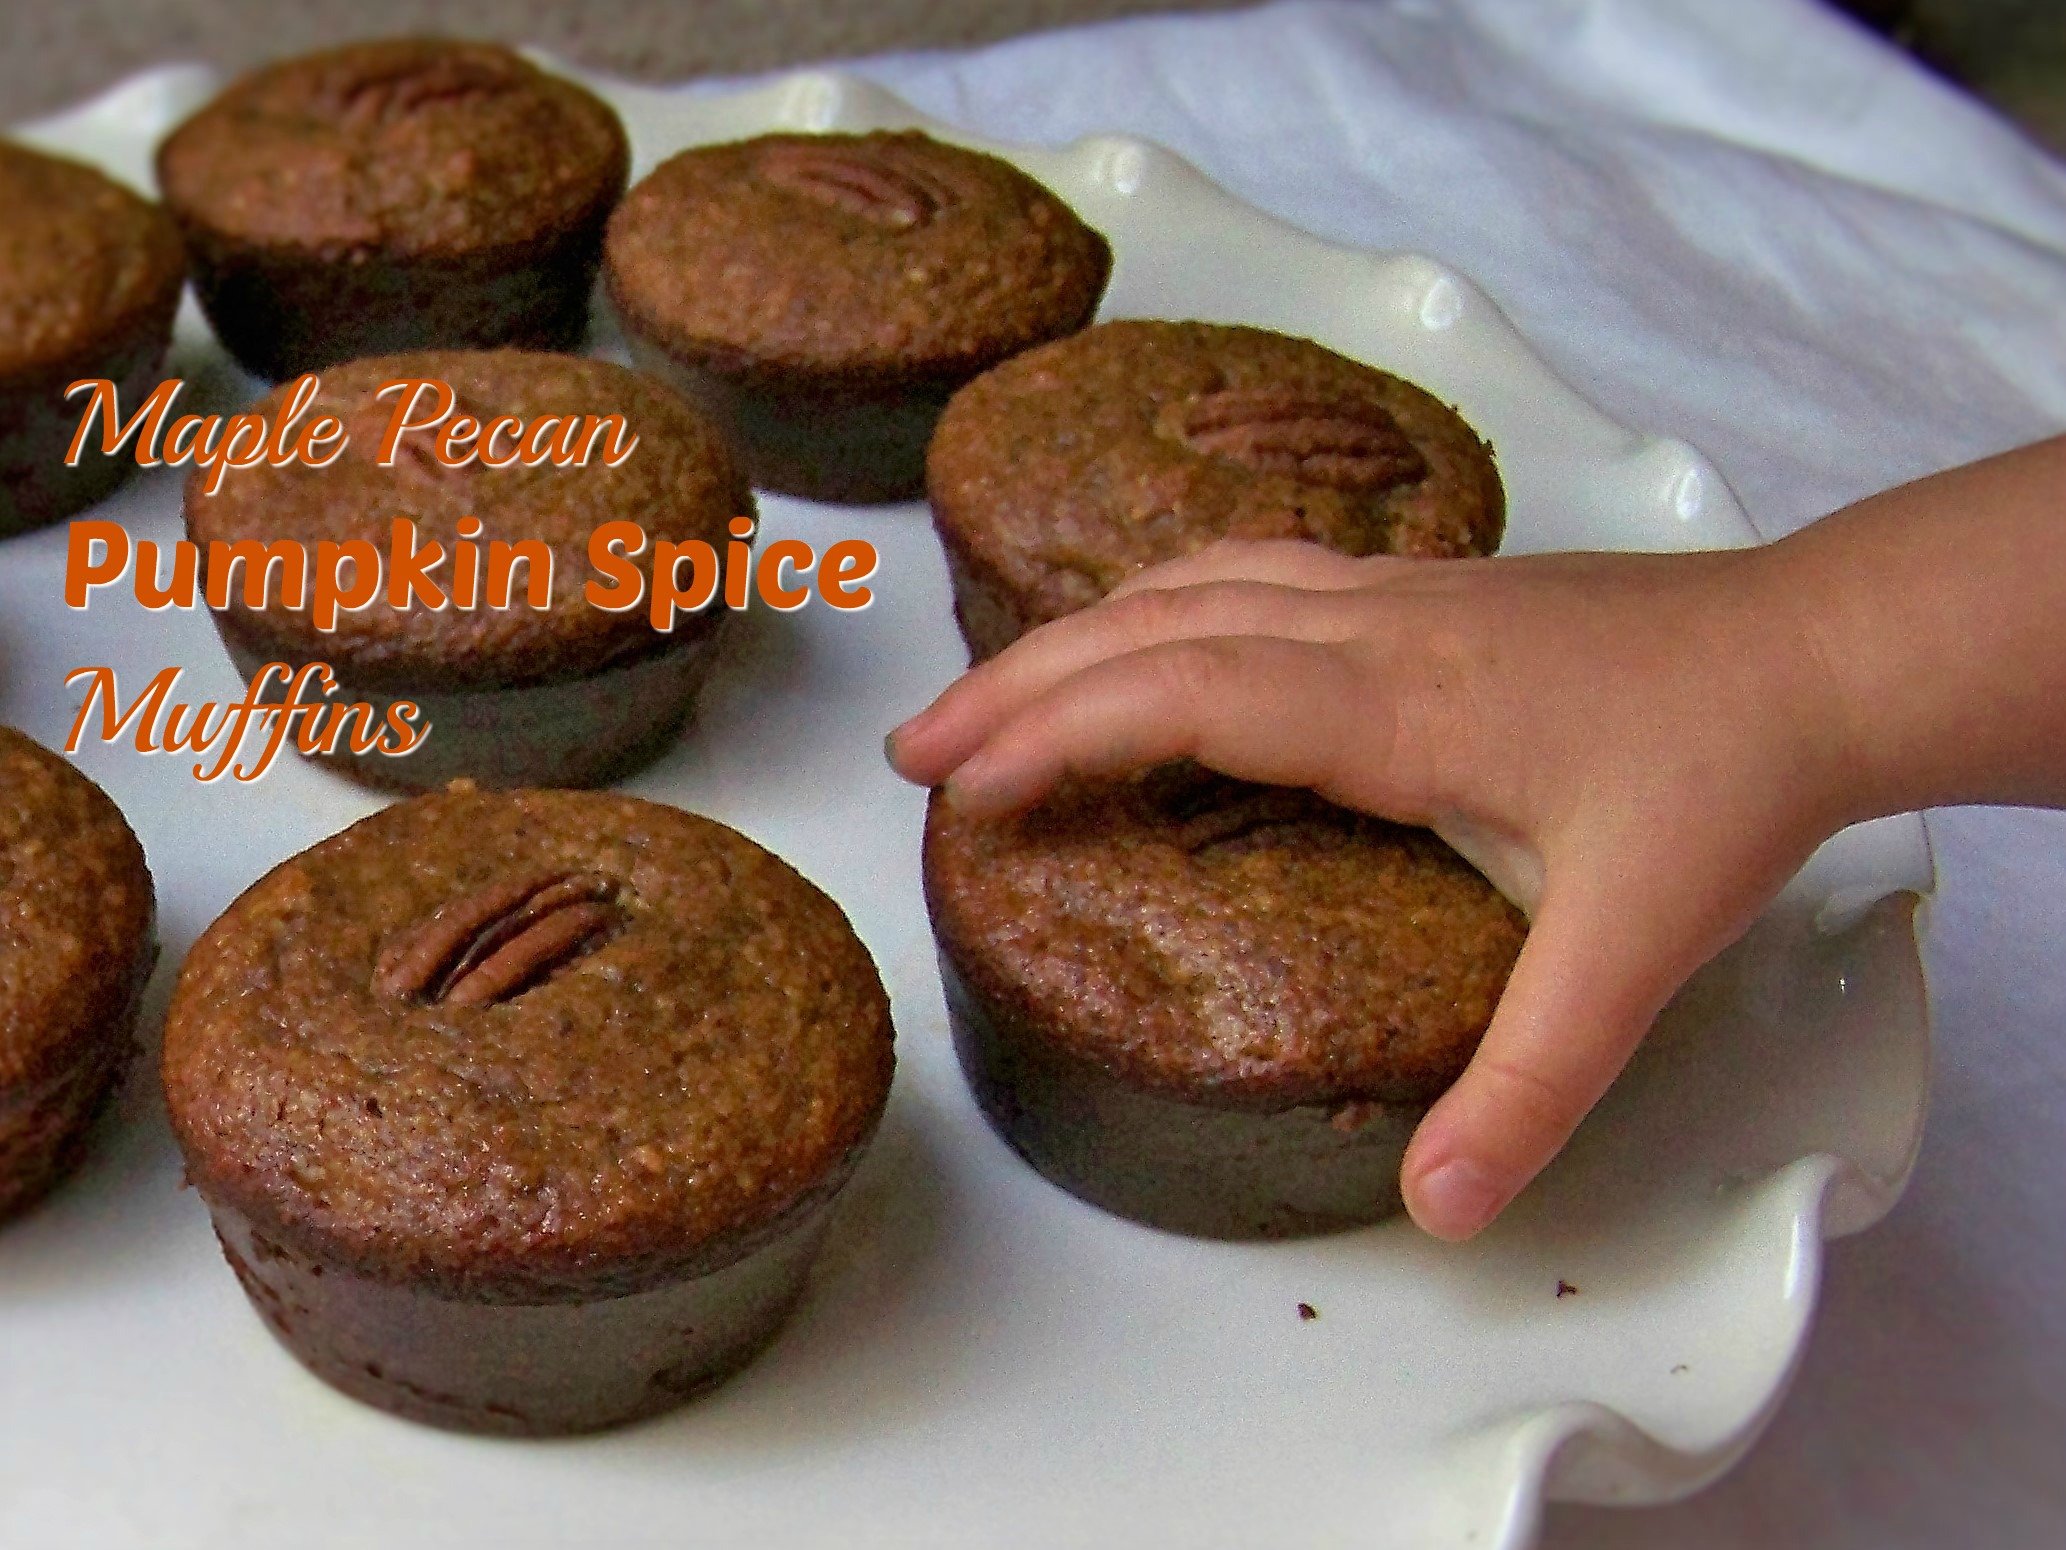
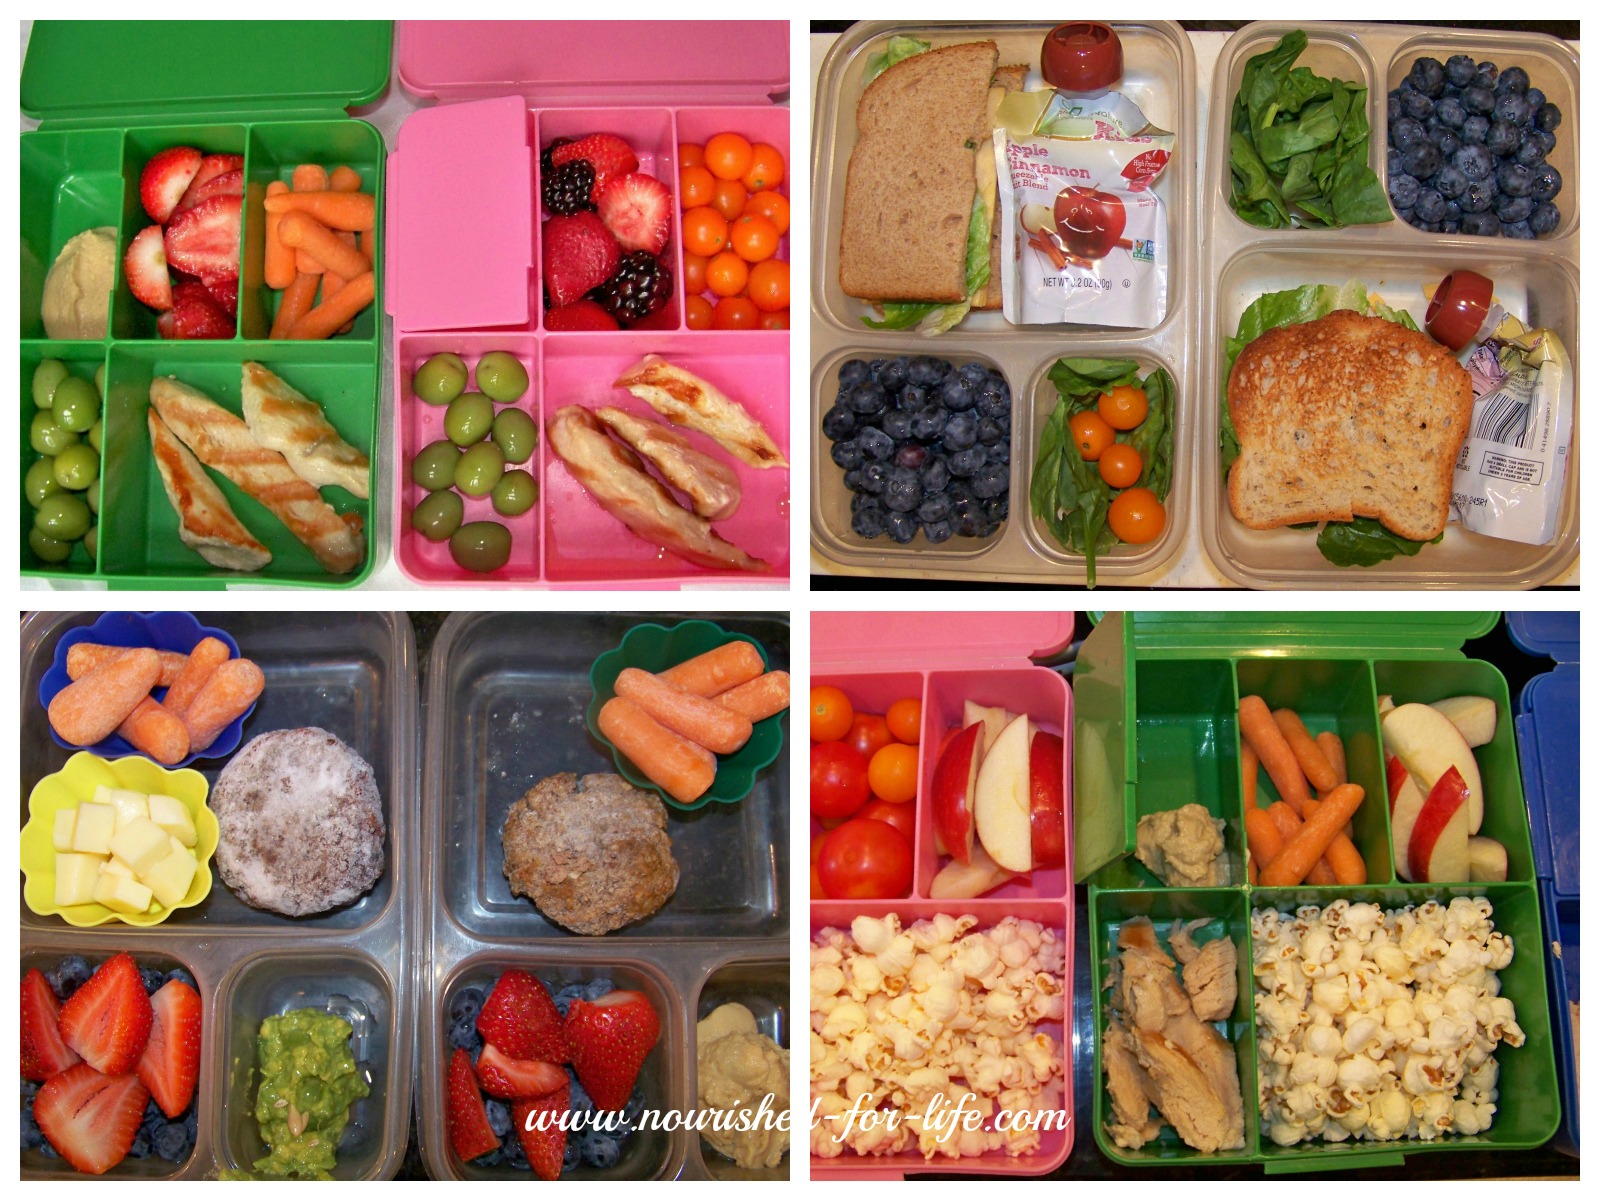
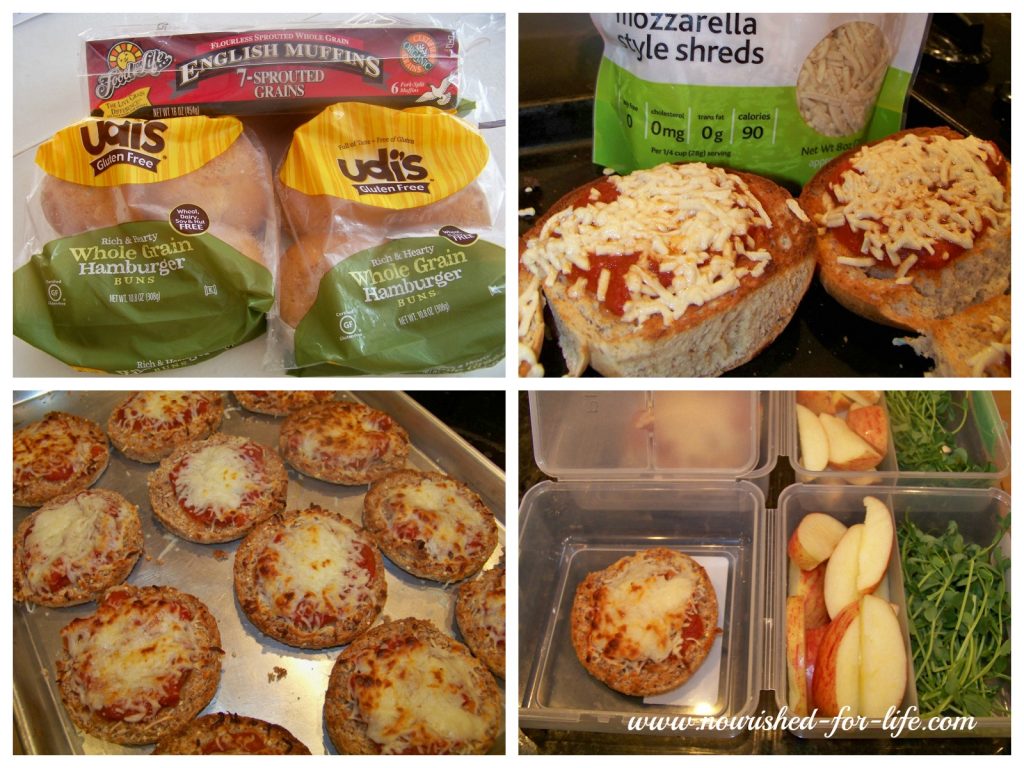
I recently read about a 2014 study that found home packed school lunches, as a whole, included more sugar, calories and unhealthy fats had lower nutritional value than school lunches. Wow! If this is true, we have some serious work to do, fellow lunch packing parents! I’ll admit packing school lunches is not my favorite activity. But it’s really important to me to feed my family foods that nourish their bodies and minds and we also have multiple food allergies, so its a necessity for us.

Our school lunches aren’t fancy, but they are filled with real whole foods that I feel good about feeding my kids. I’ve given you a quick reference list of the things on the rotation for my kids’ lunches. Read on below for my tips for getting this done quickly and easily. With a little planning ahead it really is possible to pack healthy, real food lunches in ten minutes a day!

I make most of our school lunches the night before. If I’m packing leftovers, I make lunches while I’m cleaning up from dinner so I only have to put food away once and I’m getting lunches packed at the same time. Then in the morning all I have to do is put the lunch containers in insulated lunch bags with a few ice packs. The biggest exception to this is soup–I heat it up and put it in thermoses in the morning while the kids are eating breakfast and it is still warm at lunch time.

I might have a bit of a problem with lunchbox containers. We have so many! But it helps keep the lunch packing process a bit more fun for me and I hope it keeps the kids from getting bored with their lunch options, too. We use the three compartment plastic EasyLunchBoxes and our Pottery Barn Kids bento boxes the most, but I also have several different Sistema containers. I really like their Lunch Cubes and Salad to Go containers and we use the Small Split for their morning snack.

Lunchbox collage

I generally follow the same basic formula: Main course (meat or another healthy protein/fat/whole grain), at least one fruit and at least one vegetable. Then I may add another side or two, depending on which lunch containers I’m using and whether I feel like they need more food.

I stock my freezer with things I can easily pull out and pop in a lunch container and they are thawed and ready to eat by lunchtime the next day.

  • When I make hamburgers, meatballs, or chicken for dinner I always make extra to freeze for lunches. I cut up chicken breasts into strips, grill them on a grill pan and freeze them for lunches. I always keep turkey meatballs and leftover hamburger patties in the freezer. My kids will happily eat any of these cold. I used to cut rounds of bread with a biscuit cutter and make cute little hamburger sliders with lettuce and cheese, but they prefer just the plain patty, which doesn’t seem quite as fun but I won’t complain because it makes my job easier. If possible, buy hormone and antibiotic free meat from grass fed/pastured animals. In addition to avoiding the hormones and antibiotics, pastured meat is much higher in omega-3 fatty acids and you get the benefit of the nutrition from all of the greens the animals eat. We buy our meat directly from Fischer Farms, a wonderful local family farm. I love knowing where my meat comes from and that it was raised humanely and healthfully.
  • Protein Muffins — I love to freeze these super healthy and delicious Grain Free Banana Protein Muffins from One Lovely Life for breakfasts and lunches. I make the recipe exactly as written except that I make 18 standard size muffins. These Flourless Chocolate Muffins were also on my list this week. Like the banana muffins, they are high in protein, have no flour, sugar or refined oils and they are so good.  You will never know they are made of chickpeas. My kids think they’re getting a chocolate cupcake in their lunches.
  • This week I also made and froze 24 Mini Pizzas. I use Food for Life sprouted grain hamburger buns or English muffins (for my gluten eaters) and for my gluten free kiddos either Food for Life gluten free English muffins or Udi’s whole grain gluten free hamburger buns. I lay the bun or muffin halves face up on a baking sheet and toast them in the oven, top with organic pasta sauce and cheese (or Diaya non-dairy cheese shreds for my dairy free kids), pop them back in the oven until the cheese melts, then let them cool and freeze them in a zip top bag. I’ll add a piece of fruit and a small salad or sprouts to their lunch and they will be set.

Healthy School Lunches

Other Main Courses — 

  1. Tacos — We have tacos for dinner several times a month and I always make extra so we can have tacos for lunches at least one day. I make 3 extra tacos before I clean up from dinner, put each one in a snack size zip top baggie so the toppings don’t fall out, and then put them in their lunch container with a piece of fruit and another side or two (sometimes a few organic blue corn chips and salsa or guacamole). The tacos are cold and I’m pretty sure the shells are soggy by lunch time but my kids still love them.
  2. Canned tuna — My daughter likes tuna plain straight from the can on a sandwich, on a salad or with whole grain crackers.
  3. Almond butter or sunbutter sandwiches are quick and easy.  Make sure you buy 100% pure, no sugar added Almond butter and use sprouted, whole grain or gluten free bread with the fewest and best ingredients possible.
  4. Lettuce and cheese sandwiches — I use Diaya cheddar style slices for my dairy free kiddos and put lettuce and cheese on sprouted wheat, whole grain or gluten free bread. My daughter likes a slice of tomato too. Once in a great while I give them BLTs.
  5. Chili or soup is good for variety in the fall and winter and makes a great, healthy lunch when paired with a real food muffin and a piece of fruit.
  6. Hard boiled eggs  — Make a dozen hard boiled eggs at a time and have enough for several days lunches. Buy local, organic or omega-3 eggs from pastured chickens, if possible.
  7. Organic yogurt — My preference is plain yogurt with just a bit of honey and some fruit or granola added, so I can control the amount of sugar.

Sides — Every lunch I pack has at least one vegetable and one fruit. I may add  a second fruit or one or two of the other options listed here:

  1. Veggies with hummus or guacamole for dipping— carrots, celery, bell peppers, broccoli, cauliflower, grape or cherry tomatoes, cucumber, or sugar snap peas, depending on which child and what they will eat.
  2. Lettuce or spinach salad — this is really just a few bites of salad, sometimes it gets eaten and sometimes it doesn’t!
  3. Pea, sunflower or radish sprouts — This is new for us this year. At our farmers market this summer we discovered Sprout Farms, a farmer who grows and sells micro greens and my kids love them! The amazing thing is that the sprouts really do taste just like the vegetable or seed they are grown from. The Pea Shoots really taste like peas and the Sunflower Shoots really taste like sunflower seeds. I’m thrilled to have another leafy green my crew will eat in their lunches. If you’re local, you can purchase them at the Downtown Evansville or Newburgh Farmer’s Markets or through their website. Or if you’re really ambitious you can grow sprouts in your own sprouting trays.
  4. Fresh Fruit — apple slices, berries, bananas, clementines and grapes are the most common lunchbox fruits for us
  5. Unsweetened applesauce — look for 100% applesauce with no added sugar (I’ve been known to pack apple slices and applesauce a few times when lunch supplies were very low.)
  6. Individual size fruit cups in 100% juice — I always have a few on hand for emergencies when we are out of fresh fruit
  7. Olives — My kiddos love olives and they are an easy and healthy fruit full of good healthy fats!  Our favorites are Castelvetrano Olives.
  8. Nuts and dates — I often fill one space in their bento boxes with nuts or a mix of dates and nuts for a healthy treat
  9. Cheese — buy organic where possible, local grass fed cheese is the best option if its available and fits your budget
  10. Protein muffins — see above for two of my favorites for my freezer stash
  11. Popcorn — a healthy whole grain treat as long as it isn’t popped in hydrogenated oils or loaded up with artificial flavoring
  12. Pretzels or whole grain or gluten free crackers — not really real food, but make it into my kids’ lunches once in a while
  13. Organic blue corn chips — also not really real food but I still use them once in a while on taco day

I hope this gives you some inspiration for your lunch boxes. It really is worth the effort to feed our kids real foods that nourish and heal their bodies and minds. I would love to hear if you have other real food lunch box ideas that your kids enjoy. Please share in the comments!

Matteo’s Buckwheat Pancakes

Five years ago when my son Matteo was diagnosed with intolerances to gluten, dairy and soy, I had a really steep learning curve. For the longest time we lived on clean meat, fruit, vegetables and rice while I tried to learn how to cook and bake with our limitations. In the end, we’ve adjusted quite well and our whole family is healthier for it. Aside from eating a lot more fruits and vegetables (did you know we should all eat at least 9 servings of fruits and vegetables a day?) we’ve learned to enjoy quinoa, buckwheat and a variety of nutrient dense grains, seeds and other whole foods.

Buckwheat isn’t actually wheat at all, or even a grain. It’s an incredibly nutrient dense fruit seed with over 80 vitamins, minerals and phytonutrients including manganese, copper, magnesium, phosphorus and folate. It is low glycemic and high in protein, fiber and antioxidants. Among its many health benefits, buckwheat has been found to help reduce inflammation and lower unhealthy LDL cholesterol, blood pressure and blood glucose levels. It’s a great alternative for those with celiac or gluten sensitivities and a good source of protein for vegetarians and vegans. But you should add buckwheat to your diet even if you aren’t vegetarian and don’t avoid gluten. Especially these pancakes.

Buckwheat Pancakes

These buckwheat pancakes were one of my first successful efforts in the world of gluten free baking so it seems fitting the recipe should be part of my first blog post. There was a time when Matteo would eat them two (or even three) times/day. They’re that good. Kid and in-law approved. The recipe is very forgiving and endlessly adaptable. If you’re used to white buttermilk style pancakes, try substituting unbleached all-purpose flour (or your favorite all-purpose gluten free blend) for one-third to one-half of the buckwheat flour and gradually increase the buckwheat as you acquire a taste for it.

Buckwheat Pancakes

Serve them with 100% real maple syrup (none of that fake artificially flavored corn syrup stuff please!!) And whatever you do, don’t skip the cinnamon and orange extract. Trust me on this one. Cinnamon has many healing properties, and cinnamon and orange are fantastic together and in combination with real maple syrup.

I’ve made several dozen batches of these pancakes in the last week to photograph. As I sorted through all of the too dark, too light or mis-shaped pancakes looking for the perfect ones I decided these aren’t picture perfect, food stylist pancakes.  They’re better. Thick, hearty, nutrient-dense, delicious, four-hungy-kids-waiting-impatiently-for-their-breakfast pancakes. No need for perfection. Your hungry family will love them just as much as mine does.

Buckwheat Pancakes

Matteo’s Buckwheat Pancakes

Ingredients

  • 6 oz. approx. 1-1/4 c. buckwheat flour
  • 2 oz. 1/2 c. ground flaxseed (flax meal)
  • 1 tsp. Baking powder
  • 1/2 tsp. Baking soda
  • 1 tsp. Sea salt
  • 1 tsp. Cinnamon
  • 2 eggs at room temperature* (or flax gel for vegan option, see note below)
  • 4 oz. 1/2 c. Melted coconut oil (applesauce also works well as a substitute in this recipe, it will just make your pancakes a bit cakier)
  • 1 tsp. Vanilla extract
  • 1 tsp. Orange extract
  • 8 fl.oz. 1 cup almond or coconut milk, at room temperature*
  • 1 Tbsp. Apple cider vinegar

Instructions

  • Mix milk and Apple cider vinegar and let it sit for a few minutes.
  • Whisk together dry ingredients. In a separate bowl or a large measuring cup, mix wet ingredients together. Then add to dry ingredients and stir until combined. These are fairly thick and hearty pancakes. If you like your pancakes thinner, feel free to add a bit more almond milk or water to the batter.
  • Lightly oil your pancake pan and warm it over medium-high heat. Cook pancakes 3-5 minutes per side, flipping to the second side when you start to see a few bubbles form.
  • Serve with 100% real maple syrup.