Paleo Chocolate Chunk Cookies

If you’re baking for Christmas this week, Paleo Chocolate Chunk Cookies are one of my family’s favorite sweet treats! They’re free of grains, gluten, dairy and refined sugar. But still so full of flavor and delicious chocolatey goodness. My whole family LOVES them.

I’m really sensitive to sugar and if I eat it on an empty stomach I have a sugar headache in less than five minutes (a sign of the havoc its creating on my blood sugar levels & endocrine system). So when I bake sweet treats I use healthful sweeteners like raw honey, pure maple syrup or coconut palm sugar, and I like to balance the sugar with protein from nuts, nut flours, nut butters or my favorite plant based protein powder, to reduce the glycemic impact. Enjoying sweet treats (in moderation) AFTER a healthy meal rather than on an empty stomach also helps to reduce the disruption to our endocrine system.

Paleo Chocolate Chunk Cookies

If you’re hosting or attending holiday celebrations this month, you don’t have to eat perfectly. But I highly recommend making or taking a healthy dish or two that you can enjoy and fill up on completely guilt free. I also always take a sweet treat I can enjoy, and these Paleo Chocolate Chunk Cookies fit the bill. You won’t feel the slightest bit deprived or tempted by all of those holiday treats with health harming ingredients!

Easy Nutty Energy Bites

Hello Friends, Happy Monday! I wanted to share a really quick and easy recipe my family has been enjoying this summer. These tasty and easy nutty energy bites are a healthful sweet treat that I’m sure will be making their way into my kiddos lunch boxes as they head back to school this week.

You know I love my chocolate and sweet treats, but I want to make them in the most healthful way possible–with wholesome ingredients that won’t sap my energy or derail my health and with sweetness that is balanced by protein and fiber to avoid a blood sugar spike or crash.

Easy Nutty Energy Bites

I love this recipe because its so flexible. This is one of my favorite combinations, but you can use any combo of nuts, seeds, oats, unsweetened coconut flakes, chocolate chips, raisins or other dried fruit for endless variations to suit everyone in the family.

And if you’re short on time or don’t feel like rolling out all of the bites, just grab a spoon and eat it right out of the bowl like you would cookie dough, its that good!

XO,  Kristi

PS – Speaking of school, its that time again! Make sure to check out my blog post Real Food School Lunches in Under Ten Minutes a Day for my favorite healthy lunchbox options and tips for making packing healthy lunches a breeze. Well as much of a breeze as packing lunches every day can be!

Print Recipe
5 from 1 vote

Easy Nutty Energy Bites

These make a perfect, healthful treat to satisfy your sweet cravings without the blood sugar crash and without derailing your health.
Calories: 3046kcal

Ingredients

Stir together:

Add in:

  • 1/3 c chopped walnuts
  • 1/3 c raw pumpkin seeds
  • 1/3 c mini chocolate chips we use Enjoy Life brand allergen free chocolate
  • OR 1 cup total of any combination of nuts seeds, oatmeal, unsweetened coconut flakes or dried fruit you prefer

Instructions

  • Roll the "dough" into small bite sized balls. You may need to adjust the amount of almond butter, honey and protein powder slightly as there is a lot of variation in the thickness of different brands of almond butter and raw honey. If your dough is too sticky to roll out, add a bit more Complete or just put it in the fridge for an hour or so. If its too dry, add a bit more honey or a bit of nut, coconut or olive
  • oil. Adjust as needed, you can't mess these up!
  • Store in an airtight container in the refrigerator and enjoy! These freeze well if you want to save them longer.

Notes

A quick note about protein powders. I used to be a firm believer that protein powders aren't real food. Most aren't. I avoid anything with whey (a highly inflammatory and unhealthful byproduct of the dairy industry), processed or artificial sweeteners, colors, preservatives or additives. Juice Plus Complete is the only protein powder I've found that meets my definition of real food--minimally processed, nutrient dense, whole food, plant based protein from chemical-free, non-GMO legumes. grains, seeds and even mushrooms, one of the only food sources of Vitamin D--and its low glycemic and actually tastes really good! If you're interested in purchasing Complete I'd love to help! Just follow my link or shoot me a message.

Double Chocolate Buckwheat Waffles

You all know I love my chocolate, and I also love buckwheat. And these Double Chocolate Buckwheat Waffles, well, they’re pretty magical!

So when my son and I went on a date to a local coffee shop where they sell the most amazing gluten free, chocolate waffles (warm chocolate-y goodness that reminded me of my Buckwheat Brownies) we had to come home and try to recreate them.

After trying out the few recipes I found on Pinterest, none of them were really what we were looking for. So we started experimenting. At least a dozen batches later, my tasters finally said this one was the winner. It’s not quite Honey + Moon’s chocolate bubble waffles (which I highly recommend trying if you’re local), but they’re just as delicious! We don’t have a bubble waffle iron, but if you do please try these out in it and let me know what you think.

Double Chocolate Buckwheat Waffles

If you’re interested in some of the healthful properties of buckwheat, you can read more about that (and get the recipe for Matteo’s Buckwheat Pancakes) here.

Or just dive right in to making these! They’re part healthy breakfast, part dessert, and 100% delicious. They will make the perfect Valentine’s Day breakfast for all of your loves!

XO,

Kristi

Double Chocolate Buckwheat Waffles (gluten free, dairy free, refined sugar free)

Delicious, healthful, chocolatey goodness in these gluten, dairy and refined sugar free waffles. Egg free/vegan option.
Calories: 2093kcal

Ingredients

  • 1 1/2 cups Buckwheat flour
  • 3/4 c. raw cacao (I like Navitas Organics Raw Cacao)
  • 1 tsp. unrefined sea salt
  • 1 tsp. baking soda
  • 1 tsp organic cinnamon (optional)
  • 1 1/2 c. vegan "buttermilk" (1 T apple cider vinegar or lemon juice + unsweetened, unflavored almond milk, or your favorite plant based milk, to fill a 1-1/2 cup liquid measure; let sit for a few minutes to sour)
  • 2 farm fresh or organic eggs
  • 1/2 c. pure maple syrup
  • 2 tsp vanilla extract
  • 1/2 c. melted coconut oil
  • 1 c. Enjoy Life Dark Chocolate Morsels

Instructions

  • Whisk together dry ingredients in a mixing bowl.
    In a separate bowl, whisk together the buttermilk, eggs, maple syrup & vanilla. Stir buttermilk mixture into the dry ingredients, then add the coconut oil. (This prevents the coconut oil from solidifying if your milk and eggs aren't at room temperature.) Stir until well combined.
    Stir in the chocolate chips. Let the batter sit for a few minutes for the buckwheat to absorb the wet ingredients and the batter to thicken up a bit, If your batter is too thick, add a tiny bit more almond milk. Meanwhile, heat your waffle iron.
    When waffle iron is hot, scoop about 1 cup of batter onto your waffle iron and cook according to your waffle maker's directions. With my waffle iron, the indicator light comes on well before the waffles are actually done. I found setting a timer for 4-5 minutes worked perfectly. If your waffles don't come cleanly & easily out of the waffle maker, you probably need to cook them longer.
    Carefully remove waffles from waffle maker, place on a plate, and keep warm in a 200 degree preheated oven, if desired, while you make the rest of the waffles.
    We enjoy these waffles plain or with berries or banana slices. Feel free to serve with pure maple syrup if you wish! These will keep well in a zip lock baggie for 2-3 days (although I can't say any of ours have lasted that long!) or they freeze well. To reheat, place on a sheet pan and warm in the oven or pop in the toaster.
    Enjoy!!    

Notes

MAKES APPROX. 6 FULL SIZE WAFFLES (24 QUARTERS) OR 9-12 SERVINGS
You can substitute an equal amount of coconut palm sugar in place of the maple syrup if you prefer. I've tried both and it works great.
I haven't tried this recipe with flax eggs, but I think it would work fine for a vegan/ egg free version. If you try it, please let me know!
I'm a dark chocolate girl, so I love the dark chocolate morsels, but we also tried this recipe with Enjoy Life milk chocolate mini chips and they work just fine too.

Easy DIY Freezer Pickles

Happy October, Friends!

I hope you’re all enjoying this beautiful fall! I’ve been so busy with group workshops, coaching and a new certification program I’m doing through the Institute of Functional Health Coaching (much more on this in another post!) that I haven’t been blogging very much the past couple of months.

Easy DIY Freezer Pickles

So I wanted to share something fun with you today. A few years ago we grew SOOOOO many cucumbers in our Tower Garden that I couldn’t eat or give away any more. So the kids and I made pickles. I’m not a canner, but a friend suggested we freeze them and it worked perfectly. They were delicious and lasted us all through the fall and winter. My husband and kids loved them and have been asking for more ever since.

We moved the Tower Garden inside and use grow lights now, which is amazing for lettuce, herbs and greens all winter, but I haven’t had homegrown cucumbers since then. This fall we’ve had an abundance of beautiful organic cukes from our CSA and we happen to have a beautiful bunch of dill growing on the Tower Garden right now too. So yesterday Juliette and I made eight quart jars of dill pickles. They’re in the refrigerator now for a couple of days and then I’ll put most of the jars in the freezer.

I can’t say I’m an expert pickle maker by any means, but if you google freezer dill pickles you will find several recipes. This is the one we used this year, with a few modifications (for us it required about double the vinegar plus an equal amount of water to cover the cucumbers for 8 jars. I also added chopped fresh garlic, black peppercorns and we used a lot of fresh dill). Adjust the seasonings according to your own tastes. You honestly cannot mess this up. If you decide to try this, make sure you leave a good inch at the top of your jar to allow for expansion as the pickles and brine freeze. And as an added precaution, I freeze mine with the lid off and then put the lids on after they’re frozen.

Next time you buy pickles, take time to read the ingredients. Most brands are full or preservatives and have artificial blue and yellow coloring, which is so irritating because it is so completely unnecessary!! (You can read a little bit about why you should avoid artificial colors here.) I like Bubbies brand (which is usually in the refrigerator section)  but I can’t always find their dill pickles here. If you’re in the same boat, it really is easy to make your own and its such a fun thing to do with your kids. My whole crew thinks its so much fun to make and eat our own pickles!

Local friends, make sure to check my website and Facebook page often for upcoming workshops and wellness events. I have a lot of fun things in the works!!

Blessings to you and yours!

Kristi

PS. I’d love to see you at any or all of my upcoming workshops!!

Be a Smart Healthy Shopper

Friday, October 13, 2017 from 11:00 AM to 12:00 PM

NMS Chiropractic Clinic | 2568 Waterbridge Way | Evansville, IN 47710

Join Danielle Pond (Dietician @ NMS Chiropractic) and Kristi Cirignano (Certified Health Coach) for a light healthy lunch and a fun hour of talking about how to become a smart and healthy grocery shopper & get more healthful whole foods in your life! We will talk about::

–what foods you should focus on when you’re making your grocery list or doing your shopping

–food label reading strategies including how to interpret the information on a food label and what ingredients you should absolutely avoid putting into your shopping cart or mouth

–simple ways to get more whole food nutrition into your diet

Lunch is always gluten and dairy free and we will have recipes to share! This event is free but space is limited so please RSVP to Kristi@nourished-for-life.com or via eventrite at https://smart-shopper.eventbrite.com

Raising Healthy Kids

Tuesday, October 17, 2017 from 9:30 AM to 11:00 AM

Kristi’s home | 10276 Shefield Ct. | Newburgh, IN 47630

We all want to raise healthy kids, but it’s a challenge in today’s environment! Do you struggle with:

–picky eaters?

–societal pressures on our families and kids to eat like everyone else?

–meal planning?

–finding time for cooking and feeding your family healthful whole foods when we are running all day from work or school to homework to sports and activities?

Eating nutrient dense whole foods is so, so important to our kids performance in school, sports and activities, and even more important to their long term health. But its not always easy! Join us for a light, healthy lunch and we’ll talk about overcoming picky eating, peer pressure & meal planning tips to set yourself up for success!

Lunch is always gluten and dairy free and we will have recipes to share.! This event is $10 per person. Please register via eventbrite at https://healthy-kids.eventbrite.com

Essential Oils & How They Can Benefit You

Friday, October 27, 2017 at 11:30 AM – 1:00 PM

Kristi’s home | 10276 Shefield Court | Newburgh, IN 47630

Join us for a light, healthy lunch and learn the basics of essential oils …

What are they?

How do you use them?

How can they benefit you and your family?

You will get to smell and sample a variety of oils and learn how to use them in your home!

** Please note essential oils have many benefits, but they are powerful substances and it is important do your own research on any oils that you use, use caution and make sure you are using them appropriately and safely! We will share some of my favorite resources for researching oils and their uses.

Lunch is always gluten and dairy free and we will have recipes to share. This event is $10 per person. Please register via eventbrite at https://essential-oil-basics.eventbrite.com

Chocolate Crisp Rice Protein Treats

Hello Friends! I promised you I would post this Chocolate Crisp Rice Protein Treats recipe this week, so here it is!

Chocolate Crisp Rice Protein Treats

I can’t really take the credit for this one. I originally got this recipe from my friend and mentor Bonnie Schnautz, ND of BRenewed Wellness Center. But it is so deliciously addictive and is a regular at our house so I have to pass it on to all of you!

I make these with Juice Plus Complete, my favorite whole food, plant-based protein powder. When it comes to protein powders, I’m extremely picky. Plant-based is a must. I avoid anything with whey (a highly processed by-product of the commercial dairy industry loaded with hormones and antibiotics) or any artificial flavors, colors, sweeteners or other questionable additives. Complete contains 15 different plants including nutrient dense legumes, ancient grains, broccoli sprouts, pomegranate, spirulina and even mushrooms. It is also high fiber, low glycemic, non-GMO and is NSF certified to be free of chemicals, heavy metals and any other contaminants or fillers.

Chocolate Crisp Rice Protein Treats

Try these for a delicious treat or (don’t tell my kids) they could even be a high protein, nutrient dense breakfast bar. Just don’t eat the whole pan at once!

Chocolate Crisp Rice Protein Treats

Ingredients

  • 1/2 c. all natural organic peanut butter (make sure to buy a brand with no sugar added. We use Aldi's Simply Nature brand)
  • 1/2 c. raw honey
  • 1 scoop 1/3 c
  • Chocolate Complete
  • or your favorite whole food plant-based protein powder
  • 1-1/2 to 2 c. gluten free crisp rice cereal (I use
  • Barbara's Organic Brown Rice Crisps
  • )

Instructions

  • Stir together the peanut butter, raw honey and Chocolate complete. Mix in the crisp rice cereal. I start with 1-1/2 cups and then add more as needed. It really varies depending on your brand of peanut butter and how runny or thick your honey is.
  • Press into an 8x8 pan and cover tightly. I keep ours in the refrigerator. If you like them softer, room temperature is fine too. Enjoy!

New to Food Allergies? Here are some tips!

I frequently hear questions from friends and clients who are are new to the world of food allergies and sensitivities or who have simply chosen to go gluten and dairy free for health reasons. So I wanted to share some of the tips and tools I have learned in our 6+ years experience AND give you some of our favorite brands and products to help in your health journey.

If you know someone who avoids gluten, dairy, soy and/or eggs please pass this on to them!

Our son Matteo was first diagnosed with intolerance to gluten, dairy and soy just after his third birthday. My boys both have a very severe reaction to fava beans & certain medications (due to an enzyme deficiency called G6PD Deficiency) and for a year or so Matteo was also off eggs as well. This was over 6 years ago and there were a LOT fewer resources and allergen friendly products available then. It was really overwhelming. Thankfully I am a compulsive researcher, I like to cook and bake and I’ve never been one to back down from a challenge. But it still took a lot of time, a lot of trial and error and quite a few tears to figure out what worked for us. Now that we’ve made the adjustment (and my youngest daughter and I are both gluten and dairy free now as well) its really not so bad and I know we are all a LOT healthier for it!!

Whether its for you or a family member, you can do it too and it will all be worth it, I promise!

When I was first getting started, the best advice I read came from Gluten Free Girl, Shauna Ahern. I love Shauna’s attitude and approach to gluten free eating and it is the first advice I give to anyone who asks for help:

Focus on foods that are naturally allergen free.

The biggest difficulty comes with processed packaged foods and (not coincidentally) those are the foods that are the least healthy for us anyway! So in the beginning at least, keep it simple and focus on naturally allergen free foods like:

  • fruits
  • vegetables
  • clean, unprocessed meats (stick with meat from hormone and antibiotic free, grass fed or pastured animals, if possible and stay away from processed meats like hot dogs, sausage, salami and deli meats)
  • potatoes
  • naturally gluten free grains like rice, quinoa and gluten free oats
  • nuts (if you can have them, of course!)
  • seeds
  • beans

The gluten containing grains are wheat (including ancient varieties like spelt and kamut), barley & rye. Oats do not naturally contain gluten but are almost always cross-contaminated so its important to only buy oats that are labeled as gluten free. Items that you might not suspect but often contain gluten include: condiments, soy sauce, salad dressings, processed meats and many processed packaged foods. Most packaged food also contains other additives–artificial flavors, colors, sweeteners, flavor enhancers, emulsifiers & preservatives–that are terrible for us anyway! So just view it as a win-win … you avoid harmful allergens and your whole family is healthier for it!

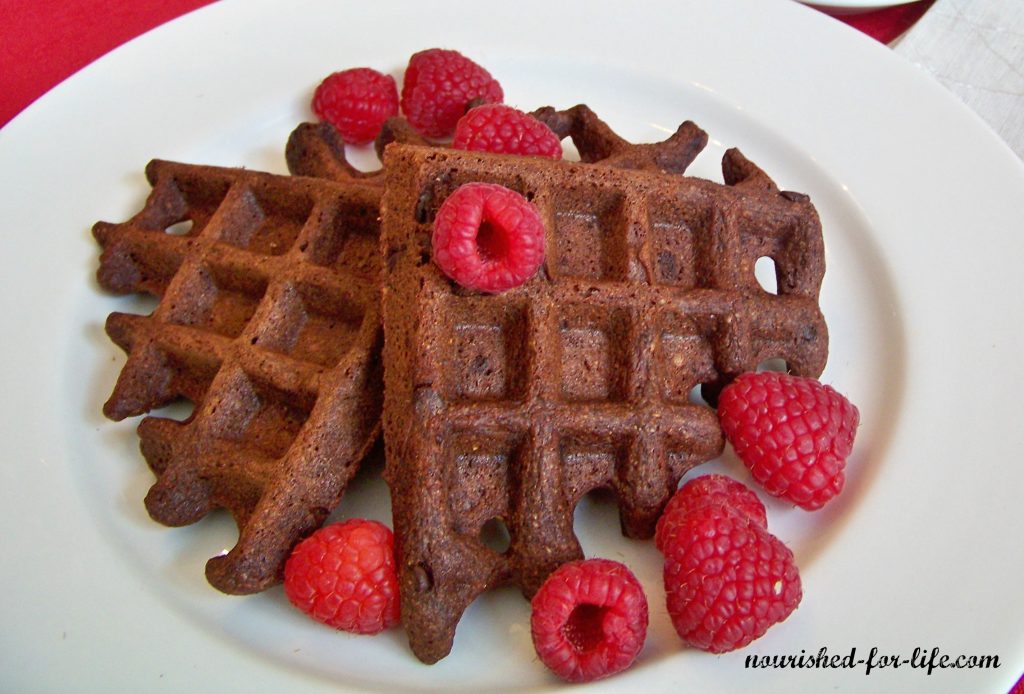
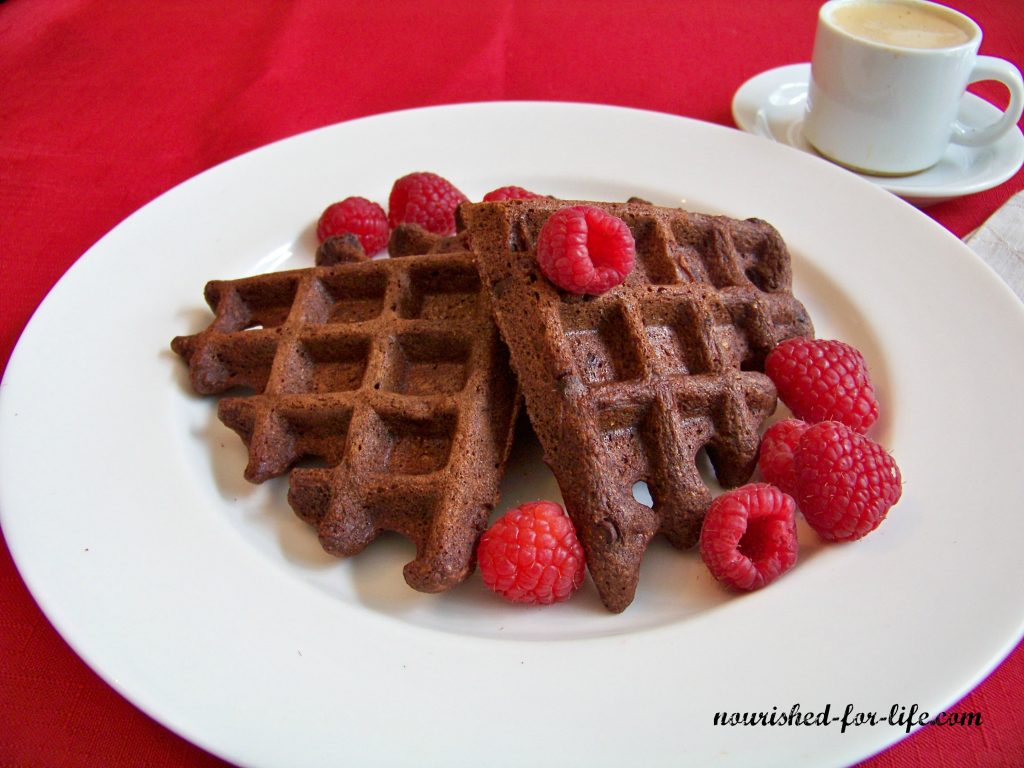
When it comes to baking, keep it simple!

When you’re ready to venture into the world of gluten free baking, keep it simple!  Start with Paleo or Paleo-like recipes that use only one or two flours. Its really not necessary to have a freezer full of flours to blend unless you really get into gluten free baking. Quick breads, muffins & pancakes are by far the easiest! Here are a few of our favorites that use only one or two flours and other common ingredients:

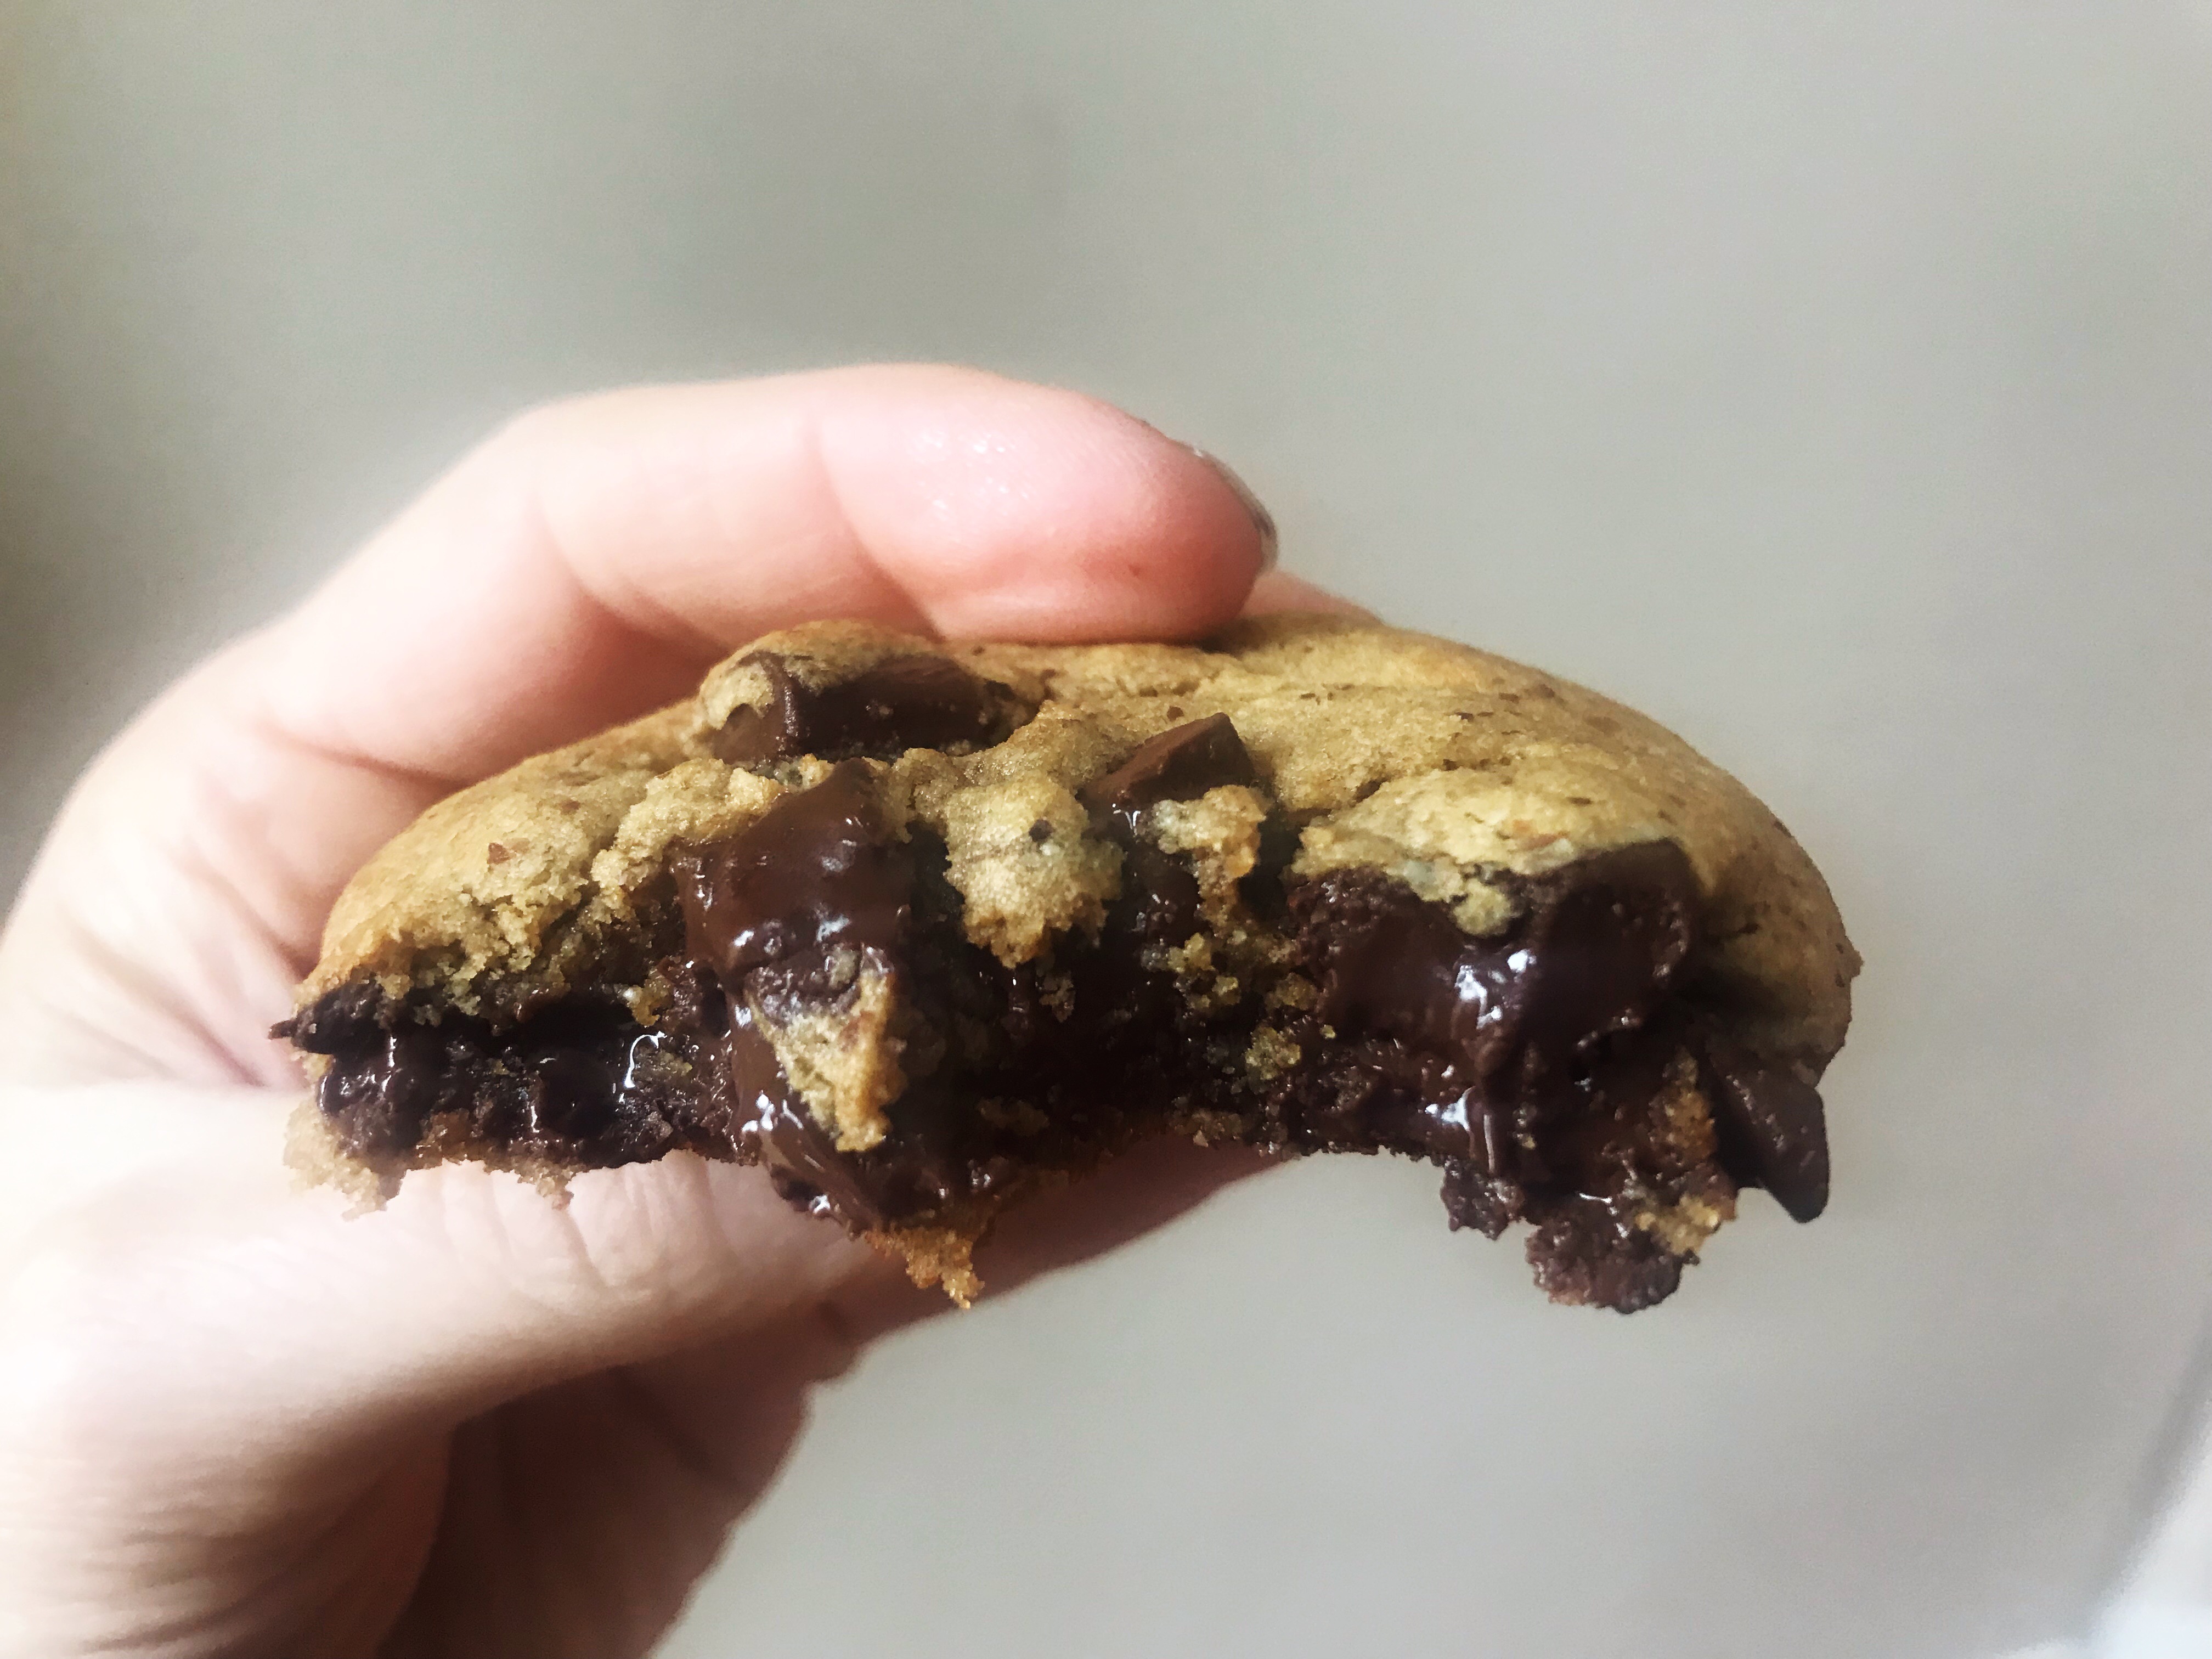
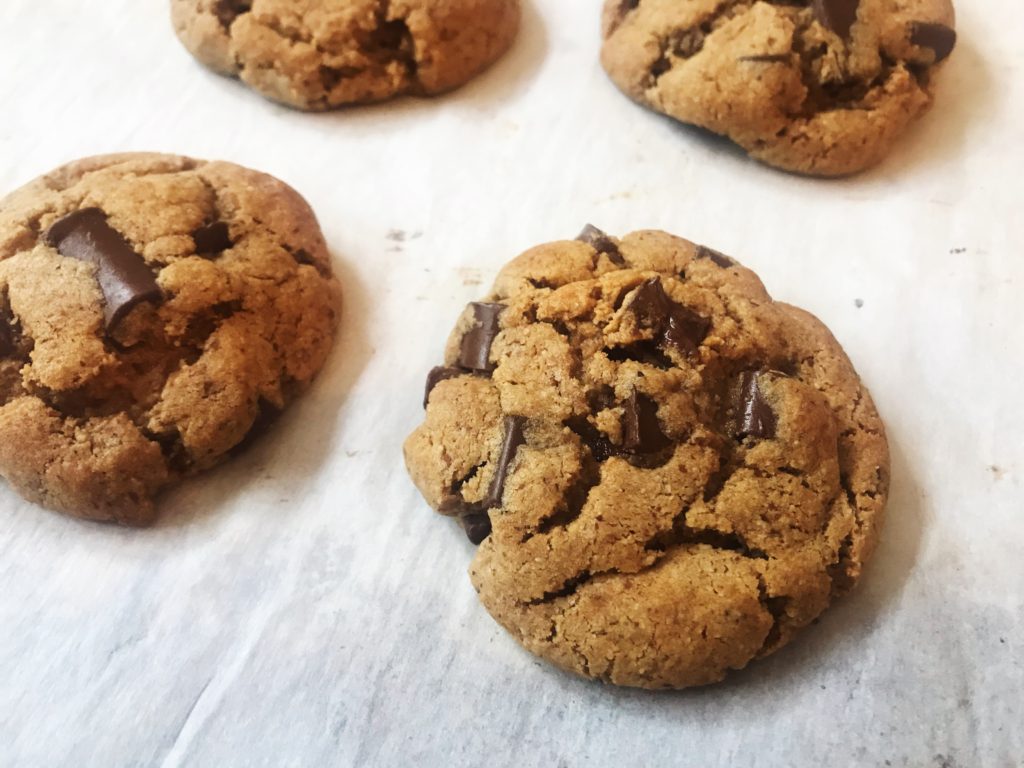
If and when you are feeling more ambitious and just really HAVE to have a good crusty ciabatta or chocolate chip cookie, some of my favorite gluten free recipes come from Gluten Free Girl on a Shoestring. Nicole’s recipes aren’t necessarily healthy and she uses an all purpose flour blend that requires blending several different gluten free flours, starches and some other ingredients that must be special ordered. But for those times you just want something that tastes every bit as good as its glutenous counterpart, these are the best I have found!

Dairy substitutions

Dairy substitutions are pretty easy. My favorite non-dairy milk for most uses is organic, unsweetened, unflavored Almond Milk. But try all of the plant-based milks and choose whatever you like. Avoid added sweeteners and flavors and choose a brand with the fewest ingredients possible. If you’re really ambitious (and for the most healthful option) you can make your own. For savory dishes, smoothies and desserts that call for heavy cream, sour cream or yogurt I love to use full fat canned coconut milk.

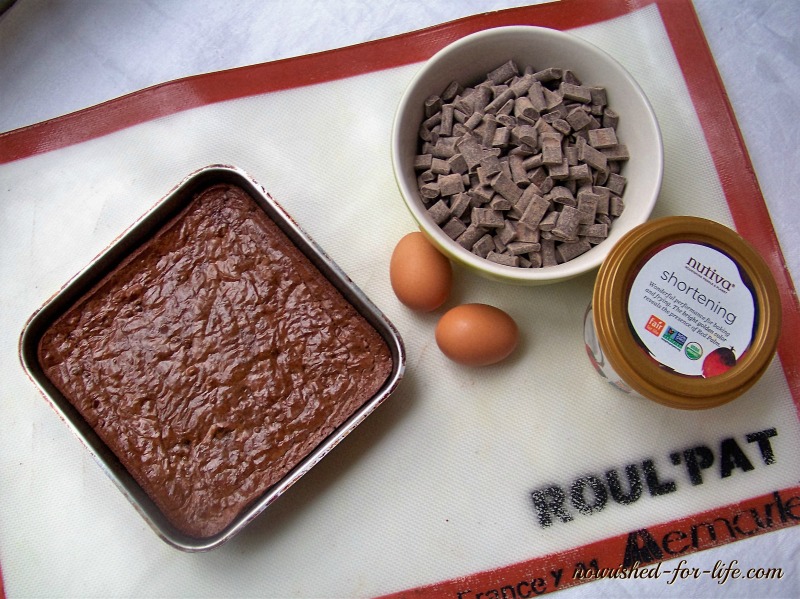
In place of butter, I use extra virgin olive or  coconut oil (either Nutiva brand from Amazon or Simply Organic from Aldi)(for toast or cooking) and for baking I use Nutiva non-hydrogenated Organic Shortening, a blend of coconut oil and palm oil which is naturally solid at room temperature. Its impossible to tell the difference in most baked goods!

The only dairy I really miss is cheese. We use Daiya brand non-dairy cheese (available in most grocery stores) and it works great for my dairy-free kids to have a grilled cheese sandwich or pizza once in a while. When I make a baked (gluten free) pasta dish like lasagna or baked ziti, I usually make 2 pans–one for my dairy eaters and one with Daiya brand cheese. But in my honest opinion, it doesn’t taste great and I usually just go without.

Egg substitutions

Egg substitutions are a bit trickier, but for quick breads, pancakes and muffins a “flax gel” egg works great. For each egg measure 1 T ground flaxseed into a small bowl, add 2 T hot water and let it sit for a few minutes until the water is absorbed and it forms a gel that functions much like an egg.

Aquafaba (the water from a can of chickpeas) is also a very interesting and versatile egg substitute. If we were still egg free I would definitely be experimenting with this more!

Other Favorite products

When it comes to packaged foods, always read labels! Even products/brands I buy regularly I still check once in a while to make sure the ingredients haven’t changed. The shorter the list of ingredients the better, both from a general health perspective and because you’re less likely to find an allergen hiding under a name you don’t recognize. Here are a few of the products we like:

  • Bread — I generally just skip bread at this point, because they are all processed and full of starches that aren’t particularly healthful. But my son and daughter like Udi’s Millet & Chia bread (in the freezer section) or Aldi’s gluten free whole grain bread
  • Jovial is by far and away our favorite brand of pasta. We also use Aldi’s GFree brand which is less expensive and works fine in a pinch! You can find our favorite, authentic Italian pasta recipe here: Cousin Claudio’s Authenitc Italian Pasta Sauce
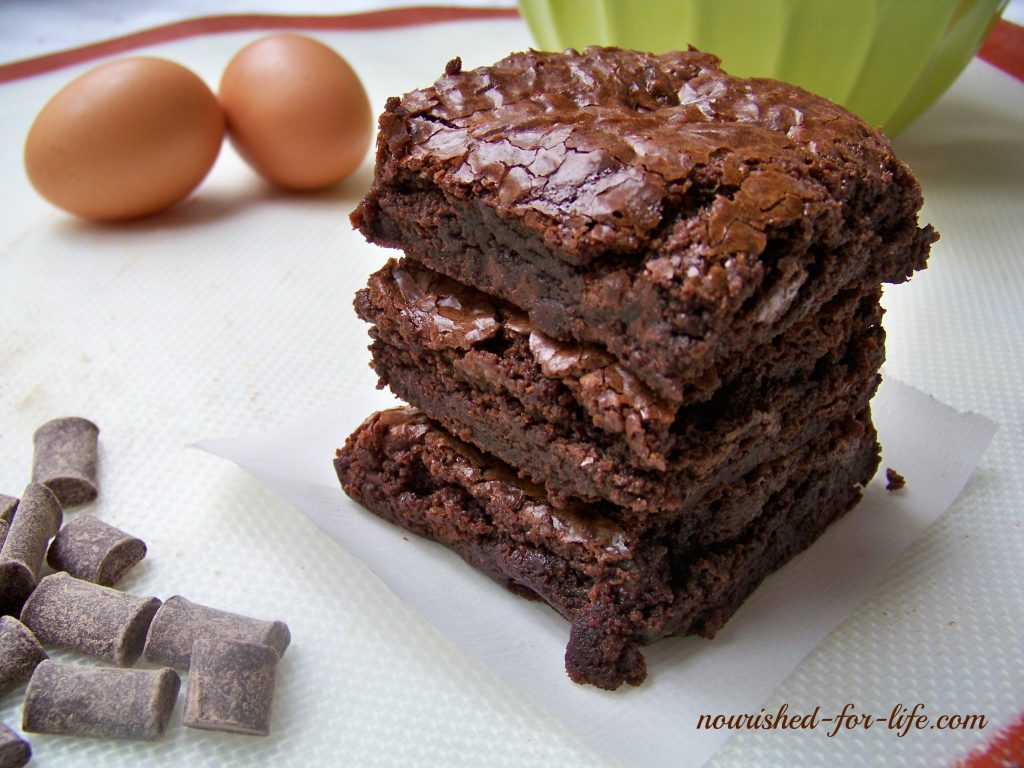
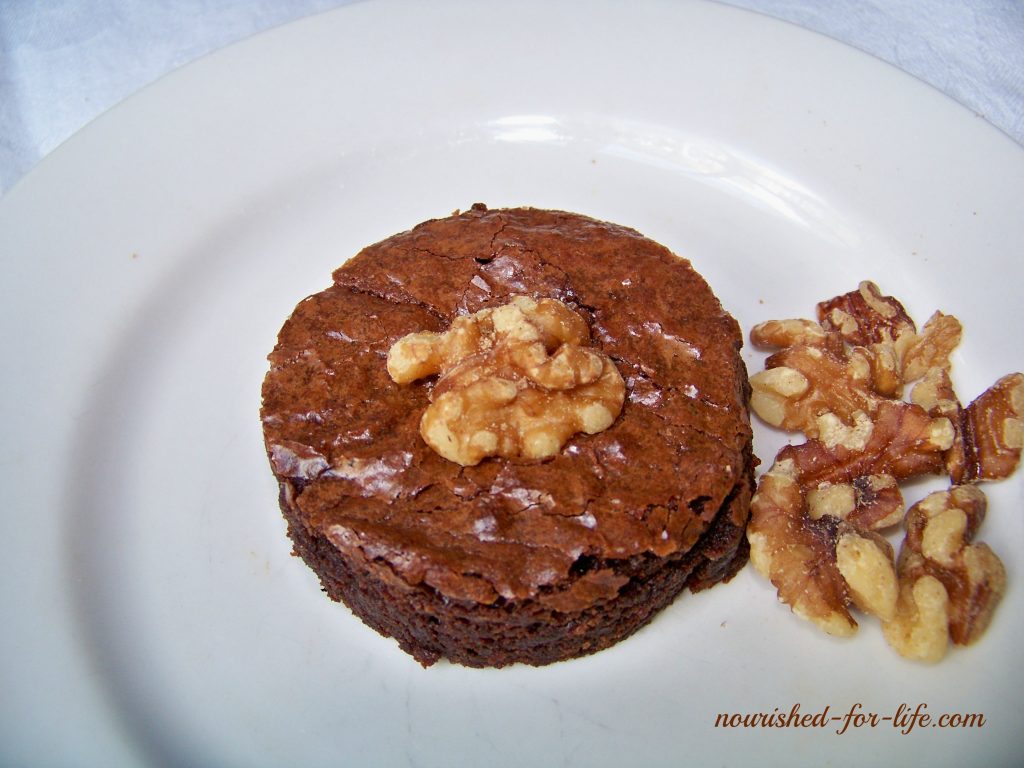
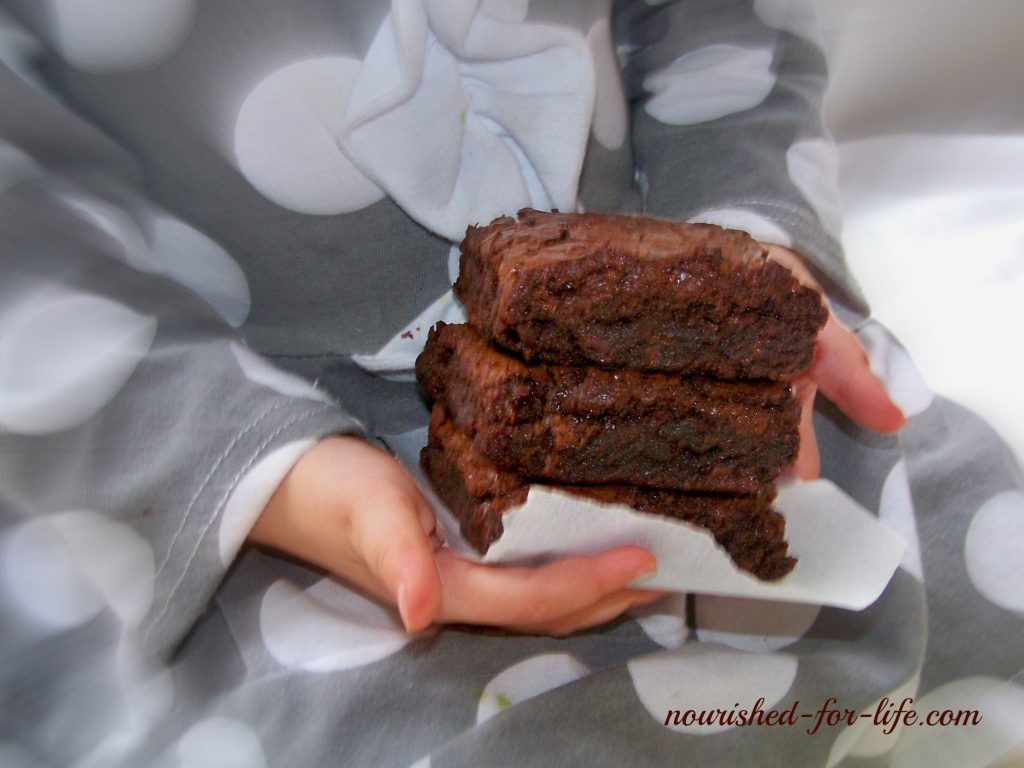
  • Enjoy Life makes a wide selection of cookies, bars & snack foods that are free of the most common allergens (including gluten, dairy, soy, eggs, nuts and fish). I keep their cookies and baking mixes to use in a pinch when we need a safe treat. But their baking chocolate is absolutely to die for. No dairy, soy or fillers and it is so good you will never go back! You can buy it in most grocery stores now, but if you sign up for their email list, you will get coupons and discount codes by email. I wait til all of their chocolate chips and chunks are 15% to 30% off and stock up! Two of our favorite treats using these chocolates are:
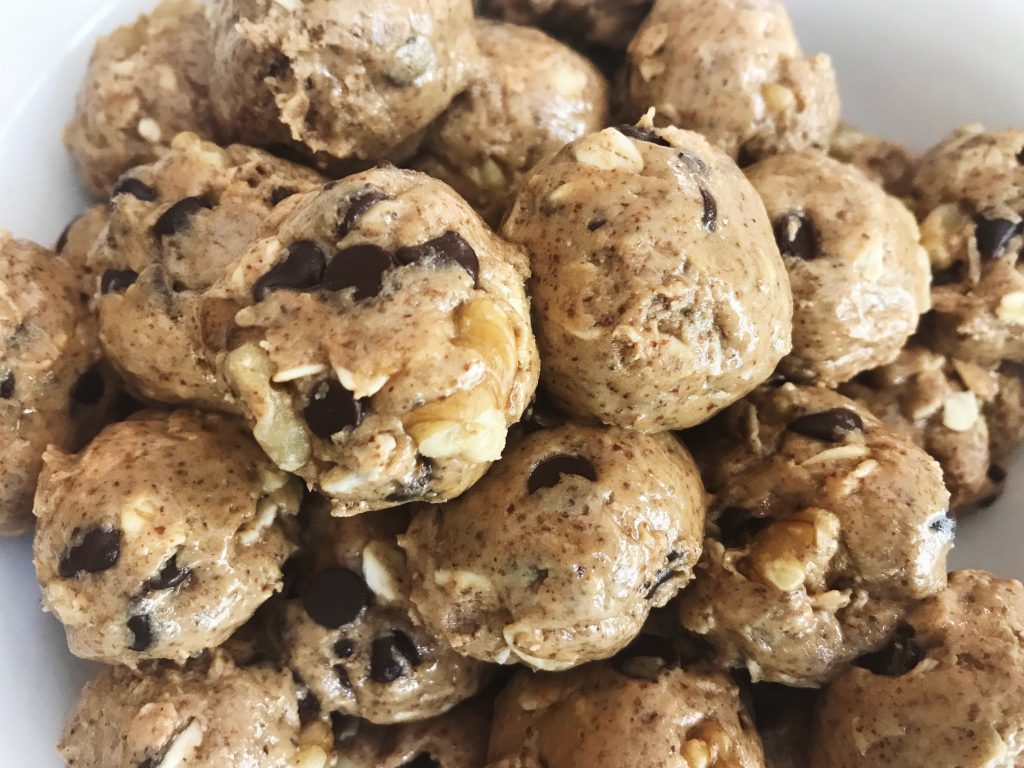
  • Bob’s Red Mill Gluten Free Oats are a staple for a quick and easy breakfast and for baking and healthful treats like protein bites.
  • Organic Brown Rice, White Rice or Wild Rice
  • Alternative flours: Almond meal or flour, Coconut flourBuckwheat flour, Organic Cornmeal are my favorites
  • So Delicious Almond or Coconut Milk ice cream is just as good or better than the dairy version!
  • Organic corn chips (we buy Aldi’s Simply Nature brand)
  • Organic popcorn (make sure there are no flavors or additives, we like Aldi’s Simply Nature brand or pop our own in coconut oil)
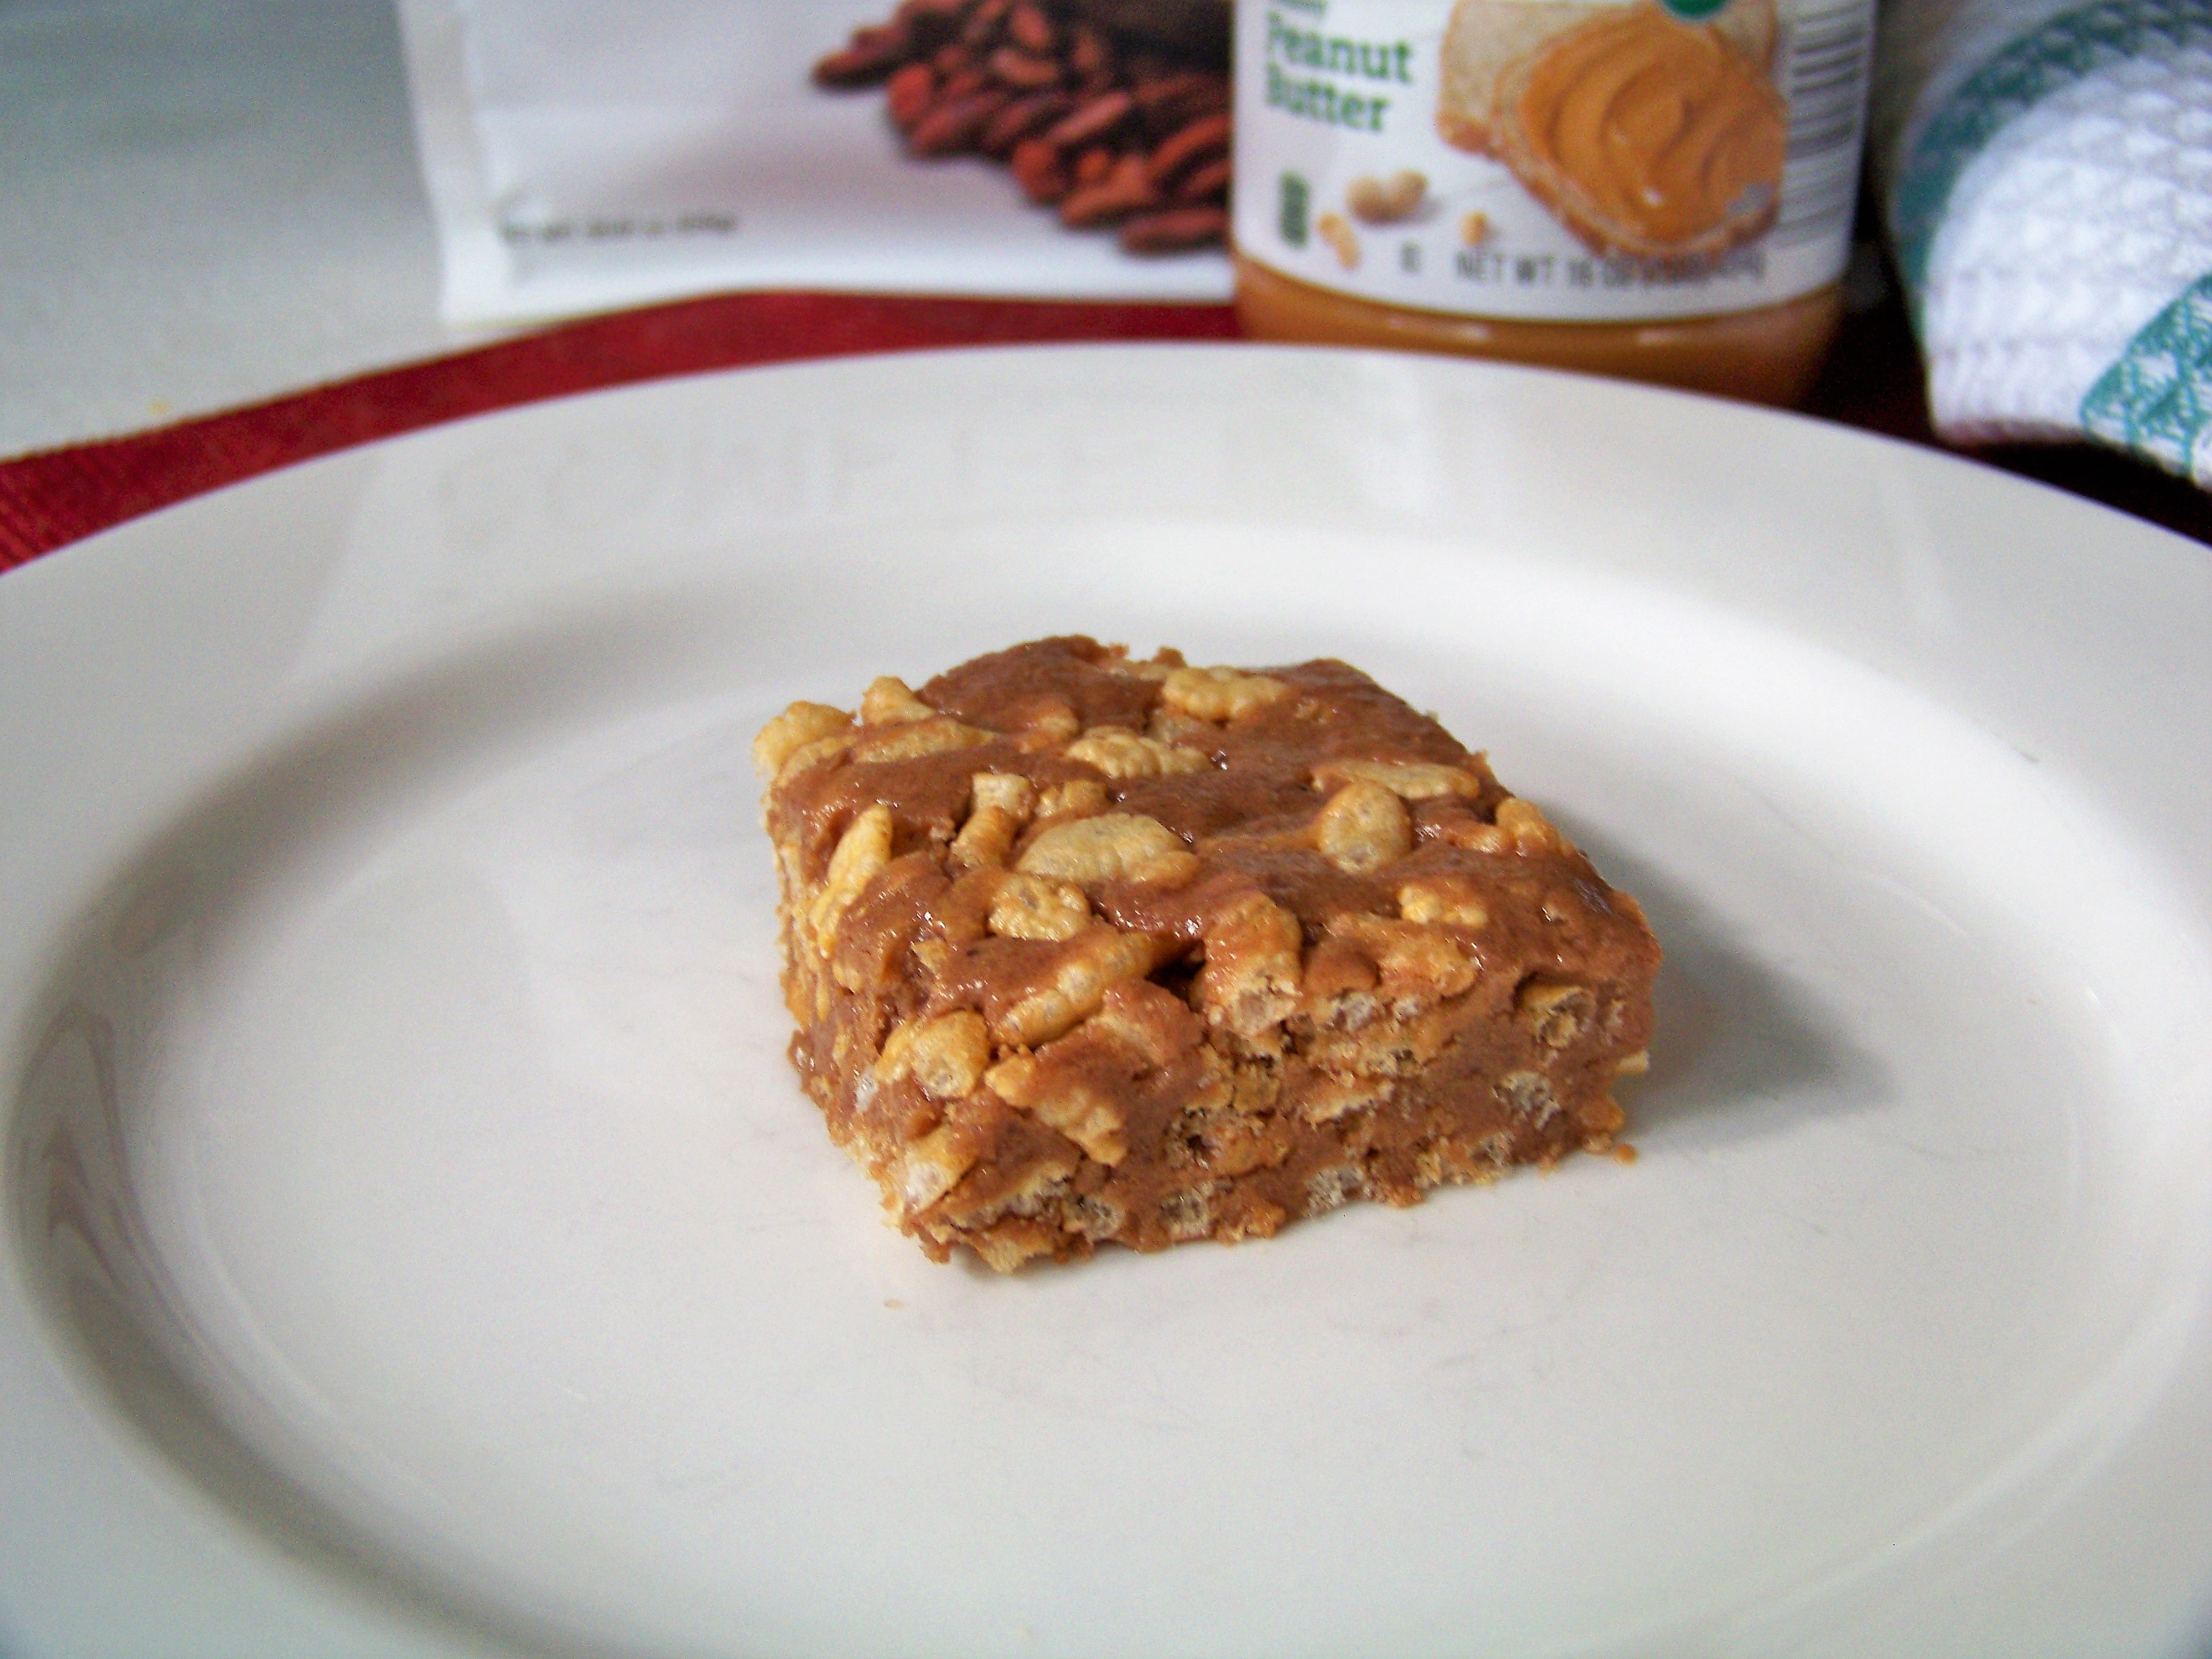
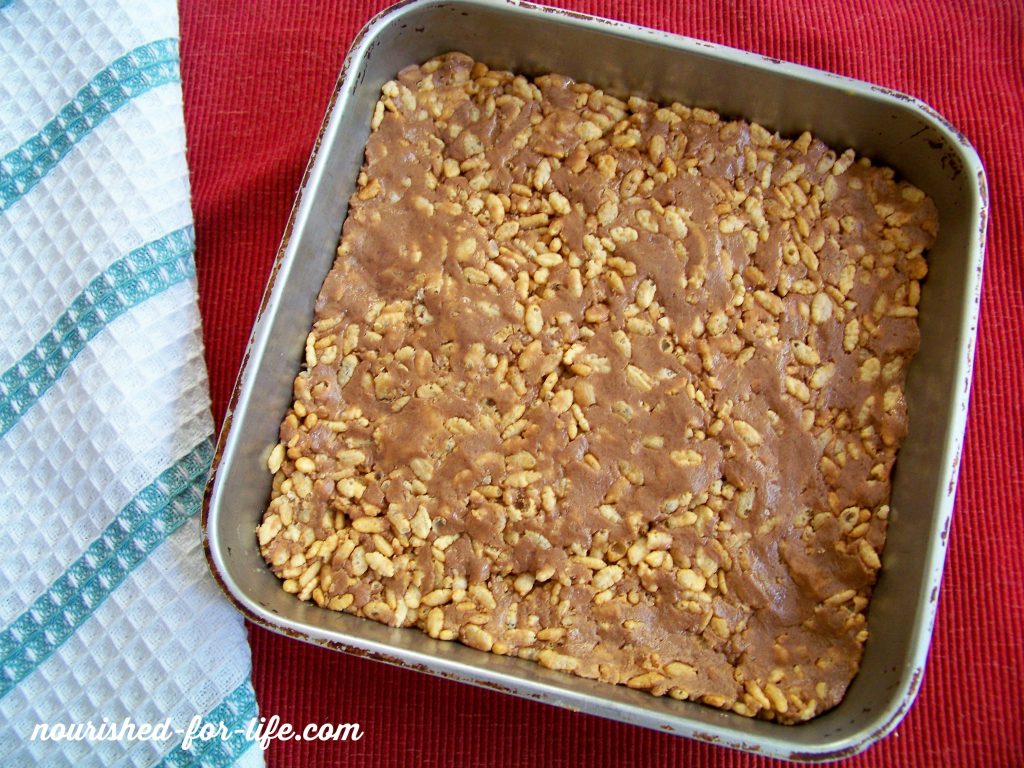
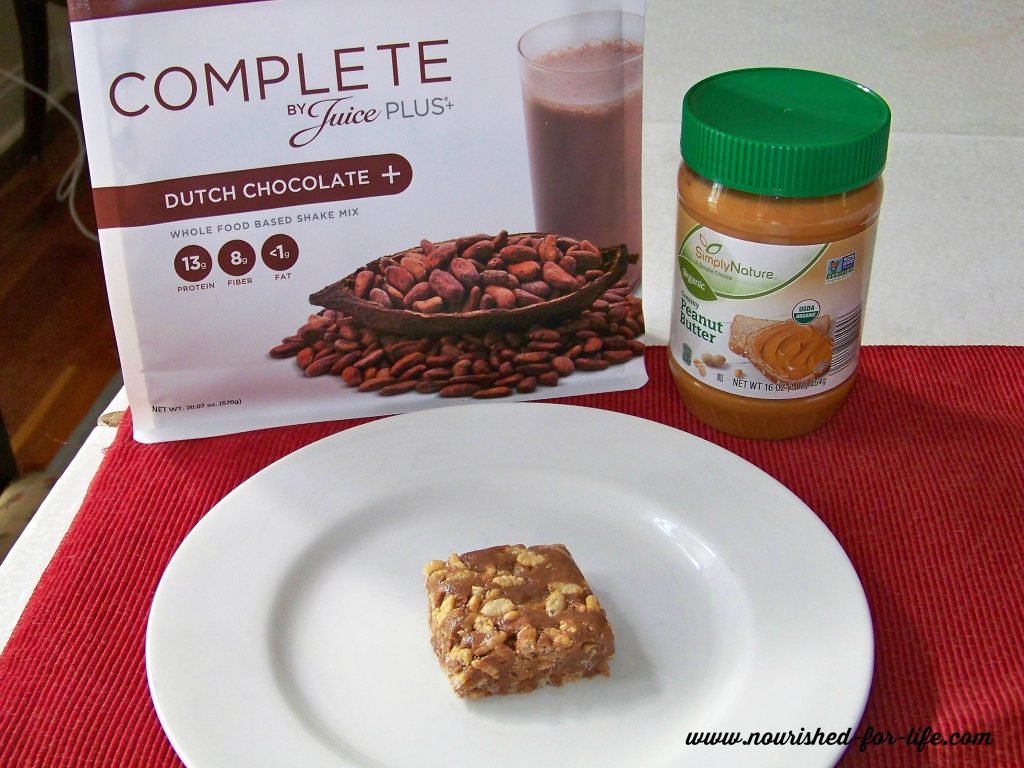
  • Barbara’s Organic Brown Rice Crisps Cereal— I keep several boxes of these on hand to use in my Chocolate Crisp Rice Protein Treats (recipe coming next week, keep an eye out!)

I’d love to hear your favorite allergy friendly tips, tricks or products!

In other News . . .

I’m taking new coaching clients now for a new Shred group starting July 10. If you’ve been reading my Shred10 information and posts and wondering if this program might be for you, now is the perfect time to find out! This is not a weight loss program, although achieving and maintaining your ideal weight is a great side benefit! Shred10 is about reducing your toxic load and increasing your nutrition to help you feel great, look great and reduce risk of disease. We don’t count calories or points, there is no deprivation & no guilt.

Ten days to focus on you and your health.

The program includes:
Our Shred guidebook filled with great info and tools

TWO cooking guides/recipe books filled with amazingly delicious recipes that will also nourish your body

Daily private coaching by phone or text with a certified health coach (Me!)
A private FB group where we provide support, accountability and even more great information and recipes
A jump start to a healthier lifestyle and a healthier YOU!

What are you waiting for????

To your life and health,

Kristi

PS:  If you’re not following me on Facebook, what are you waiting for? Come on over so you don’t miss out an any of the health and wellness info I share there or the latest news from Nourished for Life!

Paleo Carrot Cupcakes

Happy Easter, friends!

I absolutely love spring. It has been beautiful here the past few days and getting outside for soccer games and walks around the neighborhood is so good for my soul! Easter is also one of my favorite holidays, maybe because its spring and also, I think, because the focus is on faith and enjoying time together rather than all of the other trappings that makes some other holidays so hectic and stressful.

Today I have a new recipe for you that is perfect for your Easter celebration this weekend and a book recommendation.

Paleo Carrot Cupcakes

Paleo Carrot Cupcakes

When our daughter turned one, I wanted to make carrot cake cupcakes for her birthday. Of course they had to be gluten and dairy free, but I also wanted them to be free of refined sugar and oils and as healthful as I could make them. I looked at dozens of recipes and none were quite what I wanted. So I used all of my healthy baking tricks and created these. They were a big hit with the whole family. So much so that I made them again for my husband’s birthday a month later and for Juliette’s 2nd birthday as well.

These cupcakes are so healthful, high protein and nutrient dense they could easily be breakfast muffins. Without the icing, they are completely free of any refined sugar. For moist, delicious and nutritious muffins, add in the walnuts and golden raisins and skip the icing. Shhh …. don’t tell my family they’re really super healthy muffins, they think they’re getting cupcakes.

Since I was making these for birthday “cupcakes” and now an Easter treat, I did add icing with powdered sugar to make them a bit more fun and festive, but that is completely optional.

The maple icing is my dairy-free version of a buttercream icing and its delicious with these cupcakes. I love to top them with carrot & walnuts too, but that isn’t necessarily my kiddos favorite. So eat them plain, iced, or with whatever toppers you and yours will enjoy!

Paleo Carrot Cupcakes

Might I suggest, if you are looking for a delicious, fun and healthful treat for your Easter brunch these might be the perfect thing. They will be making an appearance at our house next weekend!

If you’re looking for other Easter treats, you might also consider my Buckwheat Brownies (gluten free, dairy free and refined sugar and oil free) or these amazing little Salted Caramel Almond Clusters.

Lessons from The Blue Zones

The past few weeks I’ve been reading a book called The Blue Zones by Dan Buettner. Buettner and a team of researchers have spent years finding and researching places around the world with extraordinarily high concentrations of centenarians. They have found five such “Blue Zones” and Buettner tells stories of the centenarians he has met in each of the Blue Zones and outlines the diet and lifestyle factors which appear to contribute to the health and longevity of people of these regions. It’s a fascinating read for anyone interested in healthy living. The amazing thing is not just the longevity of the people of these regions, but their health as they age. He tells stories of 80 or 90 year olds he mistakes for 60. And they continue to be very active, walking every day, working in their farms, vineyards and gardens, caring for grandchildren and great-grandchildren, spending time with friends and family and contributing their communities well into their 80s, 90s and 100s.

Here are some of the common factors which appear to increase both the life span and more importantly, the health span of people in these regions:

  1. Move more — Stay active! Intentional exercise is wonderful, but just adding more movement to your every day life appears to make a big difference. Walk more. Park at the back of the parking lot and walk further to the store or office. If you work at a desk all day, get up and walk around the office for five minutes every hour. Climb stairs. Ride a bike. Garden. Play a recreational sport. Stretch while you’re watching tv in the evenings. Do yoga. Do isometrics while you’re standing in line at the grocery store. Chase your kids or grand kids around. The healthiest people don’t sit still and continue to stay active as they age.
  2. Eat less — Okinawans say “hara hachi bu before every meal–a Confucian-inspired adage that is a reminder to stop eating when their stomachs are 80% full. We tend to eat until we’re full. Okinawans eat until they are no longer hungry. This is a significant difference. As one researcher notes, “We gain weight insidiously, not stuffing ourselves, but eating a little bit too much each day–mindlessly.” (Buettner at 271) As a result of this attitude, people in each of the Blue Zones tend to consume fewer calories every day. Reducing calorie intake has been shown in many studies to prolong life, and an expanding waistline correlates with an increase in almost every western disease including heart disease and diabetes.
  3. Eat a whole food, plant based diet — In addition to eating fewer calories, people in the Blue Zones also eat nutritionally dense, real unprocessed foods, rather than the calorie-dense and nutritionally deficient foods commonly found in the western world. Each of these cultures also eat a very limited amount of meat. Strict Seventh Day Adventists of Loma Linda, California (the only American Blue Zone) are vegetarians. The other Blue Zones traditionally only had access to meat on rare occasions and reserved it for Sundays or holidays. Traditional Sardinians, Nicoyans and Okinawans eat what they produce in their gardens, supplemented by duram wheat (Sardinians), sweet potato (Okinawans) or maize (Nicoyans). “[S]cientists analyzed six different studies of thousands of vegetarians and found that those that restrict meat are associated with living longer.” (Buettner at 275-76) Beans, whole grains, garden vegetables, fruit and nuts are the basis of all of these longevity diets. If/when you do eat meat, make sure it is from grass-fed or pastured, hormone and antibiotic free animals. When it comes to animal products, spend your grocery dollars on quality, rather than quantity.
  4. Have a purpose — Okinawans call it ikigai and the Nicoyans of Costa Rica call it plan de vida. Both phrases translate essentially as “why I wake up in the morning”. An 11 year study of people ages 65-92 found that individuals who had a strong sense of purpose, a goal in life, both lived longer and were sharper and higher functioning than those who did not. This may be as simple as caring for grand children or a hobby you enjoy. Volunteerism–helping others–is also important to feelings of fulfillment and healthful aging. Exercising your brain by learning a new language or doing things that are novel and complex has also been shown to decrease memory loss and may decrease risk of Alzheimer’s. (Buettner at 281)
  5. Relieve stress — Its so important to our health to find time and ways to slow down, relieve stress and increase our serenity and people in the Blue Zones all seem to do this well. Sardinians pour into the streets every day at 5 pm to socialize with their friends and neighbors. Nicoyans take a break every afternoon to rest and socialize. Traditional Okinawans each have a group of life-long friends called a “moai” that they visit with every evening before dinner. For Adventists, Saturday Sabbath is an entire day when they stop their work, homework, sports and weekly activities. They spend the day focused on God, family and spending time in nature (which often includes a hike). All of this results in a greater sense of well-being and lower stress. (Buettner at 284) Chronically elevated stress hormones causes chronic inflammation, which accelerates aging and increases our risk of all of the so-called “age-related” diseases such as heart disease, diabetes, Alzheimer’s and even cancer.
  6. Belong to a faith community — Centenaries in the Blue Zones are all people of faith. Studies have shown that attending religious services make a difference in how long a person lives. One study found those who attended religious services at least once a month reduced their risk of death by about a third, an impact about as great as that of moderate physical exercise. Faith in God and a higher purpose lowers stress levels and promotes peace. “It appears that people who pay attention to their spiritual side have lower rates of cardiovascular disease, depression, stress and suicide and their immune system seems to work better.” (Buettner at 288)
  7. Make Family a Priority — Centenarians in the Blue Zones “tended to marry, have children, and build their lives around that core. Their lives were imbued with familial duty, ritual, and a certain emphasis on togetherness.” (Buettner at 290-91) “By the time centenarians become centenarians, their lifelong devotion produced returns: Their children reciprocate their love and care. Their children check up on their parents, and in four of the five Blue Zones, the younger generation welcomes the older generation into their homes. Studies have found that elders who live with their children are less susceptible to disease, eat healthier diets, have lower levels of stress, and have a much lower incidence of serious accidents.” (Buettner at 291) Another study found that elders who live with their families had much sharper mental and social skills.

These are not isolated factors, but tend to go hand in hand. For example, moving more, faith in God or a higher power and close relationships with family all help to relieve stress. I highly recommend reading the stories of fascinating centenarians from around the world and I think you will be inspired to adopt a longevity lifestyle too.

Buona Pasqua! A blessed Easter to you and yours. I hope you each enjoy this special time with nourishing and delicious food and, just as importantly, make the time to nourish your body, mind and soul by connecting with your faith, family, friends and getting outside to enjoy God’s beautiful creation.

XOXO,

Kristi

Paleo Carrot Cupcakes (gluten free, dairy free, refined oil & sugar free)

These nutrient dense and delicious carrot cupcakes are make the perfect healthful Easter treat or first birthday cupcakes. Free of gluten, dairy and refined oils.
Prep Time30 minutes
Cook Time25 minutes
Total Time55 minutes
Servings: 18 cupcakes
Calories: 355kcal

Ingredients

  • 1 ripe banana mashed well with a fork (1/2 cup)
  • 4 oz. unsweetened organic applesauce
  • 1 c. grated carrots I have also used pulp from my carrot, orange and ginger juice
  • 1 c.
  • almond butter
  • 1/4 c.
  • coconut oil
  • , melted I put a glass jar in the oven while it preheats to melt the coconut oil
  • 3 eggs
  • 4 T
  • pure maple syrup
  • 2 tsp. vanilla
  • 1 c.
  • almond flour
  • 1 tsp.
  • baking soda
  • 1 tsp.
  • sea salt
  • 2 tsp. cinnamon
  • 1 tsp. nutmeg
  • 1/2 c. golden raisins optional add-in
  • 1/2 c. chopped walnuts optional add-in
  • Dairy Free Maple "Butter"Cream Icing
  • 1 c.
  • Nutiva Shortening
  • I have also used 1/2 c. coconut oil and 1/2 c. palm shortening
  • 1 tsp. vanilla
  • 1/2 c. pure maple syrup
  • 2 to 3 cups powdered sugar

Instructions

  • Preheat oven to 350 degrees and grease or line muffin tins to hold 18 muffins.
  • In a medium bowl, stir together all ingredients in the order listed. Add the golden raisins and walnuts if desired. Mix until well combined.
  • Scoop batter into greased or lined muffin pan, filling each cup 3/4 of the way full.
  • Bake at 350 degrees for 20-25 minutes, or until cupcakes are golden and baked through. Cool completely.
  • While cupcakes are cooling, make the icing. Combine the shortening and 2 cups powdered sugar in the bowl of your stand mixer, fitted with the paddle attachment. Add maple syrup and vanilla and mix well. Mix until combined, adding more powdered sugar as needed to achieve the desired consistency. Ice completely cooled cupcakes and enjoy!

Buckwheat Brownies

Happy Monday, friends!

As we head into this hectic holiday season I have to confess, I am already worn out! In the past three weeks we have had Halloween (thankfully the kiddos all took it pretty easy on me on their costumes), celebrated 4 birthdays, the end of the soccer season, wrestling, hours of Nutcracker rehearsals, a traveling husband, a teething toddler and then said toddler also had a cold (which means neither toddler nor mama have slept much in the past couple of weeks).

I can only imagine how poorly I would be functioning right now if I wasn’t fueling my body with real whole foods. During these especially hectic and sleep deprived phases of life, we need the nourishment that comes from plants even more. Which is why I take my Juice Plus religiously and do my best to get my green smoothie in every single day, even when I am so tired I can barely see straight. The phytonutrients from all of those fruits and vegetables provides more nourishment and sustained energy for my body than all of the caffeine in the world ever could.

But, after all of that talk about plant nutrition, I hope you will forgive me for sharing a brownie recipe today. Because once in a while we need chocolate too, don’t we?

Buckwheat Brownies

My son has been gluten and dairy free for six years now and his baby sister and I have since joined him. In the last six years I have tried a LOT of brownie recipes. When I bake, I like to use the most healthful ingredients I possibly can. But I have to be honest–the recipes I’ve tried with black beans and other mystery ingredients just don’t cut it for me. Neither have any of the other gluten and dairy free variations I’ve tried, whether healthy or not. None have ever measured up to the perfectly moist, rich, chocolatey, chewey not cakey, dense but not too dense, gooey but not too gooey brownie I have in my head.

That is, until these. It turns out buckwheat–one of my favorite flours–is the perfect solution! You can read more about the health benefits of buckwheat (and get our favorite pancake recipe) here. No one will ever know these brownies are gluten free unless you tell them. They are moist, amazing, and unlike many gluten free baked goods they stay moist and keep well (tightly wrapped) for up to a week.

Buckwheat Brownies

I use Nutiva coconut sugar, which is still sugar and should only be eaten in moderation as a special treat. But it is more healthful than conventional white sugar, which is heavily processed, bleached and almost always made from GMO sugar beets. Nutiva’s coconut sugar is organic and non-GMO. It is unrefined, which means that unlike white sugar which is completely empty calories devoid of any nutrition, coconut sugar retains some small amounts of nutrients from the coconut. According to Vani Hari, the Food Babe, coconut sugar has 10,000 times the potassium, 20 times the magnesium and 20 times the iron of conventional white sugar. It also contains inulin fiber, which slows the absorption into the blood stream. It also has just over half of the glycemic load of white sugar, which helps you avoid that blood sugar/insulin spike and crash.

I also like baking with Nutiva Shortening, which is a blend of coconut oil and red palm oil. Both are naturally solid at room temperature (so no hydrogenation, the process which turns Crisco shortening and margarine into toxic trans fats), minimally processed, healthful fats. It makes a close to perfect substitute for butter. But if you can have dairy, real organic butter works great here too.

Buckwheat Brownies

I may have mentioned it before, but its worth repeating: When baking with gluten free flours, use a scale! Baking by weight is so much more accurate than volume and allows you to substitute flours or make adjustments to a recipe with a lot more success!  You can buy a good, inexpensive scale from Amazon. I have this one.

Buckwheat Brownies

You may be wondering why a health coach who preaches the evils of sugar is sharing a brownie recipe. But I love chocolate and I’m completely fine with an occasional treat when it’s made with the most healthful ingredients possible.

My personal rules for sweet treats and desserts (that I follow most of the time) are:

1) Make them out of the most healthful ingredients I can (and avoid artificial colors, flavors & sweeteners, high fructose corn syrup, trans fats and unpronounceable preservatives and additives as much as humanly possible).

2) Enjoy sweet treats after a healthy meal, never on an empty stomach. This helps to avoid the blood sugar spike & sugar headache I get from eating sweets on an empty stomach. And if I have already enjoyed a satisfying meal, one treat should be sufficient to satisfy my chocolate or sweets craving.

3) When you eat a sweet treat, make it a good one and enjoy it mindfully. I try not to eat treats that aren’t worth it and I never eat them on the run. It’s so easy to get in the habit of grabbing something to munch on anytime you walk by the pantry or as you sit in the car or at your desk. Try to get out of the habit of mindless snacking. This will make a huge impact on your health. Choose your snacks wisely–fruits and vegetables as much as possible, and when you do choose to eat a sweet treat, sit down and savor every bite!

Buckwheat Brownies

Enjoy and Happy Thanksgiving, friends! I hope you are all surrounded by loved ones this week and take the time to count your blessings! I am thankful for YOU and for the commitment you make to your health and the health of your family with the choices you make every day!

XOXO,

Kristi

Best Ever Buckwheat Brownies (gluten, dairy & refined sugar free)

No one will know these moist, amazing brownies are free of gluten, dairy and refined sugar and are made with nutrient dense buckwheat flour.
Prep Time10 minutes
Cook Time22 minutes
Total Time32 minutes
Servings: 16 Brownies
Calories: 10426kcal

Ingredients

  • 6 oz. Enjoy Life semi-sweet chocolate chunks (or 5 oz. Enjoy Life dark chocolate morsels)
  • 8 (Approx 175 g) T. Nutiva shortening (or organic butter, if you can have dairy)
  • 1 c. Nutiva coconut sugar
  • 2 farm fresh eggs
  • 1/2 tsp. Vanilla extract
  • 87 g approx. 2/3 c. Buckwheat flour
  • 1/2 tsp. Baking Soda
  • 1 tsp. Sea salt
  • 1/2 c. Enjoy Life chocolate chips or chopped walnuts optional add-ins

Instructions

  • Pre-heat oven to 325 degrees. Grease a 9 x 9 baking pain.
  • In a double boiler over medium high heat (or in a heat-proof bowl sitting over a saucepan with an inch or two of water in it) melt the chocolate and shortening and stir together. Let cool and then whisk in the coconut sugar. Whisk in the eggs, one at a time, making sure they are completely incorporated. Then add vanilla.
  • In a separate bowl, whisk together the buckwheat, baking soda and sea salt.
  • Add the flour mixture to the chocolate mixture and stir until combined.
  • Stir in the chocolate chips or walnuts, if desired,
  • Smooth batter into prepared pan and bake a 325 degrees for 20-22 minutes. Do not overbake! If you use a glass or an 8x8 pan you may have to adjust the baking time a bit. Let baked brownies cool and enjoy!
  • These brownies keep well, wrapped tightly, for several days and up to a week or freeze well for several months.

Notes

*I'm usually a dark chocolate girl, but I actually prefer semi-sweet chocolate in these. If you want a lighter brownie with a bit of a caramel taste, cut back to 5 oz of the semi-sweet chunks. If you like a darker chocolate brownie, by all means use the dark chocolate morsels instead.
**If you don't use Enjoy Life chocolate chips (which I highly recommend!) please use a good quality chocolate. It really does make all the difference in these brownies. I've tried them with a common grocery store brand of chocolate and they were just not the same.
***I honestly can't decide whether I like these better with chocolate chips or walnuts. So you choose! They're delicious either way!

Eggplant Lasagna Stacks

My son LOVES eggplant and every year eagerly waits for it to be in season at the farm and start appearing at the farmers market. He loves Eggplant Parmesan, and I try to make my gluten and dairy free version for him once every season. But it is so time and labor intensive I don’t usually make it more than once. This year (after his Eggplant Parmesan) we are still enjoying an abundance of eggplant and he asked for eggplant lasagna. I couldn’t find a recipe I liked that met our dietary needs (half of us are gluten and dairy free) so I made up my own and it turned out to be a hit with the whole family.

eggplant-lasagna-stacks-collage

This sauce is one of our favorite tricks for dairy free cooking. Adding coconut milk or cream to tomato sauce makes it amazingly creamy and delicious and mimics the flavor you would get from ricotta cheese in a traditional lasagna or baked Italian dish.

I added the sausage because, well, my kids will eat just about anything with sausage in it. We use the Salt and Pepper ground pork sausage from Fischer Farms. With all meat, we focus on quality and enjoy it in moderation. Fisher Farms’ sausage is hormone and antibiotic free, from pastured pigs and completely nitrate and preservative free. And it adds amazing flavor. For me, its a good trade off for my kids enjoying eggplant, kale and all of the other goodness in this dish. If you prefer a vegetarian dish, just leave out the sausage and instead, add more kale and a few cloves of fresh chopped garlic to the caramelized onion and season generously with salt and pepper. It will still be delicious!

eggplant-lasagna-stacks

I still have fresh herbs growing in pots on my patio. I highly recommend growing your own herbs! It is so easy and such a huge help in making real food delicious, easy and affordable. Fresh herbs are too expensive in the grocery, don’t last long and I don’t always plan ahead enough to know what I’ll need. But I spend $10 to $20 on herbs in April or early May and I’m still picking from them now in early October. I love that I can just run outside and grab whatever I need, whenever I need it.

eggplant-lasagna-stacks2

I also used kale from my Tower Garden in this recipe. This is something else I cannot recommend highly enough! It makes it so easy to grow my own greens, herbs and other vegetables (all year around if you invest in grow lights!) and I can pick whatever I need, anytime. I pick kale or chard for my green smoothie almost every morning. You can’t get any easier, fresher or healthier than that!  You can learn more about the Tower Garden here, or if you are local and want to see mine you are welcome any time.

I’ve been experimenting with goat cheese for myself and my other dairy free family members. The proteins in goat cheese are much easier to digest than cow’s milk and much less inflammatory. So it is a good, more healthful alternative for some with dairy intolerance. Its totally optional here, but I sprinkled just a bit of goat cheese on half of our pan. We love it either way.

Find time to make these Eggplant Lasagna Stacks and enjoy with a big green salad!

And please comment below and let me know if you try it. I’d love to hear what you think!

Eggplant Lasagna Stacks (Gluten & Dairy Free, Paleo)

My take on eggplant lasagna is gluten and dairy free but so full of flavor and nutrition you won't miss the noodles or the cheese! (vegan/vegetarian option)    
Prep Time30 minutes
Cook Time30 minutes
Total Time1 hour

Ingredients

  • 1 c. full fat canned coconut milk
  • 1 25 oz jar pasta sauce 2-1/2 cups (I used Aldi's organic brand)
  • 3-4 medium sized fresh eggplant choose eggplant that are firm and smooth with bright shiny skin
  • 2-3 T Extra Virgin Olive Oil
  • Salt and pepper
  • 1 lb ground sausage
  • 1 onion diced
  • 5-6 kale leaves or spinach or chard
  • 20-25 Fresh basil leaves
  • Goat cheese optional

Instructions

  • Pre-heat oven to 375 degrees.
  • Trim the top stem end off of your eggplant and cut into 1/4" slices with a mandolin or sharp knife. (I recommend a good mandolin for this, as it makes it so much quicker and easier and ensures your slices are the same thickness. I have this OXO Mandolin and love it! You will need 44-48 slices. In my casserole dish, I can fit 11-12 "stacks" with 4 slices of eggplant in each stack.) Rub the eggplant slices with olive oil, lay them in a single layer on baking sheets and sprinkle with salt and pepper. Roast eggplant for about 5 minutes and then remove from oven.
  • While eggplant is roasting, combine coconut milk and pasta sauce in a small saucepan and warm it over low heat.
  • Combine onion and sausage in a skillet and cook over medium high heat until the sausage is browned and the onion is caramelized. While its cooking, chop the kale. Slice the leaves into thin ribbons and then cut up the ribbons into small bits. Add the kale to the sausage and onion mixture and stir until the kale is wilted. Remove from heat.
  • Spread a very thin layer (about 1/2 cup) of sauce in the bottom of a 9x13 pan or a comparable size casserole dish (I use a 2 qt. Pampered Chef stoneware casserole dish and can fit 11-12 stacks, depending on the size of my eggplants).
  • Choose 11-12 of the largest eggplant slices and lay them in a single layer in on top of the sauce. (You want to start with the largest slices and with each layer, use the next largest so that you end up with the smallest slices on top of your stacks.)
  • Divide the sausage mixture into four parts and use one quarter of the mixture for each layer. Place a spoonful of the sausage mixture in the center of each eggplant slice. Tear 5-6 basil leaves into pieces and sprinkle on top of the eggplant and sausage mixture. Pour 1/2 to 3/4 cup of sauce over each stack. The stacks will not be completely covered with sauce.
  • Repeat this layering two more times: Top each stack with another slice of eggplant (using the largest slices of eggplant first) then top with the sausage mixture, torn basil leaves and 1/2 c. of sauce. Reserve 5-6 basil leaves to add as a garnish, just before serving.
  • After the fourth and final layer of eggplant, spoon the remaining sauce over the stacks. Then top with the last portion of the sausage mixture, spooning some on top of each stack.
  • Top with crumbled goat cheese, if desired.
  • Cover the casserole dish with foil and bake at 375 for 30 minutes. Alternatively the dish can be refrigerated at this point and put back in the over before you're ready to serve.
  • Stack the remaining basil leaves and slice them into a thin julienne. When your Eggplant Lasagna Stacks are done, sprinkle them with fresh basil just before serving.
  • Enjoy!!

Notes

For a vegan/vegetarian option, simply omit the sausage and instead, to the caramelized onion add 12-15 leaves finely chopped kale, 3 cloves minced garlic and salt and pepper. Layer as instructed above.

Garlicky Roasted Sweet Potatoes

One of our favorite places is our local CSA, Seton Harvest, otherwise known as “the farm”. Of course we get amazing, locally grown, chemical free produce, usually harvested the day we pick it up. But its more than that. Going to the farm to pick up our weekly share, we get to escape our normal routine and stresses and breathe in the fresh country air; visit with friends; pet the dogs; feed the chickens; pick strawberries, fresh herbs, arugula, sungold tomatoes or whatever is in season and available for u-pick; hunt for caterpillars; chase butterflies; climb piles of mulch and make mazes out of bales of hale (yes that was us, sorry Joe and Julie!)

My big kids have practically grown up at the farm and it makes me so happy to see my youngest experiencing her first year running around the farm and loving it just as much as the rest of us do. Perhaps most of all, I LOVE that my kids know who grows their food and where it comes from (not just the supermarket!) and that they love things like eggplant and eagerly ask Farmer Joe when it will be in season and that they love to pick greens like arugula and sorrell and eat them on the drive home.

Garlicky Roasted Sweet Potatoes

One of our favorite places is our local CSA, Seton Harvest, otherwise known as “the farm”. Of course we get amazing, locally grown, chemical free produce, usually harvested the day we pick it up. But its more than that. Going to the farm to pick up our weekly share, we get to escape our normal routine and stresses and breathe in the fresh country air; visit with friends; pet the dogs; feed the chickens; pick strawberries, fresh herbs, arugula, sungold tomatoes or whatever is in season and available for u-pick; hunt for caterpillars; chase butterflies; climb piles of mulch and make mazes out of bales of hale (yes that was us, sorry Joe and Julie!)

My big kids have practically grown up at the farm and it makes me so happy to see my youngest experiencing her first year running around the farm and loving it just as much as the rest of us do. Perhaps most of all, I LOVE that my kids know who grows their food and where it comes from (not just the supermarket!) and that they love things like eggplant and eagerly ask Farmer Joe when it will be in season and that they love to pick greens like arugula and sorell and eat them on the drive home.

One of our favorite events at the farm is the annual sweet potato harvest, when we enjoy a beautiful fall evening of fellowship and digging sweet potatoes. Sadly, kid schedules haven’t allowed us to participate the last couple of years, so these pictures are a few years old, but we have been enjoying the labors of our fellow shareholders this week. When was the last time you dug up a sweet potato and then took it home and roasted it with fresh garlic (also fresh from the farm)? If you haven’t been so lucky, put it on your bucket list and find a time and place to experience this!

Even if you can’t harvest your own sweet potatoes, you can still make these sweet potatoes! This recipe is very loosely based on a recipe I found in Victoria magazine many years ago. I can’t tell you what issue or who the original author was but I do know it was a Thanksgiving recipe and it had crispy sage leaves on top. We’ve kept it simple, just sweet potatoes and fresh garlic, maybe a pinch of sea salt at the end if you think you need it. That’s it. And they are so good.

Garlicky Roasted Sweet Potatoes

Whether you need a new sweet potato recipe for your Thanksgiving dinner or just a nutrient dense side dish for the next time you grill  — these will hit the spot. In a pinch, you can make them without the marinating time, but that is truly the secret to this recipe. Skip it and you will have perfectly fine roasted sweet potatoes. Plan ahead a bit and you will be rewarded with amazingly delicious, crispy potatoes infused with garlicky goodness.

One quick equipment note:  I highly recommend a good mandoline for this recipe and any others involving sliced vegetables. It makes quick work of the sweet potatoes here, and ensures that they are all the same thickness so they cook evenly and at the same speed. I have this OXO Mandoline and love it!

Garlicky Roasted Sweet Potatoes

These sweet potatoes are marinated in garlic and extra virgin olive oil and roasted to crispy golden perfection. So simple and yet so delicious!
Prep Time2 hours 15 minutes
Cook Time30 minutes
Total Time2 hours 45 minutes

Ingredients

Instructions

  • Peel and slice the sweet potatoes into 1/4 inch thick slices. Use a mandoline to make this much easier and ensure your slices will be the same size and cook evenly.
  • Mince the garlic.
  • Put the sliced potatoes and garlic in a gallon size zip lock freezer bag. Add the olive oil. Zip the bag and then turn and massage the bag until the garlic and olive oil is distributed well. You want every slice of potato to be well coated, with some oil accumulating in the bottom of the bag. Lay the bag on one side and let it sit on the counter for at least 2 hours or in the refrigerator up to 24 hours. Turn the bag over a few times. This allows the olive oil to become infused with garlic flavor and gives the potatoes plenty of time to marinate in the garlic infused olive oil. The longer they marinate, the more flavor you will have.  
  • Preheat oven to 400 degrees. 
  • Remove the potato slices from the bag and lay evenly in a single layer on 2 or 3 baking sheets. The slices can overlap a bit, but you don't want to pile them up or the potatoes will steam, rather than roast, and will be mushy not crispy. 
  • Roast for about 30 minutes, rotating the pans from top to bottom of your oven part way through. At 20 minutes, start checking the potatoes. There is a very fine line between crispy potatoes and burnt potatoes. We like ours just this side of burnt. So it may seem a bit fussy, but I check them, remove any slices that are dark enough, and then put the pans back into the oven, checking every 2-3 minutes and repeating this procedure until they are all done perfectly. If you prefer not to fuss over your potatoes this much, just take them out when the first few are browned but not yet burned and the others are just beginning to turn golden brown around the edges or on the underside when you flip one over. They will be delicious either way!