Making Whole Food a Priority, Part 2

Hello friends! Last week, I gave you three of my favorite tips to help you in your efforts to eat a real, whole foods. After you have made the commitment, stocked your pantry and freezer, and made a list of a few quick and easy meals you can be prepared to pull together anytime the need arises, what next?

Tip #4 is to plan ahead! Planning your meals and snacks for the week is key to your success.

You might be ready to tune out here, because there are dozens, if not hundreds, of articles and services to help you become a better meal planner. I get it. They all sound amazing and if you use one of these plans or services your grocery budget, sanity, and health will all thank you. But I don’t use any of them either. I’m honestly not the best meal planner out there.

But that doesn’t mean I don’t plan. Planning ahead and being prepared for different contingencies is actually vital to your whole food nutrition efforts. My plan is typically just a rough list of options of the meals and dishes I want to make that week. My list is often only in my head or scribbled on a pad of paper I may or may no be able to find when I next need it. When I’m really on the ball I make the list in Notes on my iPhone so I can look at it for a reminder at the grocery store, in the pick-up line at school or when I’m getting organized for my day.

Sometime before my weekly grocery shopping trip I think about our schedule for the week. Which evenings will we all be home to eat dinner together? What evenings will I need something really easy so the kids can eat an early dinner before they head off to sports and activities? What days will I have time to cook and what days do I need to rely on leftovers or something I can pull together really quickly?

Then I make a list of the things I want to make for the week (again often just in my head). My list is usually only 2-3 meals or dishes but they are almost always something that will provides leftovers for a second meal or that I can easily morph into a second (or third) meal for the remaining days of the week. On the days when I have time, I love to cook. But its also a really nice treat to have leftovers and know I don’t have to cook three meals a day. Every. Single. Day.

My shopping list is always in the Notes on my phone. It remains pretty constant–all of the fresh produce and staples we use every week for breakfasts, lunches, my quick and easy dinners and snacks–with just a few additions depending on the other specific dishes I choose to make for the week.

Tip #5 goes right along with planning ahead. When you cook, always. always, always make enough for multiple meals.

I almost always double or triple the recipe for anything I cook. Sometimes I can get an entire second dinner out of one meal. Other times the leftovers might be lunch for me and our 2 yr old all week. Or it might be a quick and easy thing to re-heat on nights with evening activities. Or I might just double or triple the most time intensive part of the meal (like slow cooker beans for taco night or our favorite homemade pasta sauce) and then freeze what’s left or re-purpose is for another meal.

A few years ago I read a book called An Everlasting Meal: Cooking with Economy and Grace. Its a series of essays, part cookbook and part mediation on cooking and eating. I honestly am not even sure I finished the book, I think I got distracted and never got back to it. But I appreciated the author’s philosophy. For her cooking is more of an intuitive flowing art form than any specific dish or recipe. Her essays focus on feeding the people around her without any waste … “summoning meals from the humblest ingredients”, using every bit of an animal, fruit or vegetable and especially the belief that “the best meals rely on the ends of the meals that came before them.”

A couple of examples of how I might do this on a given week:

This week I’m planning to make tacos and I always make a huge batch of black beans in the slow cooker. I usually have enough leftovers to put tacos or taco salad in school lunches the next day and for one other quick dinner on a night the kids have to eat early and get to soccer and ballet. Even after two dinners and lunches, I’ll still have plenty of beans left for another meal or two. If I don’t have time to use them, I’ll put them in the freezer to use another week. But most likely, another day this week I’ll make our version of Chipotle style burrito bowls, black bean wraps, or Mexican pizzas on sprouted wheat or brown rice tortillas toasted in the oven. With the beans made, all 3 of these meals are pretty quick and easy options that I can pull together without too much advance prep or time in the kitchen.

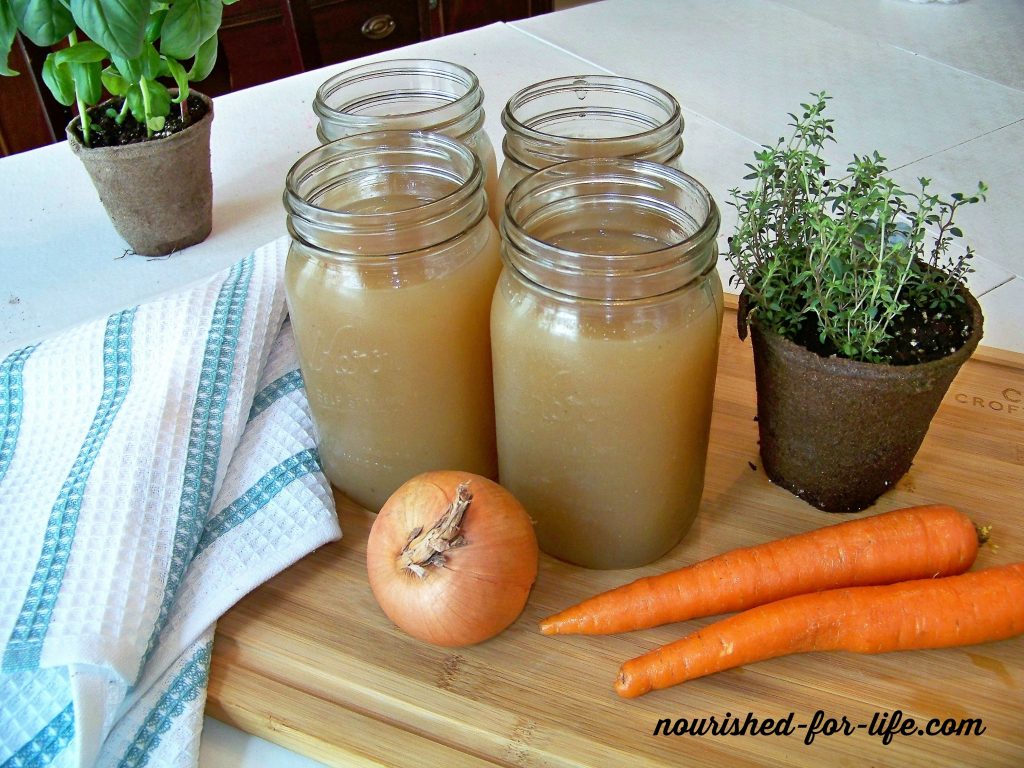
I also love to roast whole chickens. I always roast 2 at a time and we usually get 2 complete meals out of the chickens, often with some left for lunches. Then I make stock with the bones and I’ll keep the stock and remaining scraps of meat in the refrigerator to make another meal (usually soup or risotto) or freeze them to use later.

The more you cook, the more food you will have to work with and the more flexibility you will have in planning for the rest of the week. I know, I’m a genius, huh? But it’s so true!! I love having a start to a new meal (or two) already made and in the refrigerator. It makes the rest of the week so much smoother and I don’t have to start fresh every single day thinking, “Oh man, what am I going to make for dinner tonight?”

Once you get in the habit of cooking this way, it becomes so much easier and, over time, it just becomes a way of life.

Tip #6 — Make fruits and vegetables the center of every snack and meal.

Fruits and veggies are the best, most nutrient dense thing you can possibly eat. Low in calories and high in health promoting micronutrients–vitamins, antioxidants, live digestive enzymes and phytonutrients!

Did you know one apple contains approximately 10,000 different phytonutrients? And these are just the ones scientist have identified! All of these phytonutrients work together synergistically in ways we don’t even fully understand, to keep our bodies strong and healthy. And every fruit and vegetable has a similarly long list of different but equally important phytonutrients.

Most fruits and vegetables actually retain more health benefits when you eat them raw. What could be quicker or easier than that? No cooking required!

Every week I buy a mountain of fresh produce: lettuce and other greens, 4 bags of organic apples, 4 bunches of bananas, berries, a bag of clementines & lemons, carrots, grape tomatoes, celery, bell peppers, broccoli, cauliflower, Brussels sprouts, cucumbers and usually a few other things.

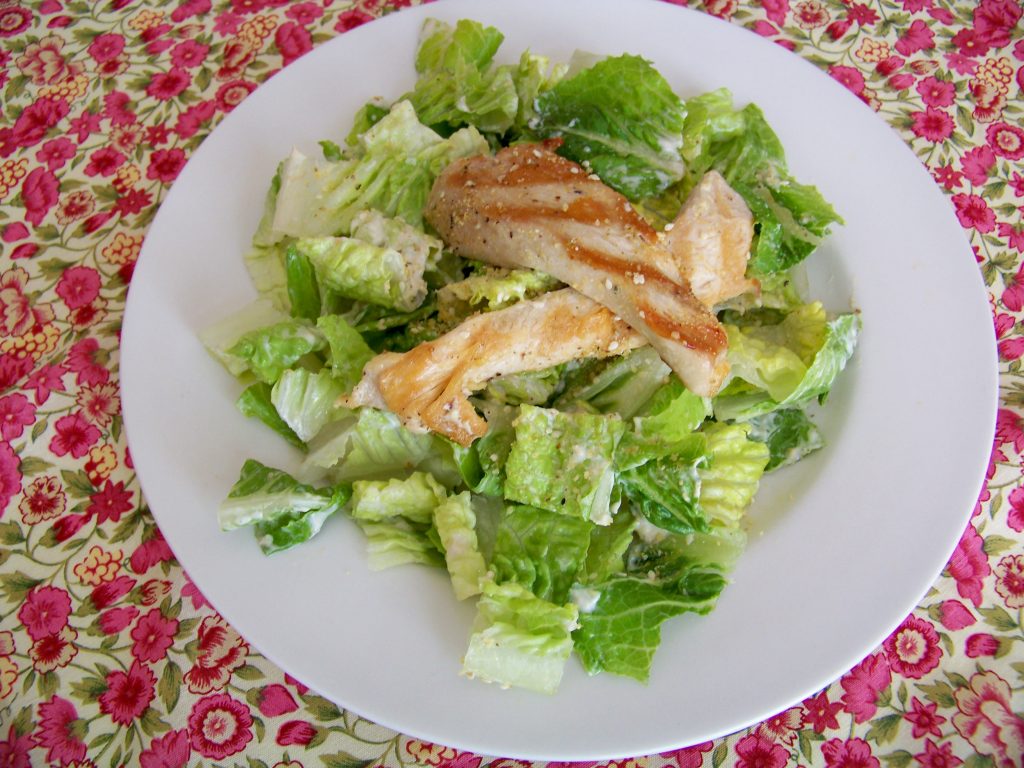
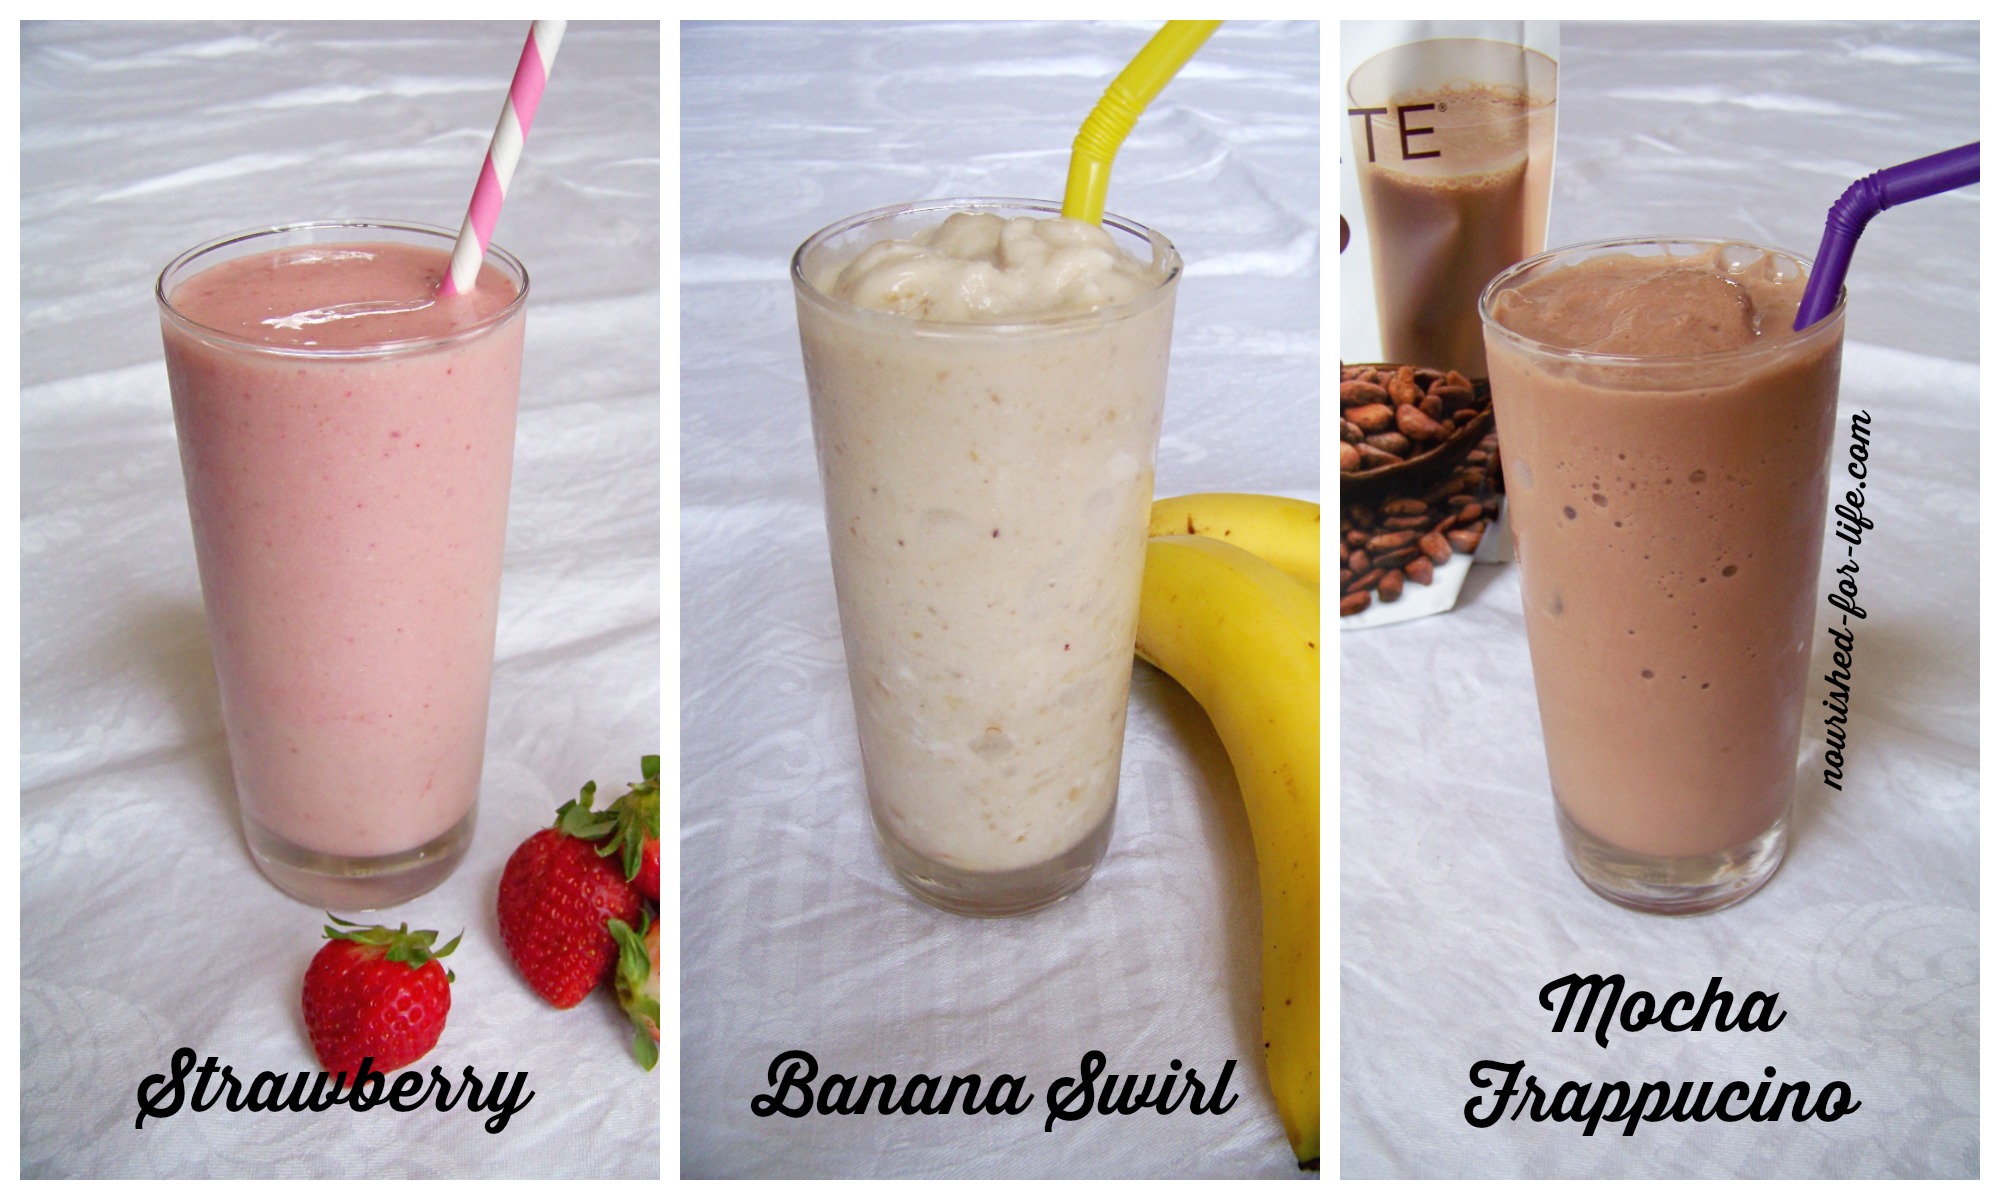
I make a giant green smoothie for breakfast almost every morning. This kids have a serving of fruit with breakfast every day. They usually take a piece of fruit to school for their morning snack. They have at least one fruit and one vegetable in their lunch boxes. They each eat an apple every single day after school. We have a green salad every night with dinner and usually one other vegetable as well. I often have a big green salad for my lunch and again for dinner. I always have hummus and guacamole in my refrigerator for snacking on with raw veggies and for an easy on the go snack.

Try to meet the recommended 9-13 servings of fruits and veggies every day!

#7 Invest in a second refrigerator and/or a deep freeze.

One of my good friends who is eats very healthfully and is raising a real food family recently sent me a picture of her nearly empty cupboard that used to be filled with packaged foods. Now, she said, it’s her fridge that is ooverflowing with fresh produce instead.

When you change your way of cooking and eating and begin eating a lot more fresh fruits and vegetables, you may need a bbigger refrigerator. Especially if you’re feeding a family. If that isn’t an option for you (it isn’t for us) consider investing in a second refrigerator for the basement or garage to serve as overflow for your freezer and to store all of that beautiful, amazing, health promoting produce you’re going to be eating. I’m not sure how we survived without ours!

Whether you are an expert meal planner with a complete weekly or monthly calendar of every meal and snack laid out in advance or more like me … making a rough weekly plan in your head, knowing you will almost certainly deviate from it … just make sure you have a plan! Focus on eating more fruits and vegetables. Figure out what works for your schedule and household and over time, with a little effort, a real whole food diet will become a natural, normal part of life.

Join me in making whole food a priority in your life! Your health will thank you!

XOXO,

Kristi

PS. If you missed Making Whole Food Nutrition a Priority, Part 1, click here to read it now! And make sure to follow Nourished for Life on Facebook for all of the latest news and more healthy living information.

Making Whole Food Nutrition a Priority, Part 1

Last week I made beef stock. Yep, I was pretty excited and proud of myself. I make chicken stock fairly often…every time I roast whole chickens in fact. But I had a chance to get some stock bones from local grass fed cows and decided to make some beef bone broth. It was amazingly rich and delicious, full of gut healing nutrients and collagen. I ended up with six quarts of beautiful stock and I froze most of it in glass jars to use this fall.

Whole Food Nutrition

At least half of you are probably thinking right now that I clearly have WAY too much time on my hands. But I assure you that is not the case! I’m a very busy, work-from-home mom with 4 kids to keep up with, including a 2-1/2 year old whose constant and ever changing demands keep me running from morning till bedtime.

But this post is not actually about making bone broth, although I highly recommend it! (You can read about some of the benefits and check out the recipe I used here.)

This post is actually about making real food a priority. None of us, including me, have time to spend all day in the kitchen, which is why in my next couple of posts I’m going to share some of my favorite tips for eating real, whole foods in the very limited time we have.

Tip #1 is simply to choose to make whole food nutrition a priority. 

We all lead such busy, hectic lives and it’s easy to use time as an excuse for not cooking or not eating as healthfully as we know we should. But honestly, what is more important than your health, or the health of your family? If there is one thing we should make a priority, isn’t it our health?

We all order our time and lives around the things that are our highest priorities. So why not make the decision, right here and now, to make your own and your family’s health a priority and invest your time in eating real, whole foods?

Once you make the decision to skip the drive thru, take out and processed, packaged foods at the grocery store and eat only real, whole foods, there may be a transition time when it seems overwhelming and really hard. But stick with it a few weeks and I promise you’ll soon get into a new groove where planning for healthy meals and snacks will just be a normal part of our life. You might even find you love it! And feeling great, having more energy and better health–both now and in the future–will be an amazing reward and the best gift you could give to your family.

So once you’ve made the decision, what next? How do you get started or improve on your commitment to eating real food?

Tip #2 — Set yourself up for success with a well stocked pantry and freezer.

The most important things you can do to set yourself up for success are planning and preparation. I’m going to devote part 2 of this series to how I go about planning our weekly meals, grocery shopping & meal prep. So stay tuned for that. But even more important than a weekly plan is your overall preparation with a well-stocked pantry and freezer. This makes last minute meals and snacks when you haven’t had time to plan much easier and makes it less likely you will resort to the drive thru or carry out or processed foods.

The things I buy in bulk and always have in my pantry include:

We buy meat from hormone and antibiotic free, pastured or grass fed animals in bulk from a local farm (Fischer Farms in Jasper, Indiana) so our freezer is always stocked. In my freezer you will also always find wild caught Alaskan Salmon, plenty of frozen fruit for smoothies (my daughters also like frozen fruit straight out of the freezer as a snack), extra loaves of sprouted wheat and gluten free bread and homemade stock for soup or other dishes.

This means even if I don’t have time to go to the grocery store all week, I can always pull together a healthy snack or meal in relatively short order.

Please don’t think real food has to be time consuming to prepare or fancy! No guilt here … there are plenty of times I don’t have time to cook a fancy meal. My go to quick-and-easy (but still real food) meals when I have had zero time to plan or prep a meal are:

  • Leftovers!! This is one huge advantage of cooking regularly.
  • Our favorite Buckwheat Pancakes
  • Eggs–scrambled, fried, hard boiled (if I have some already made) or if I have just a bit more time an omelette or frittata
  • Gluten free pasta with jarred pasta sauce or a quick pan sauce
  • Oatmeal
  • A nut butter sandwich on sprouted wheat or gluten free bead
  • A big lettuce salad with canned tuna, chickpeas, leftover chicken, avocado, nuts or berries. (You can find two of my favorite green salads here and here)
  • Depending on what I have on hand, we usually have fruit and/or veggies with hummus and/or a big leafy green salad on the side.
  • In a pinch I’m perfectly satisfied with a Complete plant-based protein shake. It’s satisfying and healthy and I feel a million times better than if I had gone through the drive thru.

We also have an aeroponic growing system called a Tower Garden which means I always have fresh lettuce, herbs and other greens growing right in my kitchen that I can grab for a quick salad or to go in a smoothie or protein shake. I absolutely love our Tower Garden and highly recommend it for any real food home.

#3 — Break your prep and cooking into smaller jobs and squeeze them in whenever and however fits your schedule. 

This is where I come back to the beef stock. It may seem like a big, overwhelming, time consuming project but it really couldn’t be easier when you break it up and fit it into your existing schedule. I kept the bones in my freezer til I had a few extra minutes one evening after dinner. Threw them in a stock pot with water and some aromatics and let it simmer over night. Five minutes and done. In the morning, I didn’t have time to deal with it so I stuck the whole stock pot in the refrigerator. 1 minute or less. One afternoon when I had a few minutes I strained the broth, put it in jars and put the jars in the freezer. 10 minutes max. It took a little planning but almost no actual time.

Another example of this is my favorite quinoa salad that I like to make for a dinner side dish or have on hand for a quick lunch or dinner. It feels like a lot of work by the time I cook the quinoa, make the dressing (an amazing tomato vinaigrette) and chop all of the vegetables. But it’s a lot more manageable if I break it up into smaller jobs. I make the dressing one day when I have time and put it in the fridge. When I’m cooking rice for dinner, I put on another pot and cook the quinoa at the same time. It goes in the fridge too until I have time to actually make the salad. And then it doesn’t take much time to chop the veggies and put it all together and I have a yummy and nourishing side dish or meal for whenever I need it.

These are just examples. Think about the real food dishes or meals your family likes, and figure out ways to break up your prep and cooking time to fit it into the nooks and crannies of your schedule.

Make the commitment. It may take some time and effort to make the transition and figure out how to make a real food eating plan work for you. But once you do, it really won’t take much more time, only a bit more planning! And it will be so worth it for your short and long term health!

XOXO,

PS —  For more tips and tricks, read Making Whole Food Nutrition a Priority, Part 2! And follow me on Facebook for more healthy living information and inspiration!

The Skinny on Vegetable Oils & My Go-To Salad Dressings

I hear a lot of questions about salad dressing, and with good reason. Bottled salad dressings are typically filled with highly questionable or downright harmful ingredients like highly processed GMO oils, sugar or high fructose corn syrup, artificial flavors and chemical emulsifiers and preservatives.

I often dress my salad with a drizzle of flax or extra virgin olive oil and a squeeze of lemon juice or balsamic vinegar. You can find two of my favorite salads where I do just this here and here. For Mexican themed salads I love to use organic salsa or fresh homemade pico de gallo and guacamole in place of dressing.

But making your own dressing is quick and easy if you have a well stocked pantry and spice cabinet. Just follow a basic formula of 2-3 parts oil to one part acid (any variety of vinegar or citrus juice) and then experiment with adding herbs and spices to come up with your own favorites. (Technically, a vinaigrette is 3 parts fat, one part acid.) Save your old salad dressing bottles, spice or jam jars, or I like to use and re-use these very affordable salad dressing bottles from Amazon. There are other great options on Amazon as well.

Use minimally processed and health promoting oils like flax, coconut or extra virgin olive oil. Look for cold pressed or expeller pressed, organic oils.

Avoid processed “vegetable” oils including soybean, safflower, sunflower, cottonseed, peanut, canola and corn oil.

These grain or seed oils are highly processed processed and refined. Can you imagine the energy and effort it takes to extract oil out of a kernel of corn?! The oil is generally extracted from the seed or bean with high heat (which destroys any nutritional value and oxidizes the oil, turning it rancid and harmful to the human body) and toxic petroleum based solvents such as hexane, traces of which remain in the oil. Then the oil must be further chemically refined to eliminate undesirable smells, flavors and colors and make it palatable. Some of these oils go through an additional process called hydrogenation, to make them solid at room temperature and increase the shelf life. These hydrogenated oils (trans fats) are used in processed foods and sold as margarine or shortening.

Soybean, corn and canola oils are almost certainly from GMO crops (unless they are certified organic). These crops have been genetically modified to withstand exponentially higher quantities of the herbicide glyphosate (Roundup), which is an endocrine disrupter and “probable carcinogen”, according to the World Health Organization. Glyphosate kills everything except the genetically modified crop and then remains in our food.(1)(2)

We have been told by various adversory groups and the government’s own dietary recommendations to avoid saturated fats and replace them with polyunsaturated fats (PUFAs) instead. As a result, between 1909 and 2009, the consumption of PUFAs increased by 300%!(3) Soybean oil consumption alone has increased 1000-fold since 1900.(4) In 1999, at the turn of the millennium, soybean oil made up an astonishing 20% of calories consumed in the United States.(5) And this has turned out to be incredibly detrimental to our health.

In his book Eat Fat, Get Thin (which I highly recommend) Mark Hyman, MD, Director of the Cleveland Clinic Center for Functional Medicine, explains how this erroneous dietary advice occurred in the first place and details the studies that show diets high in PUFAs (in the form of hydrogenated oils/trans fats AND liquid vegetable oils) are among the leading causes in the epidemic of western diseases we now face including obesity, heart disease, diabetes & cancer.

One of the issues with the studies on which this dietary advice was based is that they didn’t differentiate between the two types of PUFAs–omega-6 fatty acids and omega-3 fatty acids. Omega-3 fatty acids fight inflammation and disease, while omega-6 fats fuel inflammatory pathways in the body.(6)

A healthful diet should include equal amounts of omega-6 and omega-3 essential fatty acids. The typical American diet now contains many, many more omega-6s than omega-3s. (7) Too many omega-6 oils in our diet promotes inflammation in our bodies(8)(9). Dr. Jospeh Hibbeln, a leading researcher at the National Institutes of Health, believes that the over-consumption of omega-6 fats and the underconsumption of omega-3 fats have led to increases in:

  • cardiovascular disease
  • Type 2 diabetes
  • obesity
  • metabolic syndrome (pre-diabetes)
  • irritable bowel syndrome and inflammatory bowel disease
  • macular degeneration (age-related blindness)
  • rheumatoid arthritis
  • asthma
  • cancer
  • psychiatric disorders and
  • autoimmune disease (10)

Most Americans cook with these oils at home, eat them in restaurants, and they are found in almost every packaged, processed food we buy. Even commercially raised meat is high in omega-6s. Wild game and grass fed or pastured animals are high in omega 3-s, because the animals are consuming mostly grass and green plants. But since the Industrial Revolution, commercial farmers have been feeding animals grains and seeds high in omega-6s and low in omega-3s, rather than the animals’ traditional diets. This means even the meat most of us eat is high in omega-6s and very low in omega-3s.(11)

You can reduce your consumption of inflammatory omega-6 oils by changing the fats you cook with at home, avoiding processed packaged foods, avoiding fast food and being careful what you choose in restaurants and switching to meat from grass fed or pastured animals. Making your own salad dressing with healthful oils is also a good start to regaining the right balance of omega-6 and omega-3 essential fatty acids.

Making your own dressing is so easy and gives you endless flavor options with health promoting, real foods. Here are four of my go-to salad dressings, along with our favorite salad pairings. Try all of them and then experiment and come up with your own favorites!

Salad Dressings

Greek Dressing

3/4 c. good quality extra virgin olive oil (I use California Olive Ranch)

1/2 c. Red wine vinegar (or Bragg’s apple cider vinegar)

2 tsp garlic powder

2 tsp onion powder

2 tsp dried oregano

1 tsp ground mustard seed

1 tsp black pepper

1 tsp good quality sea salt (I use Celtic sea salt or Redmond Real Salt)

Pour all ingredients into a glass jar or a 12 oz. dressing bottle and shake well. Refrigerate until ready to use.

Good quality extra virgin olive oil solidifies and turns cloudy in the refrigerator. This is one way you can tell whether your olive oil is pure and of good quality. In a study done a few years ago at UC Davis, the vast majority of EVOO tested was found to not actually be extra virgin or to be adulterated with lower quality processed oils. So when you’re paying for extra virgin olive oil for its health benefits, its good to confirm you actually have the good stuff! Just take it out of the refrigerator 15-20 minutes before you want to use it, or let the bottle sit in a bowl of warm water for a few minutes. Shake well and enjoy this dressing with green leaf, red leaf or romaine lettuce, topped with tomato, cucumber, red onion and black olives. Optionally add a bit of feta or goat cheese.

Lemon Mustard Vinaigrette

1/4 cup fresh lemon juice (juice from 1-2 lemons)

2 T Dijon mustard

Sea salt and pepper to taste

3/4 cup extra virgin olive oil

Place all ingredients in a small jar or dressing bottle with a lid and shake well. Alternatively, add the first three ingredients to your Vitamix, blend, and then drizzle in the olive oil with the blender running till you have a smooth creamy emulsification. We like this dressing on spinach, kale, bok choy or other dark leafy Asian greens such as pak choy, mizuna or yukina savoy. On each salad I like to add crumbled bacon (please only use nitrate-free bacon from clean, pastured animals), sliced hard boiled egg (or feta cheese) and a handful of walnuts, pecans or sunflower seeds. The tartness of the dressing and some added fat from the bacon, egg and nuts really cuts through these sometimes slightly tough or bitter greens.

Caesar Salad

Dairy Free Creamy Caesar Dressing

*Adapted from Once Upon a Time: Recipes and Recollection from a Rover City (Jr. League of Evansville 2003)

3 cloves fresh garlic

3/4 c. mayonnaise (For the healthiest option, make you own mayo. If you use store bought, look for one with the fewest and best ingredients possible. We usually use Real Mayo which isn’t perfect but better than some other options.)

2 tsp. capers with brine

1/2 to 1 tsp. anchovy paste (we like the full tsp–the saltiness and umami from the anchovy makes up for the missing cheese in this recipe, but tailor this to your anchovy taste!)

1 T fresh lemon juice

1 tsp Worcestershire sauce

1 tsp. Dijon mustard

Sea salt and fresh ground black pepper to taste (I use Celtic Sea Salt or Redmond Real Salt)

Place all ingredients in your Vitamix or a good quality blender and blend until smooth. We love to toss this dressing with chopped romain and top it with grilled chicken for a gluten and dairy free Chicken Caesar Salad. Sometimes I make crutons from gluten free bread to make my kids happy, but its just as good without.

Shallot Balsamic Vinaigrette

1/4 c. balsamic vinegar

1/2 tsp sea salt

1/4 tsp fresh ground pepper

l shallot, cut in half or quarters

2 T raw honey

3/4 c. extra virgin olive oil

Place first 5 ingredients in your Vitamix and blend. With blender running, slowly add olive oil and keep blending until you have a smooth emulsification.

We enjoy this dressing on mixed greens with berries or dried fruit and nuts. I also like beets and an avocado with this dressing.  Optionally add some crumbled Gorgonzola or blue cheese.

In other news … 

Shred10

I am hosting two new Shred10 accountability groups starting Monday, March 6 and Monday, April 3. You do not have to be local to join in! This ten day program will help you jump start your health and includes help with meal planning and recipes, daily private coaching from me by text or phone and plenty of encouragement and accountability to help you achieve your health and wellness goals.

If you are ready to take the next step in your health journey, contact me for more information. Life is way too short not to be your healthiest and feel your best every single day!!   

Prime Time Health

Four Wednesday evenings in March, beginning this Wednesday, March 8, I’ll be teaching a workshop series called Prime Time Health. This workshop is a wealth of information for any adults or seniors who want to take charge of your own health and learn how to feel better, sleep better, have more energy, reduce inflammation and prevent disease. If you want to live longer and better, this series is for you!

Register here or contact me for more information.

Taste the Shred

On March 16, from 6 to 7 pm, we have an event at the Newburgh Central Library called Taste the Shred. Chef Adam Edwards will be cooking up several recipes from our Shred10 guidebook for you to taste. Join us to learn more about this health changing ten-day program and see for yourself how delicious healthy can be!

Register here or contact me for more information.

Spring is in the air, friends! Its a perfect time to get outside, breath deeply and get serious about changing your health and your future!

XOXO,

Kristi

PS.  Make sure to follow Nourished for Life on Facebook for all of the latest news and even more health and wellness related information!

Sources:

  1. https://www.ncbi.nlm.nih.gov/pubmed/19539684
  2. https://www.iarc.fr/en/media-centre/iarcnews/pdf/Q&A_Glyphosate.pdf
  3. TEDxHarvardLaw — Dr. Stephan Guyenet, The American Diet
  4. Mark Hyman, MD, Eat Fat, Get Thin (2016) at p. 80
  5. Hyman at p. 117
  6. Hyman at p. 77, 118
  7. http://www.sciencedirect.com/science/article/pii/S0753332206002435
  8. Hyman at 79
  9. https://www.ncbi.nlm.nih.gov/pubmed/19022225
  10. Hyman at 124-24, citing Hibbeln JR, Nieminen LR, Blasbalg TL, Riggs,JA, Lands WE. Healthy intakes of n-3 and n-6 fatty acids; estimations considering worldwide diversity. Am J Clin Nutrition. 2006 Jun:83(6 Suupl.); 1483S-93S.
  11. Hyman at p. 117

Healing Chronic Inflammation & 3 Healthy Treats (Strawberry Smoothie, Banana Swirl Ice Cream & Healthy Mocha Frappuccino)

Hello friends!  I’ve been working on some behind the scenes organizational things here at Nourished for Life and I have some really exciting things planned for the year that I can’t wait to share with you!

In February and March we have 4 workshops (2 individual workshops & 2 different workshop series) scheduled. Please check out the Specials and Upcoming Events for all of the details. Sign up for one or all of these opportunities and bring a friend or two with you! They are all going to be so much fun and packed full of amazing info to help you wherever you are in your health journey!

If you follow me here or on Facebook, you know I’ve been “shredding” this month and I have to tell you I LOVE this program and I love how great I feel. Shred 10  is a ten day program to help you detox and jump start your health. We use tons of whole food nutrition, avoid harmful & inflammatory foods, drink plenty of water, eat your last meal by 6 pm to allow your body time to digest and really rest and rejuvenate during the night, get at least 8 hours of sleep and 20-30 minutes of movement every day. Most of our participants feel so great that they stick with it well beyond the ten days.

Healing Chronic Inflammation

I am gluten and dairy free and eat real, whole unprocessed foods and avoid sugar and caffeine most of the time. But even I found myself having a few too many cheats and treats over the holidays and in need of a detox program. It doesn’t take very much of these inflammatory foods for me to start seeing signs of chronic inflammation such as really dry, red & itchy skin, breaks outs and joint pain. I started having quite a bit of knee pain and at bedtime on New Years Eve was a bit horrified to see my knees were swollen and black and blue! I’m 41 and have 4 young kids. My youngest is 2 and I plan to be able to keep up with her and dance at her wedding. I also know these symptoms are big red warning flags telling me my body is in a state of chronic inflammation, which will lead to more serious health problems if I don’t do something about it. Chronic inflammation is at the root of so many health conditions and diseases.

So I started shredding January 2 and I’m thrilled that I’m back to feeling great! I even wore a dress that showed my knees and high heel boots to church on Sunday. It’s amazing how even a small amount of inflammatory foods can cause such havoc on our bodies! And amazing how quickly our bodies can heal when we nourish them properly with real whole foods and a healthy lifestyle.

Common signs of chronic inflammation include:

  • skin issues (eczema, psoriasis, red, blotchy or itchy skin, blemishes or break outs)
  • ongoing swelling, joint  or muscle pain
  • seasonal allergies and asthma
  • IBS or digestive problems (bloating, gas, diarrhea or constipation)
  • food allergies and sensitivities
  • fatigue or lethargy
  • high blood pressure
  • blood sugar problems

Please don’t make the mistake of thinking these symptoms are just part of life, or a normal part of aging! Many health conditions and diseases are associated with chronic inflammation, including things like heart disease, cancer and autoimmune conditions like multiple sclerosis, ulcerative colitis, Chron’s disease or rheumatoid arthritis. Please pay attention to your body and take steps to eliminate chronic inflammation.

If you suffer from any of these signs of chronic inflammation, a whole food, plant based diet and healthful lifestyle changes can help. If you want to reduce your risk of disease, feel bettter, have more energy or achieve your ideal weight, the Shred 10 is a great way to get started and see a big difference in your health in a short period of time. The program includes a terrific guidebook with a wealth of info and recipes, private health coaching from yours truly and a private Facebook group for added support, encouragement and accountability. Our last group was amazing and I’m so excited for our new group starting February 6. Please contact me if you’d like to be included or learn more! You won’t be sorry!

A 3 month private health coaching package is also a great option if you need help fighting chronic inflammation through diet and lifestyle changes. Contact me to schedule your Initial Wellness Consultation and take advantage of my January coaching special.

I start almost every day with a green smoothie and since I’ve been shredding, smoothies and shakes have been a big part of my life the past few weeks! You can find my favorite green smoothies here. Today I’m sharing three of our other favorites.

Strawberry Smoothie, Banana Swirl Ice Cream & Healthy Mocha Frappuccino

Strawberry smoothies are my oldest daughter’s favorite.

Banana Swirl is in honor of my youngest daughter, who LOVES Daniel Tiger’s Neighborhood. In one episode Daniel tries some new healthy foods and finds out he likes them! He and his mom make a banana smoothie in the blender for dessert and Mom Tiger calls it “Banana Swirl”. So if you have a toddler, find that episode on Amazon Prime and whip up some Banana Swirl together!  Use ripe, already frozen bananas and it can be a smoothie or ice cream, depending on how much milk you add.

My current favorite is my copy cat Healthy Mocha Frappucino. Save your pocket book and your health and make this at home instead of going through the drive thru at Starbucks!  If you use protein shakes, I love and recommend Juice Plus Complete, which is a whole food, plant based protein powder that will keep you full, stabilize  your energy and help control cravings.

So that’s my smoothie round-up for today. Try them all and let me know in the comments which one is your favorite!

Strawberry Smoothie, Banana Swirl & Healthy Mocha Frappuccino

Ingredients

Strawberry Smoothie

  • 1 c. Almond milk
  • 1 very ripe banana peeled and frozen
  • 2-3 cups frozen strawberries
  • 1 scoop vanilla
  • Juice Plus Complete
  • plant based protein powder optional

Banana Swirl

  • 1-2 cups
  • full fat canned coconut milk
  • 3 very ripe bananas peeled and frozen

Healthy Mocha Frappuccino

  • 1 c. Almond milk
  • 1 scoop chocolate
  • Juice Plus Complete plant based protein powder
  • 1-2 cups ice
  • Optional -- add 1 shot of decaff espresso or a drop of peppermint extract

Instructions

  • When your bananas get very ripe on your counter (partially brown and super sweet) peel and freeze in a gallon size zip lock baggie for smoothies or muffins.
    Place all ingredients in a high powered blender, like a [Vitamix| http://amzn.to/2jeVVWv], in the order listed. Make sure liquid is in the bottom of the blender. Add additional milk as needed, to get the desired consistency or thickness.
    We like to eat Banana Swirl as an ice cream, so I tend to use less milk. If you want a smoothie consistency, use more milk.
    When using canned, full fat coconut milk, shake the can well before opening. If it is cool in your home, the cream will separate from the coconut water and will be at the top of your can. Stir well and use equal amounts of cream and water, or add more of the water for a thinner smoothie. Save the remaining coconut water and/or cream for another use!  

XOXO,

Kristi

Buckwheat Brownies

Happy Monday, friends!

As we head into this hectic holiday season I have to confess, I am already worn out! In the past three weeks we have had Halloween (thankfully the kiddos all took it pretty easy on me on their costumes), celebrated 4 birthdays, the end of the soccer season, wrestling, hours of Nutcracker rehearsals, a traveling husband, a teething toddler and then said toddler also had a cold (which means neither toddler nor mama have slept much in the past couple of weeks).

I can only imagine how poorly I would be functioning right now if I wasn’t fueling my body with real whole foods. During these especially hectic and sleep deprived phases of life, we need the nourishment that comes from plants even more. Which is why I take my Juice Plus religiously and do my best to get my green smoothie in every single day, even when I am so tired I can barely see straight. The phytonutrients from all of those fruits and vegetables provides more nourishment and sustained energy for my body than all of the caffeine in the world ever could.

But, after all of that talk about plant nutrition, I hope you will forgive me for sharing a brownie recipe today. Because once in a while we need chocolate too, don’t we?

Buckwheat Brownies

My son has been gluten and dairy free for six years now and his baby sister and I have since joined him. In the last six years I have tried a LOT of brownie recipes. When I bake, I like to use the most healthful ingredients I possibly can. But I have to be honest–the recipes I’ve tried with black beans and other mystery ingredients just don’t cut it for me. Neither have any of the other gluten and dairy free variations I’ve tried, whether healthy or not. None have ever measured up to the perfectly moist, rich, chocolatey, chewey not cakey, dense but not too dense, gooey but not too gooey brownie I have in my head.

That is, until these. It turns out buckwheat–one of my favorite flours–is the perfect solution! You can read more about the health benefits of buckwheat (and get our favorite pancake recipe) here. No one will ever know these brownies are gluten free unless you tell them. They are moist, amazing, and unlike many gluten free baked goods they stay moist and keep well (tightly wrapped) for up to a week.

Buckwheat Brownies

I use Nutiva coconut sugar, which is still sugar and should only be eaten in moderation as a special treat. But it is more healthful than conventional white sugar, which is heavily processed, bleached and almost always made from GMO sugar beets. Nutiva’s coconut sugar is organic and non-GMO. It is unrefined, which means that unlike white sugar which is completely empty calories devoid of any nutrition, coconut sugar retains some small amounts of nutrients from the coconut. According to Vani Hari, the Food Babe, coconut sugar has 10,000 times the potassium, 20 times the magnesium and 20 times the iron of conventional white sugar. It also contains inulin fiber, which slows the absorption into the blood stream. It also has just over half of the glycemic load of white sugar, which helps you avoid that blood sugar/insulin spike and crash.

I also like baking with Nutiva Shortening, which is a blend of coconut oil and red palm oil. Both are naturally solid at room temperature (so no hydrogenation, the process which turns Crisco shortening and margarine into toxic trans fats), minimally processed, healthful fats. It makes a close to perfect substitute for butter. But if you can have dairy, real organic butter works great here too.

Buckwheat Brownies

I may have mentioned it before, but its worth repeating: When baking with gluten free flours, use a scale! Baking by weight is so much more accurate than volume and allows you to substitute flours or make adjustments to a recipe with a lot more success!  You can buy a good, inexpensive scale from Amazon. I have this one.

Buckwheat Brownies

You may be wondering why a health coach who preaches the evils of sugar is sharing a brownie recipe. But I love chocolate and I’m completely fine with an occasional treat when it’s made with the most healthful ingredients possible.

My personal rules for sweet treats and desserts (that I follow most of the time) are:

1) Make them out of the most healthful ingredients I can (and avoid artificial colors, flavors & sweeteners, high fructose corn syrup, trans fats and unpronounceable preservatives and additives as much as humanly possible).

2) Enjoy sweet treats after a healthy meal, never on an empty stomach. This helps to avoid the blood sugar spike & sugar headache I get from eating sweets on an empty stomach. And if I have already enjoyed a satisfying meal, one treat should be sufficient to satisfy my chocolate or sweets craving.

3) When you eat a sweet treat, make it a good one and enjoy it mindfully. I try not to eat treats that aren’t worth it and I never eat them on the run. It’s so easy to get in the habit of grabbing something to munch on anytime you walk by the pantry or as you sit in the car or at your desk. Try to get out of the habit of mindless snacking. This will make a huge impact on your health. Choose your snacks wisely–fruits and vegetables as much as possible, and when you do choose to eat a sweet treat, sit down and savor every bite!

Buckwheat Brownies

Enjoy and Happy Thanksgiving, friends! I hope you are all surrounded by loved ones this week and take the time to count your blessings! I am thankful for YOU and for the commitment you make to your health and the health of your family with the choices you make every day!

XOXO,

Kristi

Best Ever Buckwheat Brownies (gluten, dairy & refined sugar free)

No one will know these moist, amazing brownies are free of gluten, dairy and refined sugar and are made with nutrient dense buckwheat flour.
Prep Time10 minutes
Cook Time22 minutes
Total Time32 minutes
Servings: 16 Brownies
Calories: 10426kcal

Ingredients

  • 6 oz. Enjoy Life semi-sweet chocolate chunks (or 5 oz. Enjoy Life dark chocolate morsels)
  • 8 (Approx 175 g) T. Nutiva shortening (or organic butter, if you can have dairy)
  • 1 c. Nutiva coconut sugar
  • 2 farm fresh eggs
  • 1/2 tsp. Vanilla extract
  • 87 g approx. 2/3 c. Buckwheat flour
  • 1/2 tsp. Baking Soda
  • 1 tsp. Sea salt
  • 1/2 c. Enjoy Life chocolate chips or chopped walnuts optional add-ins

Instructions

  • Pre-heat oven to 325 degrees. Grease a 9 x 9 baking pain.
  • In a double boiler over medium high heat (or in a heat-proof bowl sitting over a saucepan with an inch or two of water in it) melt the chocolate and shortening and stir together. Let cool and then whisk in the coconut sugar. Whisk in the eggs, one at a time, making sure they are completely incorporated. Then add vanilla.
  • In a separate bowl, whisk together the buckwheat, baking soda and sea salt.
  • Add the flour mixture to the chocolate mixture and stir until combined.
  • Stir in the chocolate chips or walnuts, if desired,
  • Smooth batter into prepared pan and bake a 325 degrees for 20-22 minutes. Do not overbake! If you use a glass or an 8x8 pan you may have to adjust the baking time a bit. Let baked brownies cool and enjoy!
  • These brownies keep well, wrapped tightly, for several days and up to a week or freeze well for several months.

Notes

*I'm usually a dark chocolate girl, but I actually prefer semi-sweet chocolate in these. If you want a lighter brownie with a bit of a caramel taste, cut back to 5 oz of the semi-sweet chunks. If you like a darker chocolate brownie, by all means use the dark chocolate morsels instead.
**If you don't use Enjoy Life chocolate chips (which I highly recommend!) please use a good quality chocolate. It really does make all the difference in these brownies. I've tried them with a common grocery store brand of chocolate and they were just not the same.
***I honestly can't decide whether I like these better with chocolate chips or walnuts. So you choose! They're delicious either way!